
Two of Divi 5‘s latest choices, Interactions and the Staff Carousel module, offer a solution to create interactive, sliding carousels to help you blow their own horns products, staff contributors, testimonials, or the remaining you’ll be capable to consider.
In this post, we’ll show you the easiest way to create an interactive content material subject matter reveal carousel that combines the ones two choices to boost engagement, keep visitors in your website online longer, and raise their browsing enjoy. Let’s dive in!
What Is The Team of workers Carousel Module?
The Staff Carousel module lets you assemble dynamic, responsive carousels or sliders for any content material subject matter type, from static footage to dynamic posts pulled in by way of the Loop Builder. With built-in navigation alternatives like arrows and dots, customizable layouts, and mobile-friendly responsive tools, the module provides an excellent solution to create horny carousels and sliders.
Its integration with Divi’s design settings and extensive styling options mean you can create advanced effects, an identical to animated transitions or hover-based triggers, making it an excellent device for growing horny, interactive designs.
- What It Is: A flexible module for growing carousels and sliders of groups — each static or dynamic with the Loop Builder — supporting navigational controls, transition tempo, and collection of slides to turn.
- Key Settings: A couple of layout alternatives, at the side of full-width, multi-column, and integration with choices like Nested Rows.
- Customization Possible choices: Style slides, at the side of colors, spacing, background alternatives, hover effects, and transitions, and add custom designed content material subject matter in keeping with slide. It moreover completely integrates with Design Variables.
- Pair With Interactions: Merely create content material subject matter reveals by the use of a reason.
What Is Divi 5 Interactions?
Divi 5 Interactions is a standout serve as that allows shoppers to create dynamic, no-code interactivity by way of together with triggers, effects, and animations to any section throughout the Visual Builder. This system lets you define triggers, an identical to clicks, viewport enter or cross out, or mouse over effects, that get started up effects like toggling visibility for content material subject matter reveals, switching style presets, or applying animations on hover. Being able to function specific modules, rows, or sections, Interactions permit precise regulate over user-driven studies.
Key Portions of Interactions
There are 3 main parts to Interactions. Proper right here’s how they art work:
Reason Events
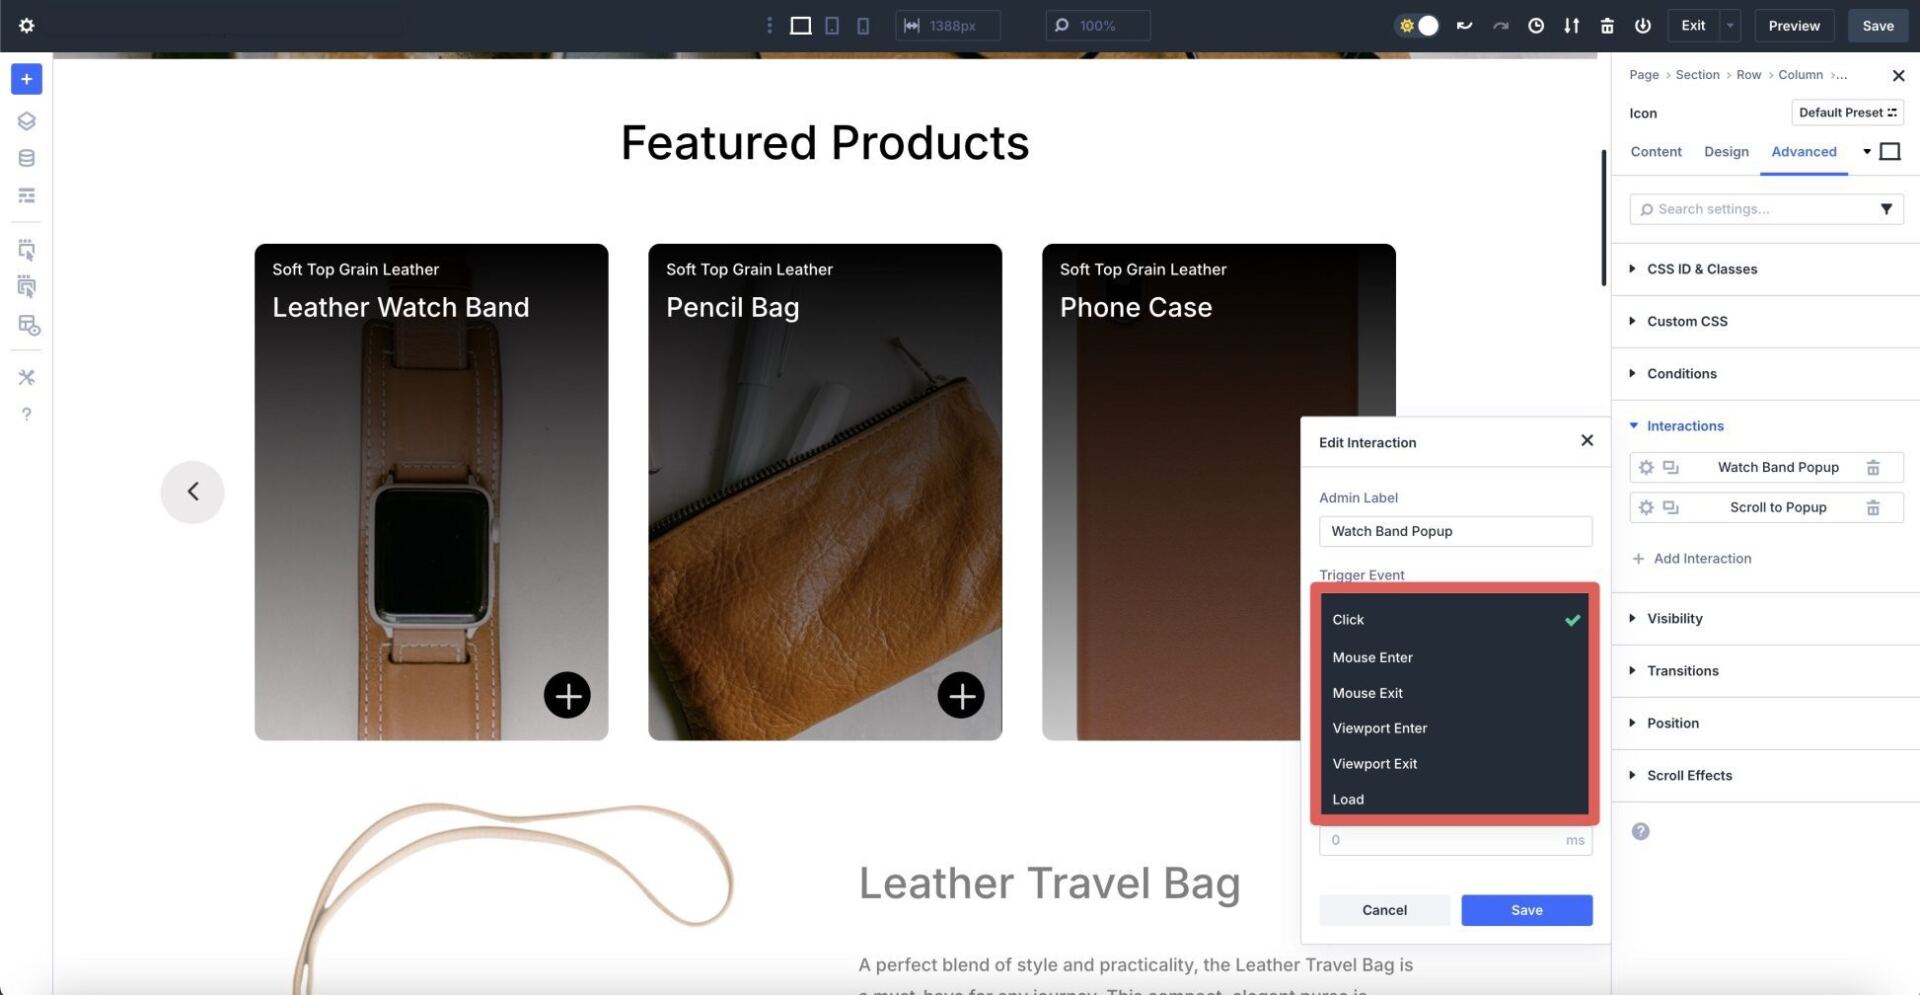
Triggers get started up the Interaction. You’ll create them to reason actions like pop-ups, content material subject matter reveals, effects on parts when hovering, scroll-based effects, and time-based effects like pop-ups loading after a time lengthen. Listed here are the available triggers:
- Click on on: Assign to a button, image, or other design module to unencumber an interaction (an identical to a content material subject matter reveal).
- Mouse Enter/Cross out: Activates an interaction when the shopper enters or leaves the section with their mouse.
- Viewport Enter/Cross out: Introduces effects for the reason that section enters or leaves the visible house of the computer screen.
- Load: This event triggers an element to begin out when the internet web page rather a little bit or after a time lengthen
Have an effect on Actions
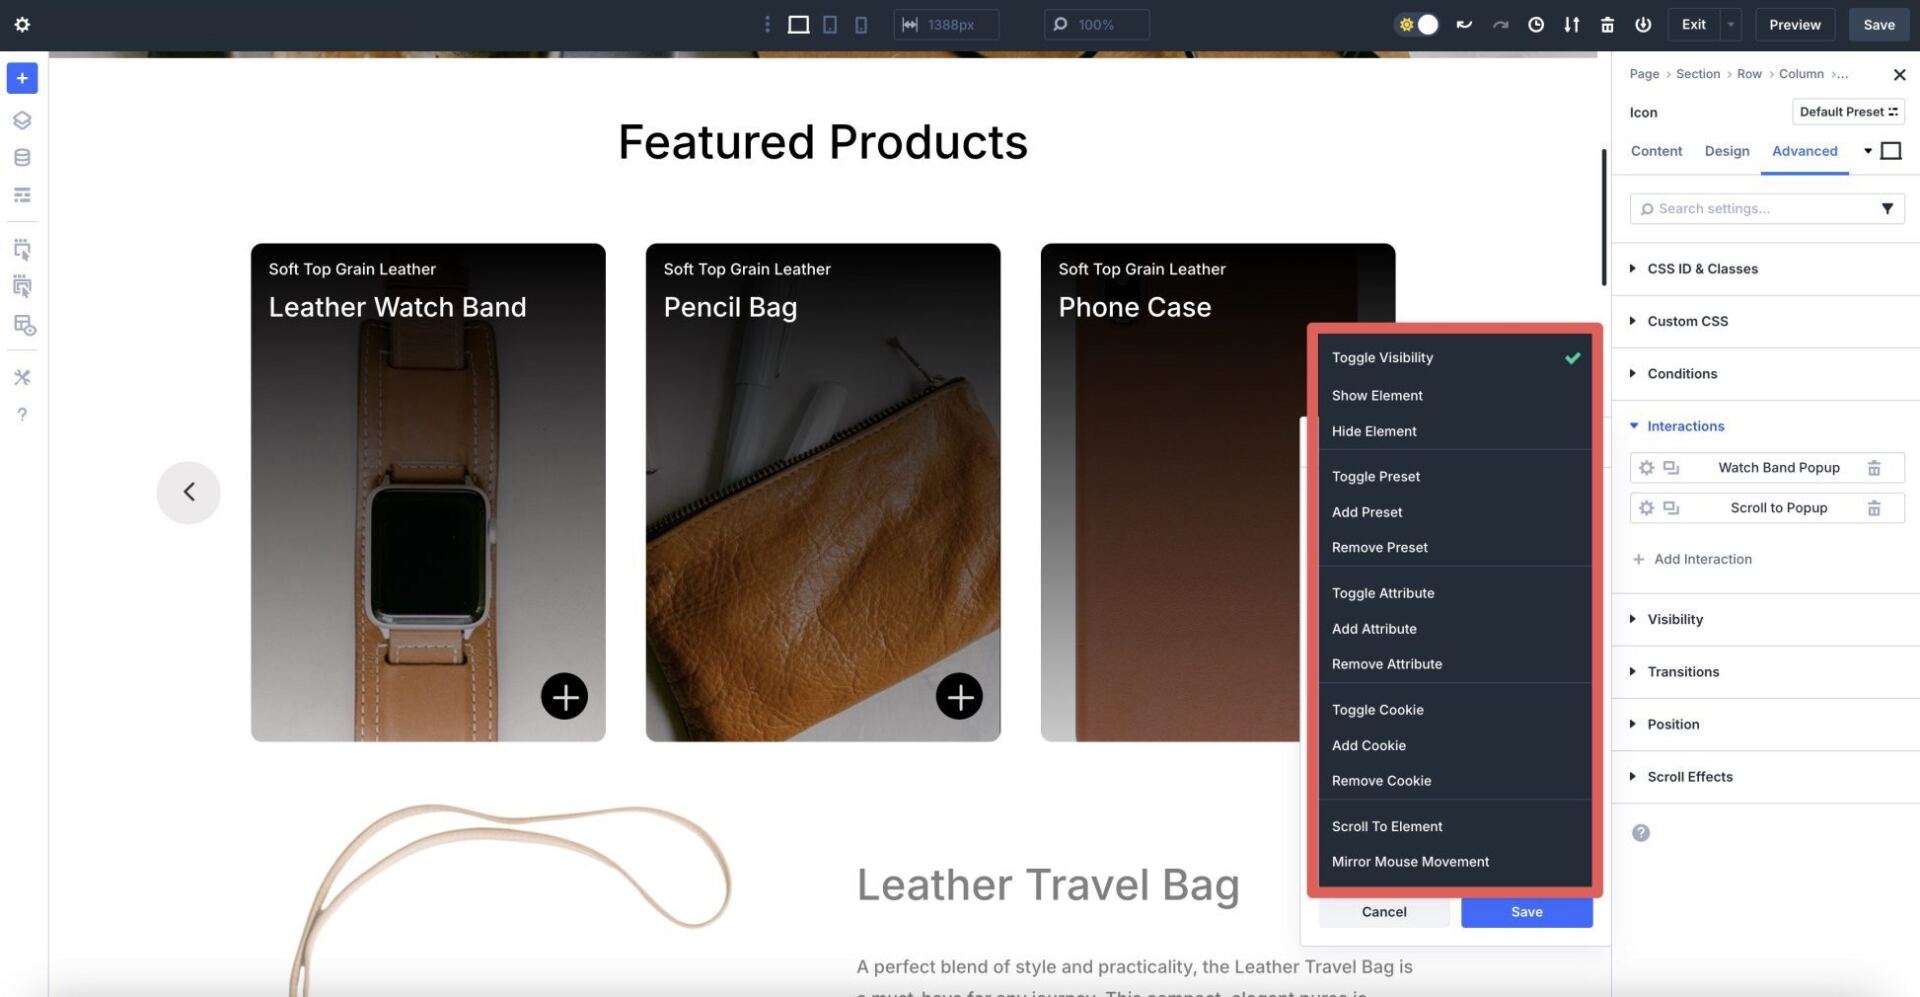
Have an effect on actions get to the bottom of what happens after a reason is activated. You’ll show or hide parts, animate with rather a large number of effects, or observe preset transitions to change sorts for the reason that shopper scrolls.
- Toggle Visibility: Affects an element’s state, between visible and hidden.
- Show/Duvet Section: Toggles the visibility of an element
- Toggle Preset: Toggles a design section’s preset on or off, with an strategy to alternate the existing preset.
- Add Preset: Used in an effort to upload a preset style magnificence to an element.
- Remove Preset: Clears the preset style from an element.
- Toggle Feature: Devices or unsets a decided on HTML feature value on an element, an identical to a CSS ID and class
- Add Feature: Assigns a decided on HTML feature value, an identical to a CSS magnificence or ID, to an element if it’s in recent years missing.
- Remove Feature: Will get rid of a chosen feature from an element.
- Toggle Cookie: Use this in an effort to upload or remove a cookie value. For example, it’s very important set a cookie when a pop-up turns out and use Divi 5’s conditional settings to ensure it most simple turns out once.
- Add Cookie: Use this to position a custom designed cookie value in a shopper’s browser.
- Remove Cookie: Use this to delete a in the past set cookie.
- Scroll to Section: Simply scrolls the internet web page to a specified section
- Mirror Mouse Movement: This permits you to define a mouse-tracking movement for an element. You’ll set the section to translate, scale, business opacity, tilt, or rotate, and keep watch over the movement sensitivity.
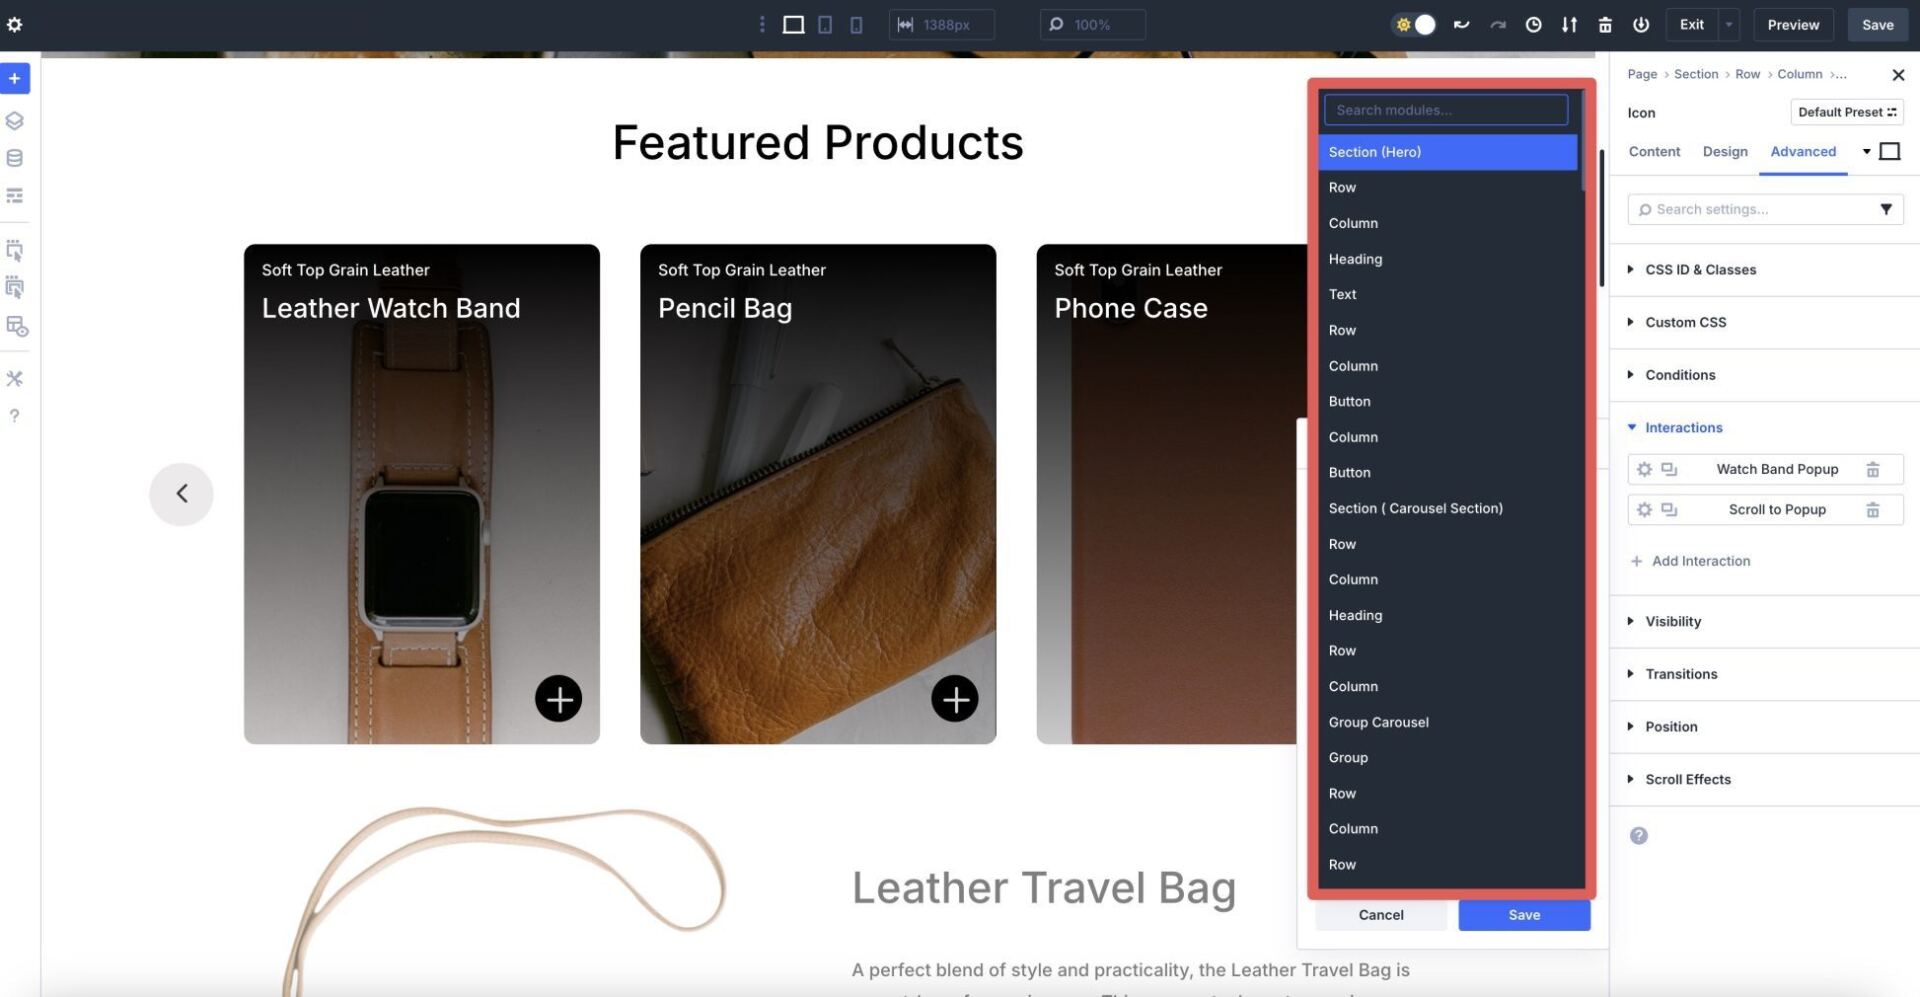
Objective Module
The target is the section that the Interaction affects, like a module, row, column, or phase. You’ll function the section itself or any other section on the internet web page, supplying you with the flexibility to create additional sophisticated interactions.
How The Team of workers Carousel Module and Interactions Artwork Together
The Team of workers Carousel module and Divi 5 Interactions blended can create interactive content material subject matter reveal carousels that captivate shoppers with dynamic content material subject matter and responsive behavior. The Team of workers Carousel module serves for the reason that core content material subject matter display, enabling you to build a graceful slider stuffed with static or dynamic content material subject matter, like products. Divi 5 Interactions enhances this by way of together with triggers and effects.
Interactions can create hover-based effects (an identical to scaling or tilting footage) to make parts of each and every slide additional horny. Combining the Team of workers Carousel module and Divi 5 Interactions is an effective way to stick shoppers engaged and most probably building up product sales, conversions, and reduce leap fees.
How To Create An Interactive Content material subject matter Reveal Carousel With Divi 5
In this phase, we’ll walk you all through the stairs to create an interactive content material subject matter reveal carousel that incorporates products on a Divi internet web page. By means of the top, you’ll have a better working out of the best way the Team of workers Carousel module works along with Interactions to create a captivating product display.
We received’t use the Loop Builder in this post to simplify problems. Learn this submit for those who occur to’d like to learn additional about the easiest way to make use of it to create dynamic loops.
Step 1: Add And Configure The Team of workers Carousel Module
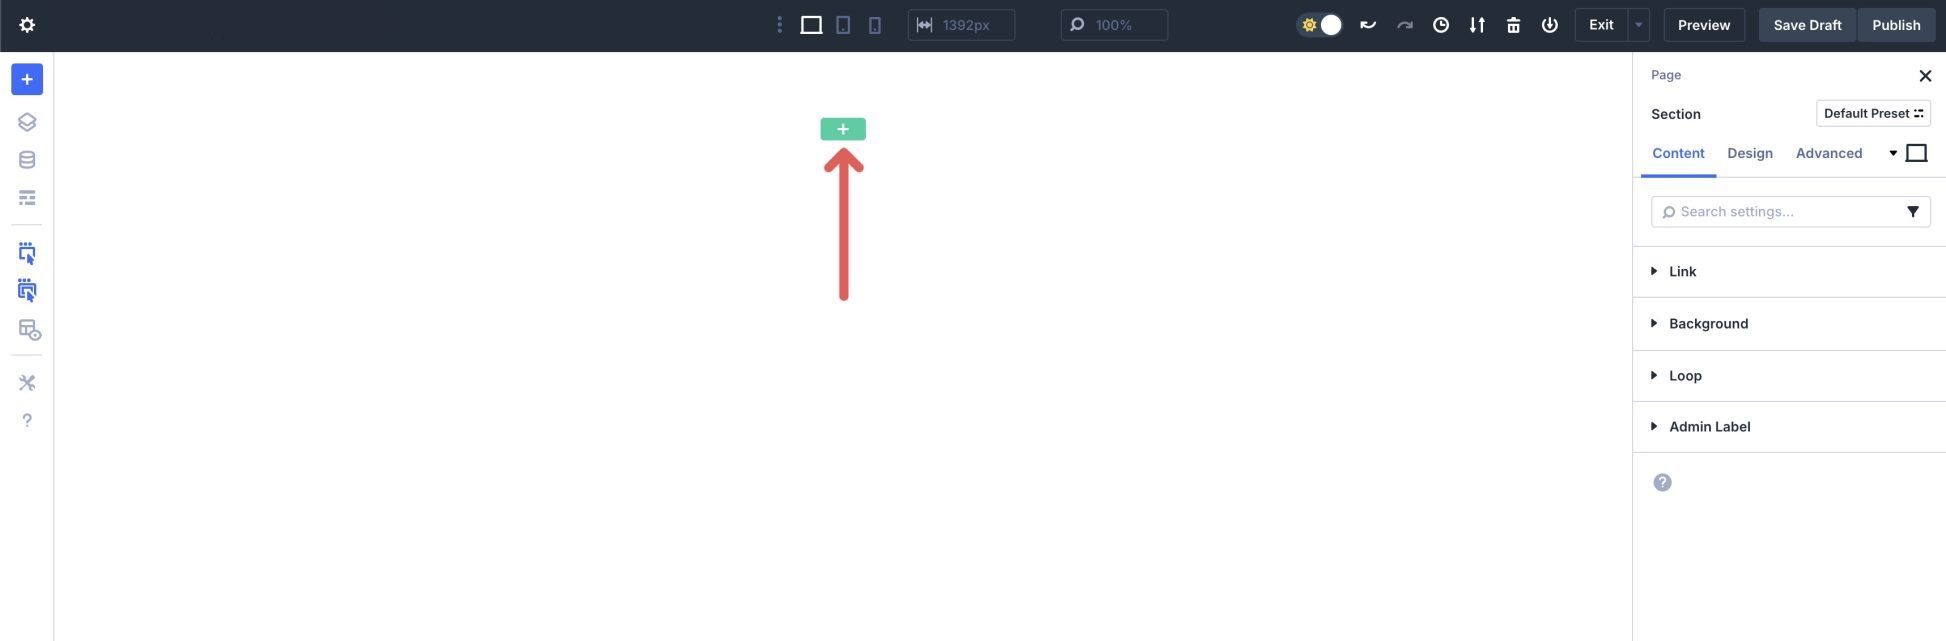
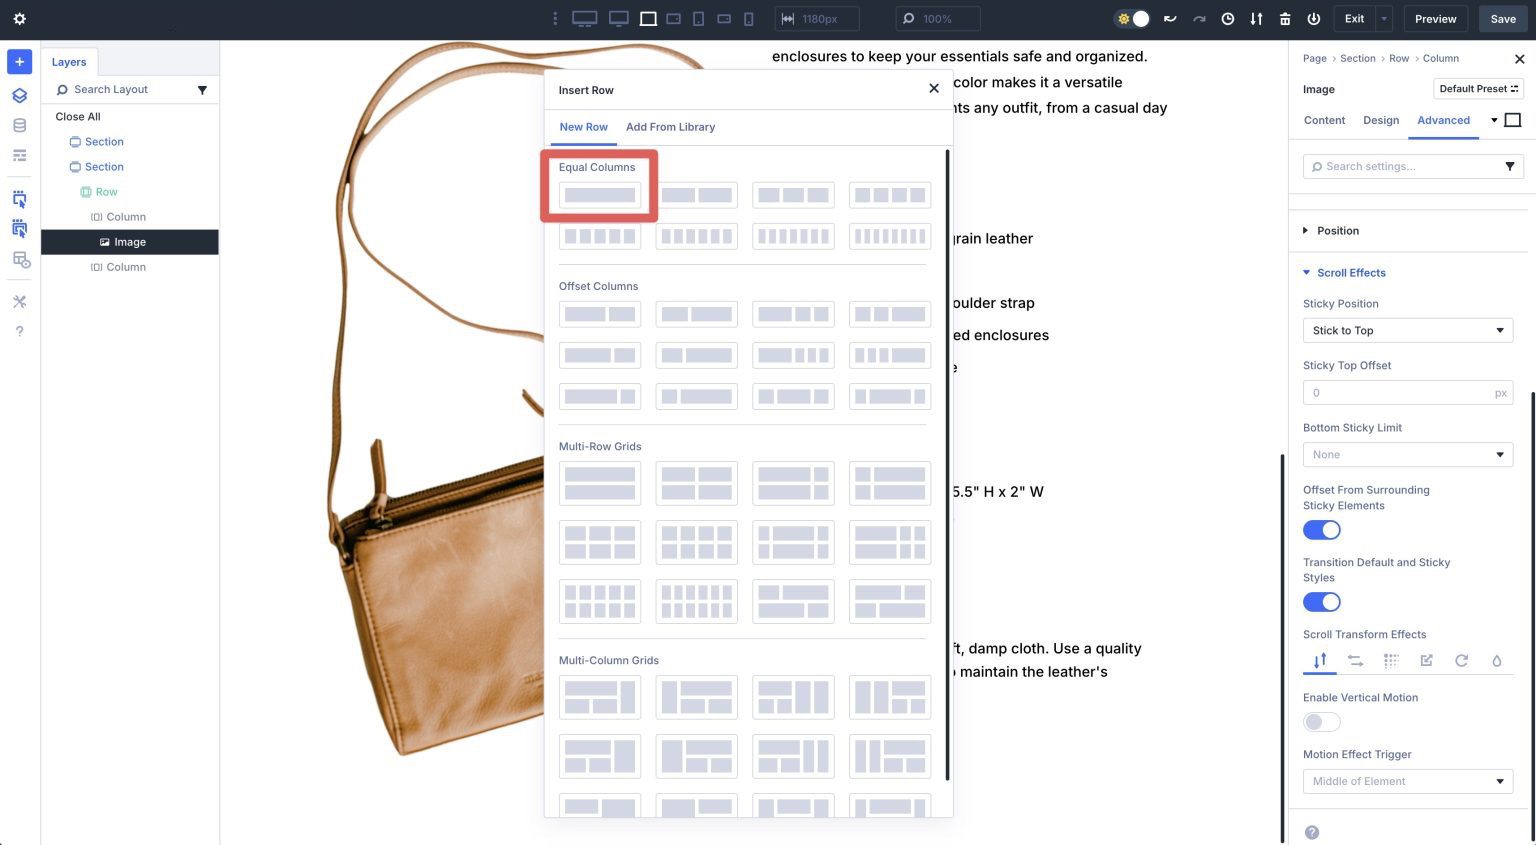
Create a brand spanking new internet web page in your wordpress internet web page. Permit the Visual Builder and click on at the green + button in an effort to upload a brand spanking new row.
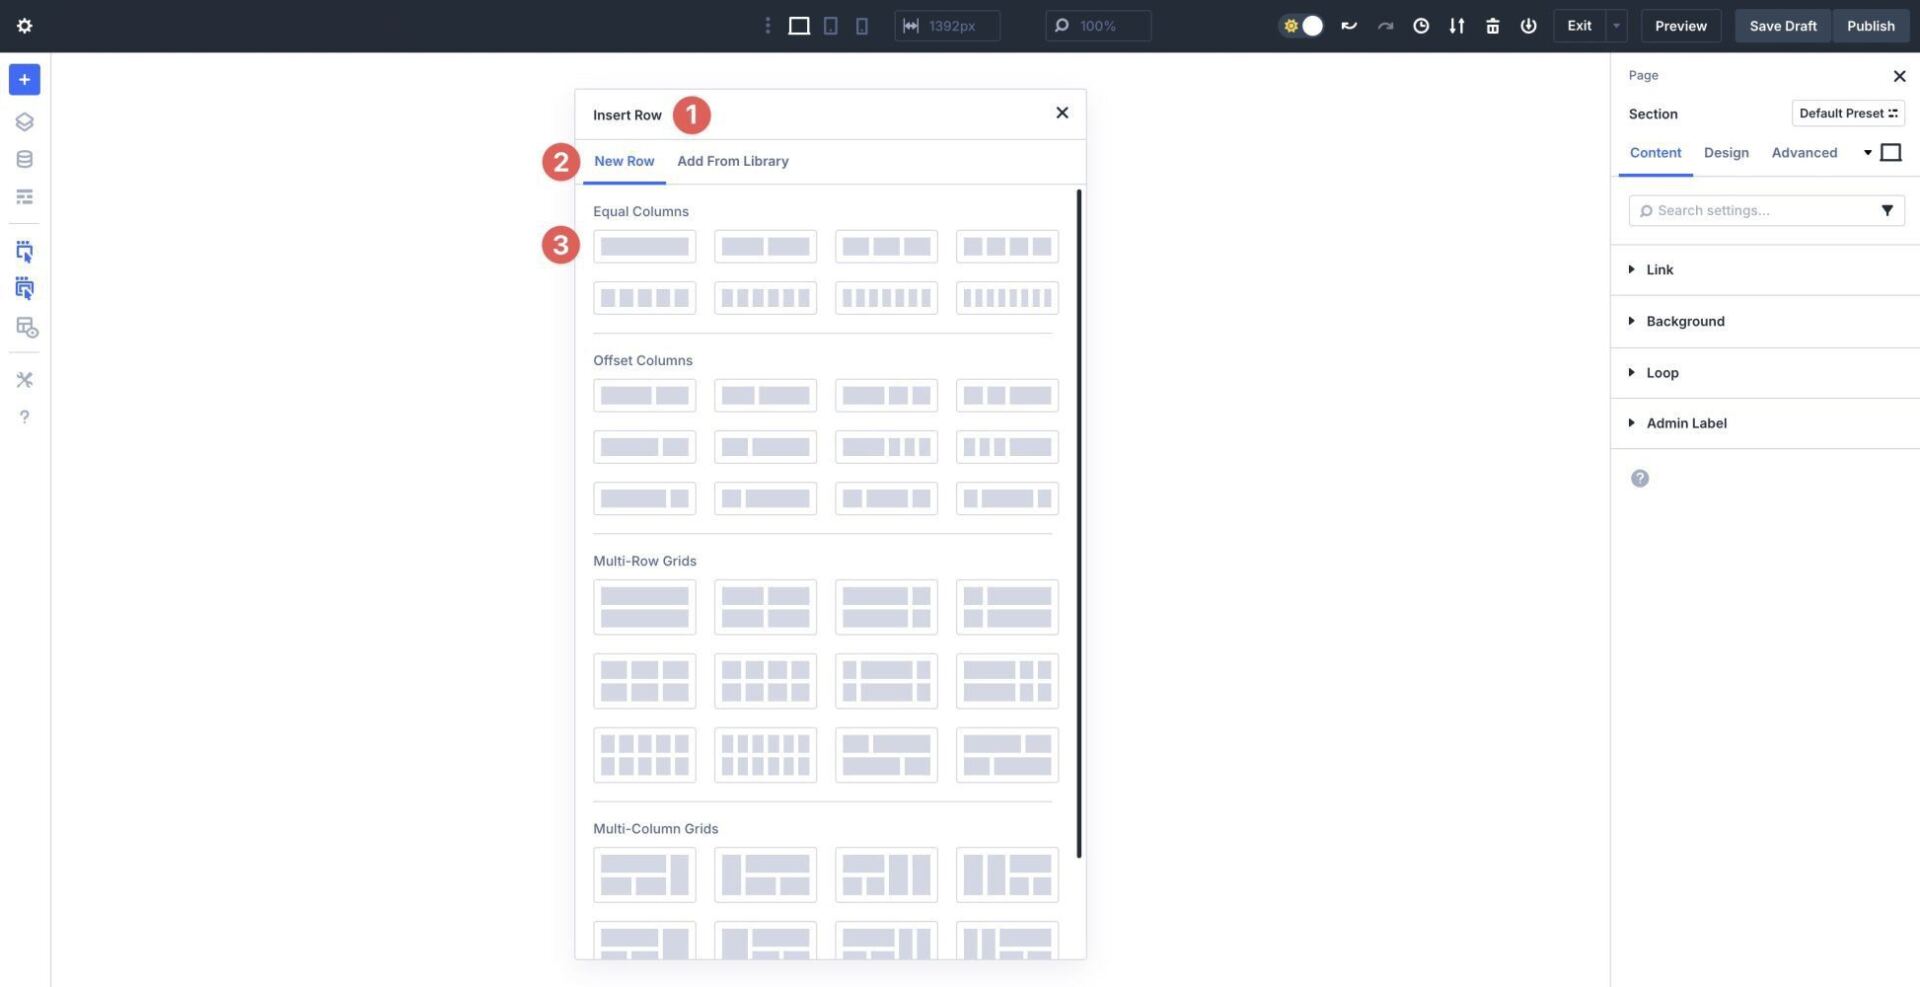
When the Insert Row dialog box turns out, select a single column row underneath An identical Columns.
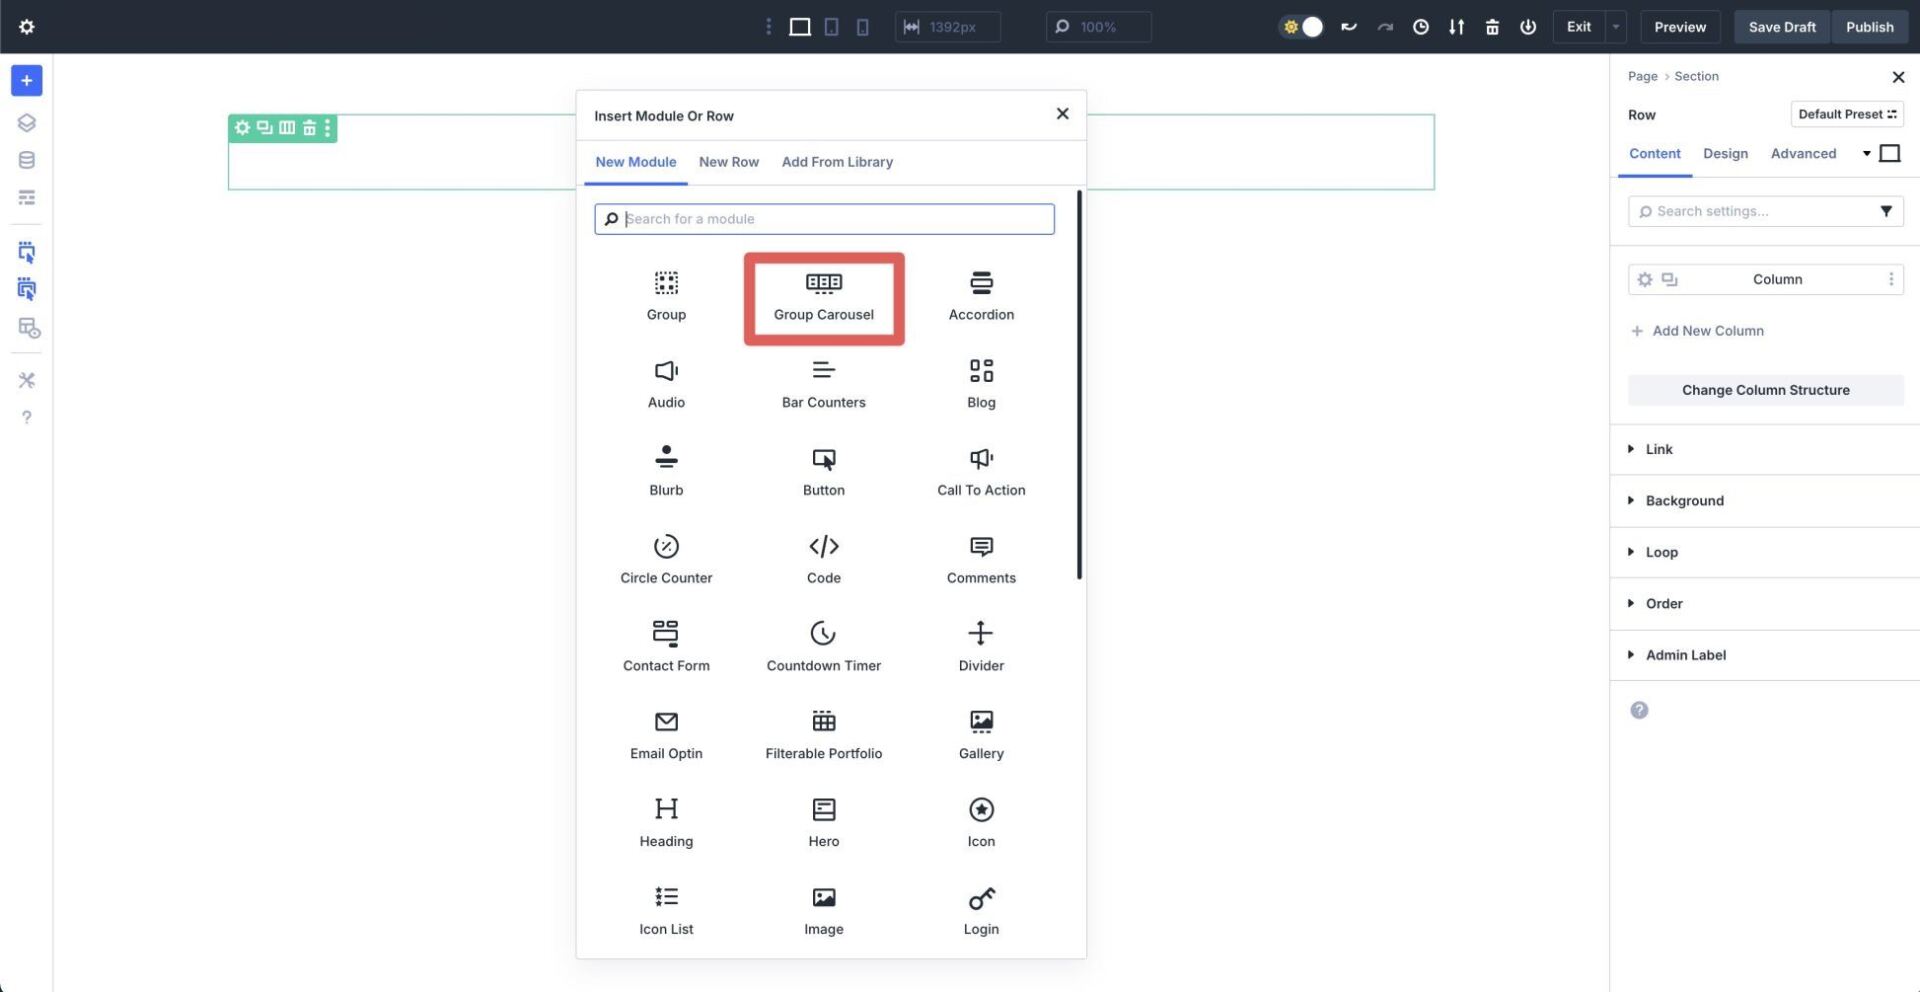
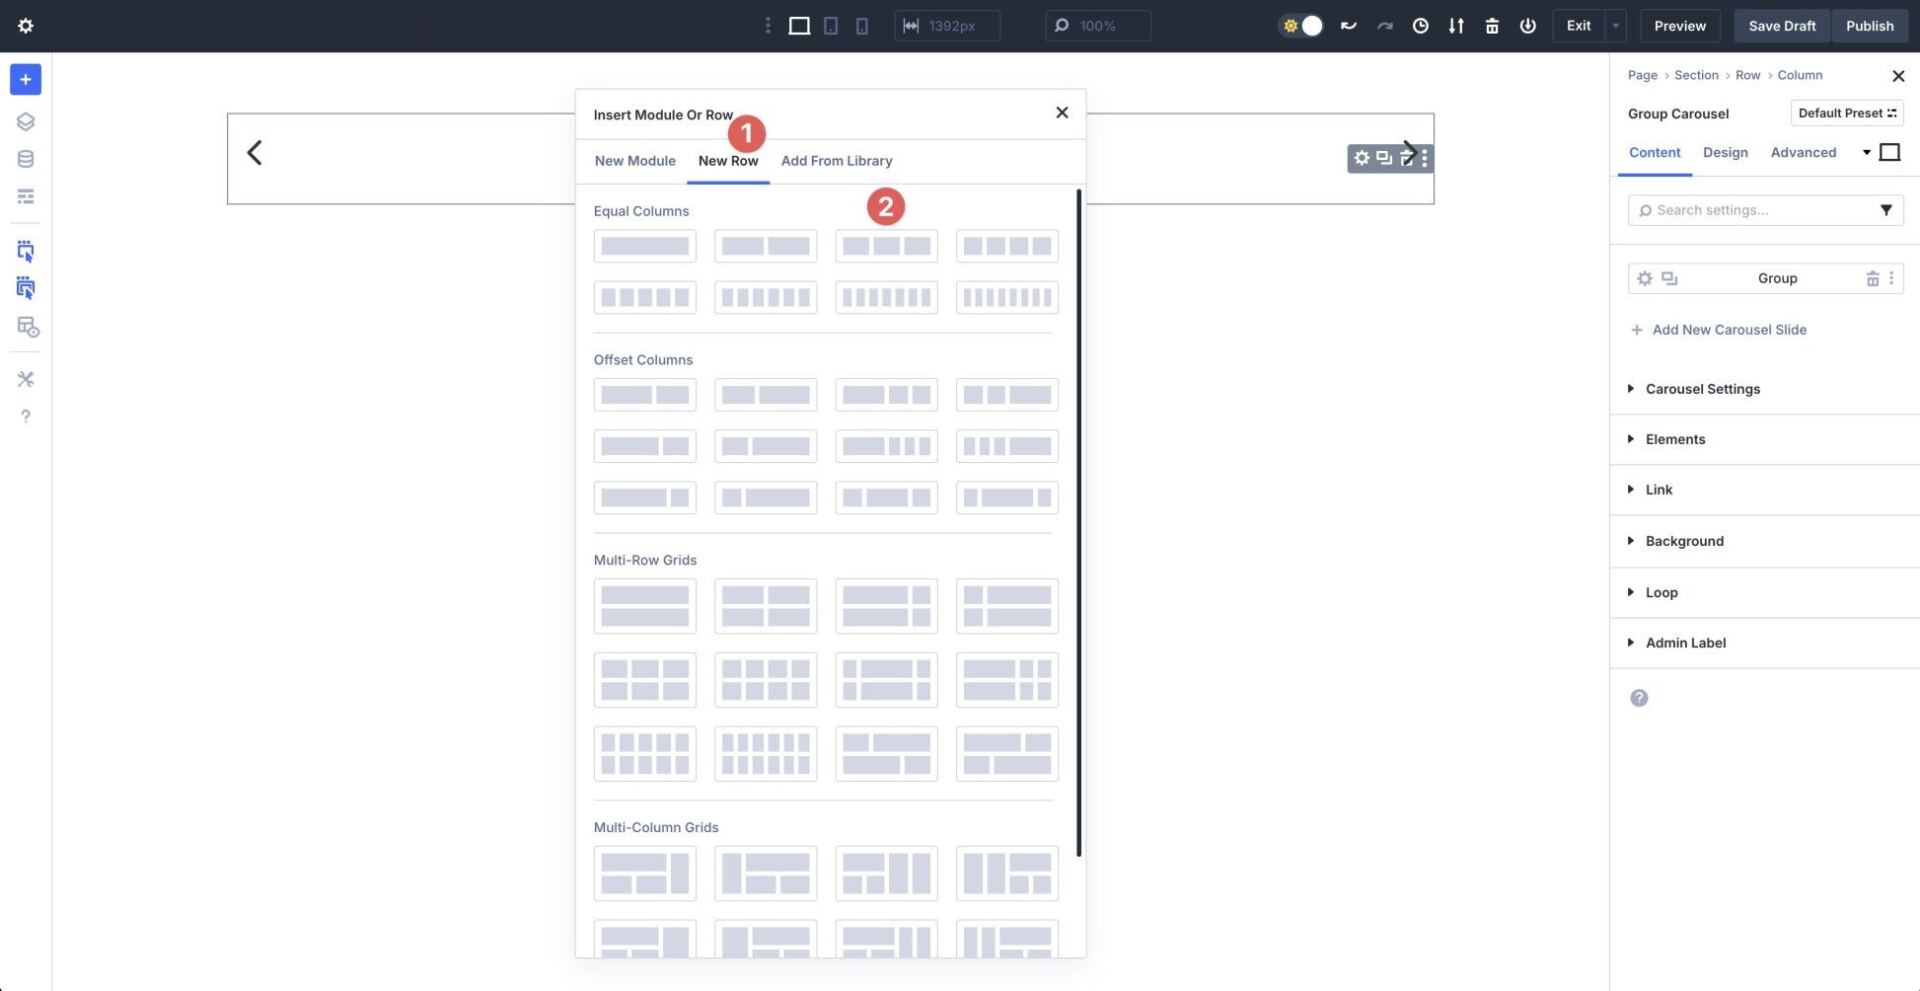
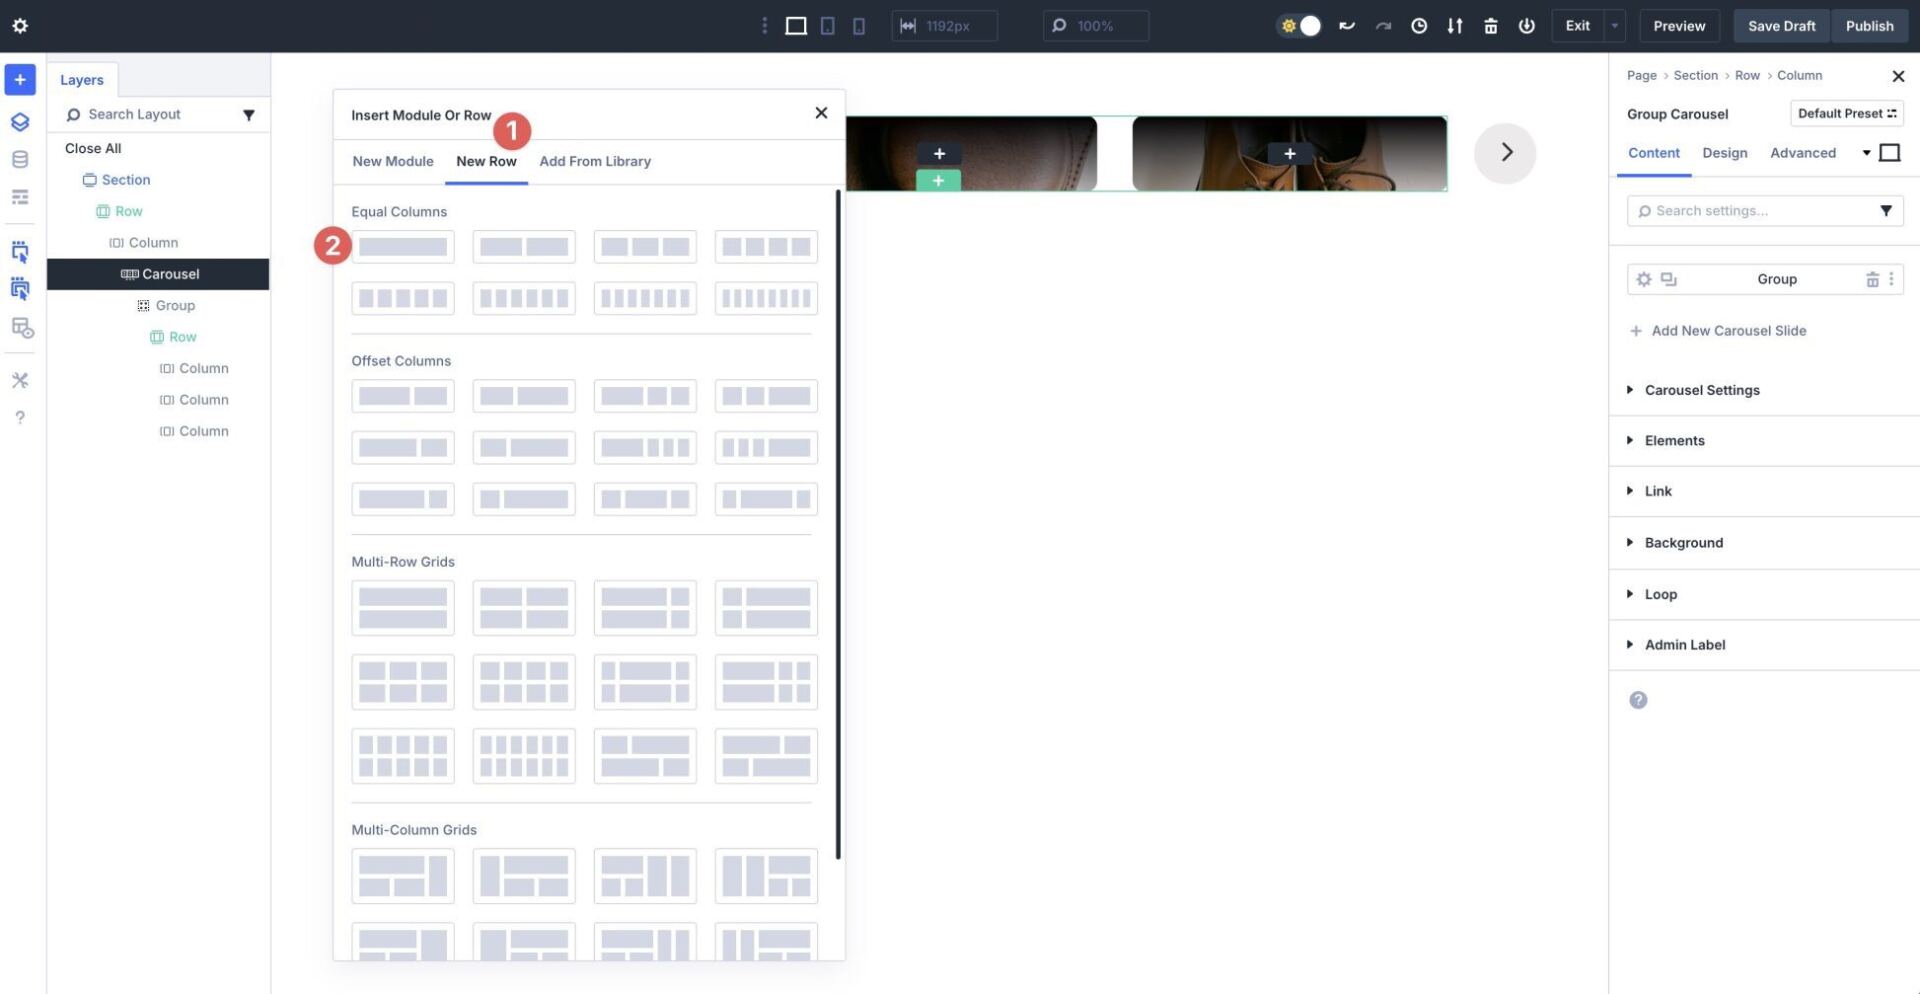
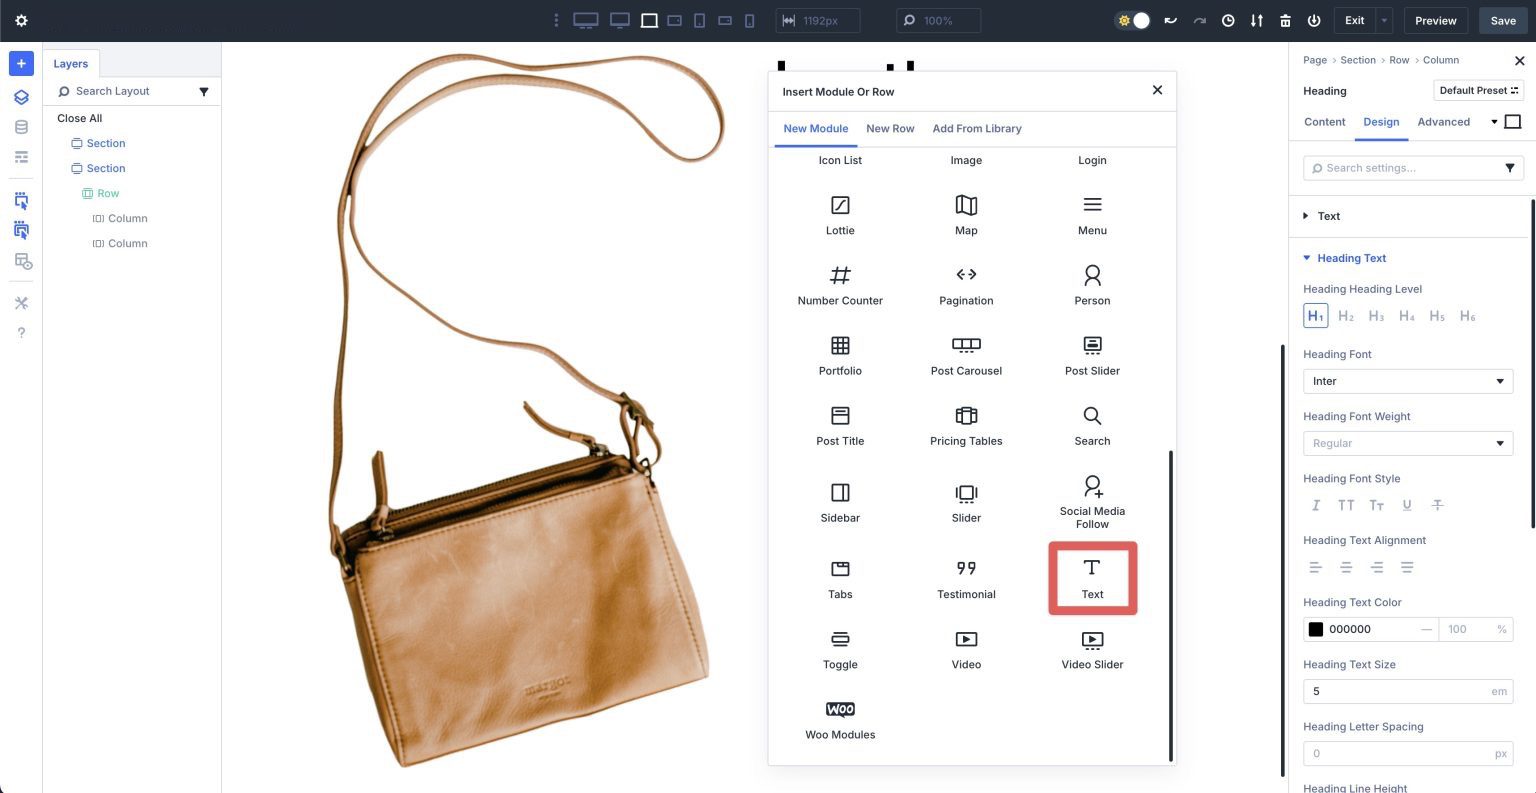
Make a choice the Team of workers Carousel module from the available alternatives throughout the Insert Module Or Row dialog box.
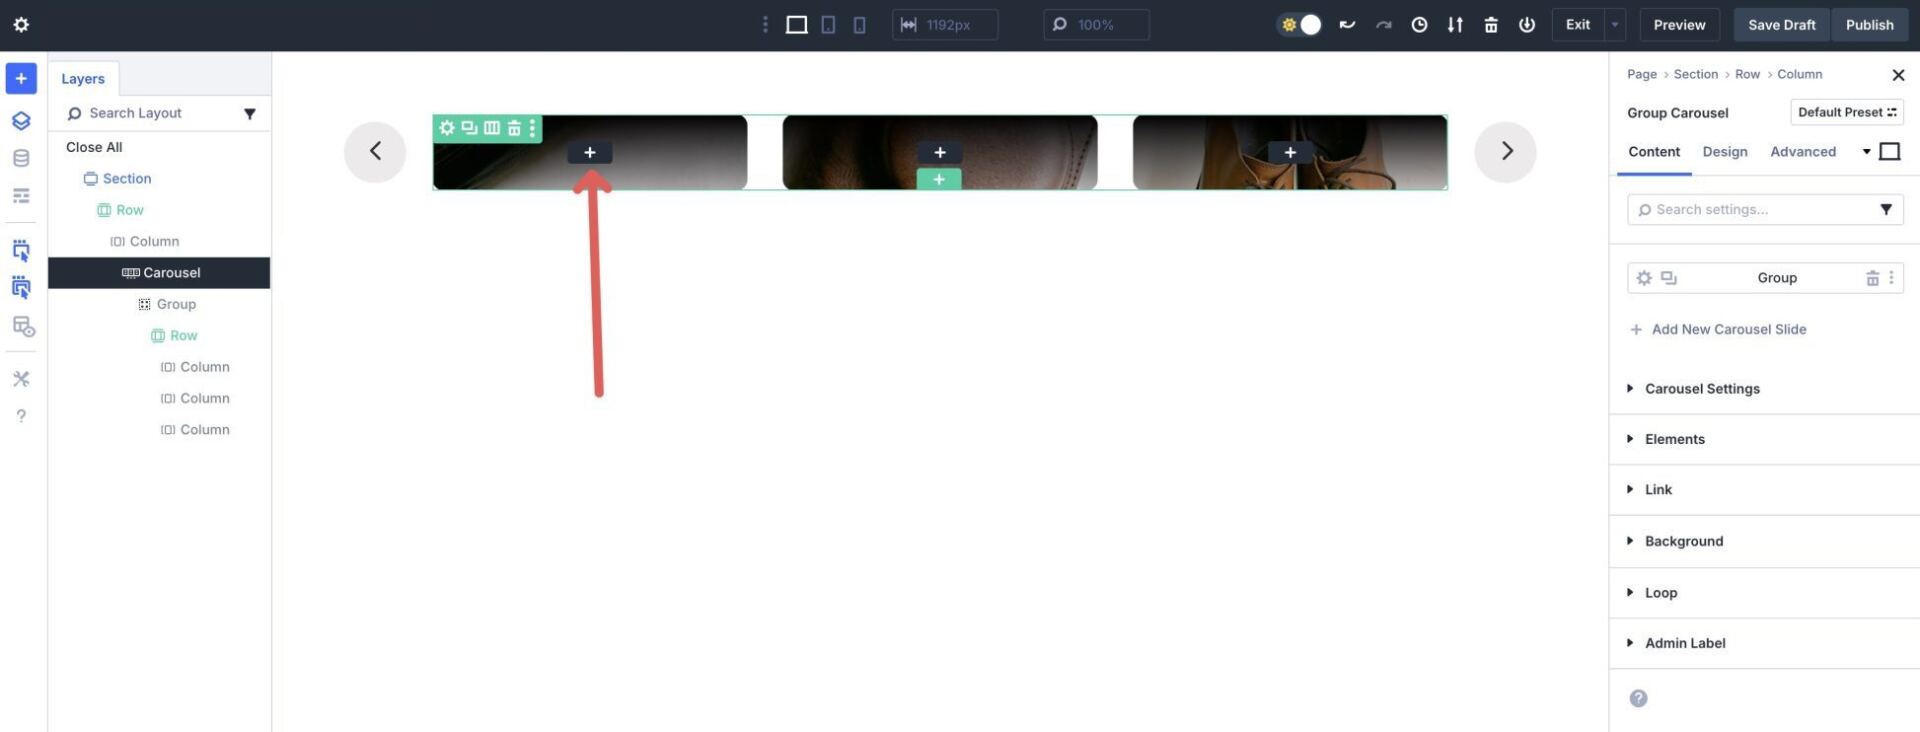
Click on at the black + icon in an effort to upload a brand spanking new module throughout the Team of workers Carousel module.
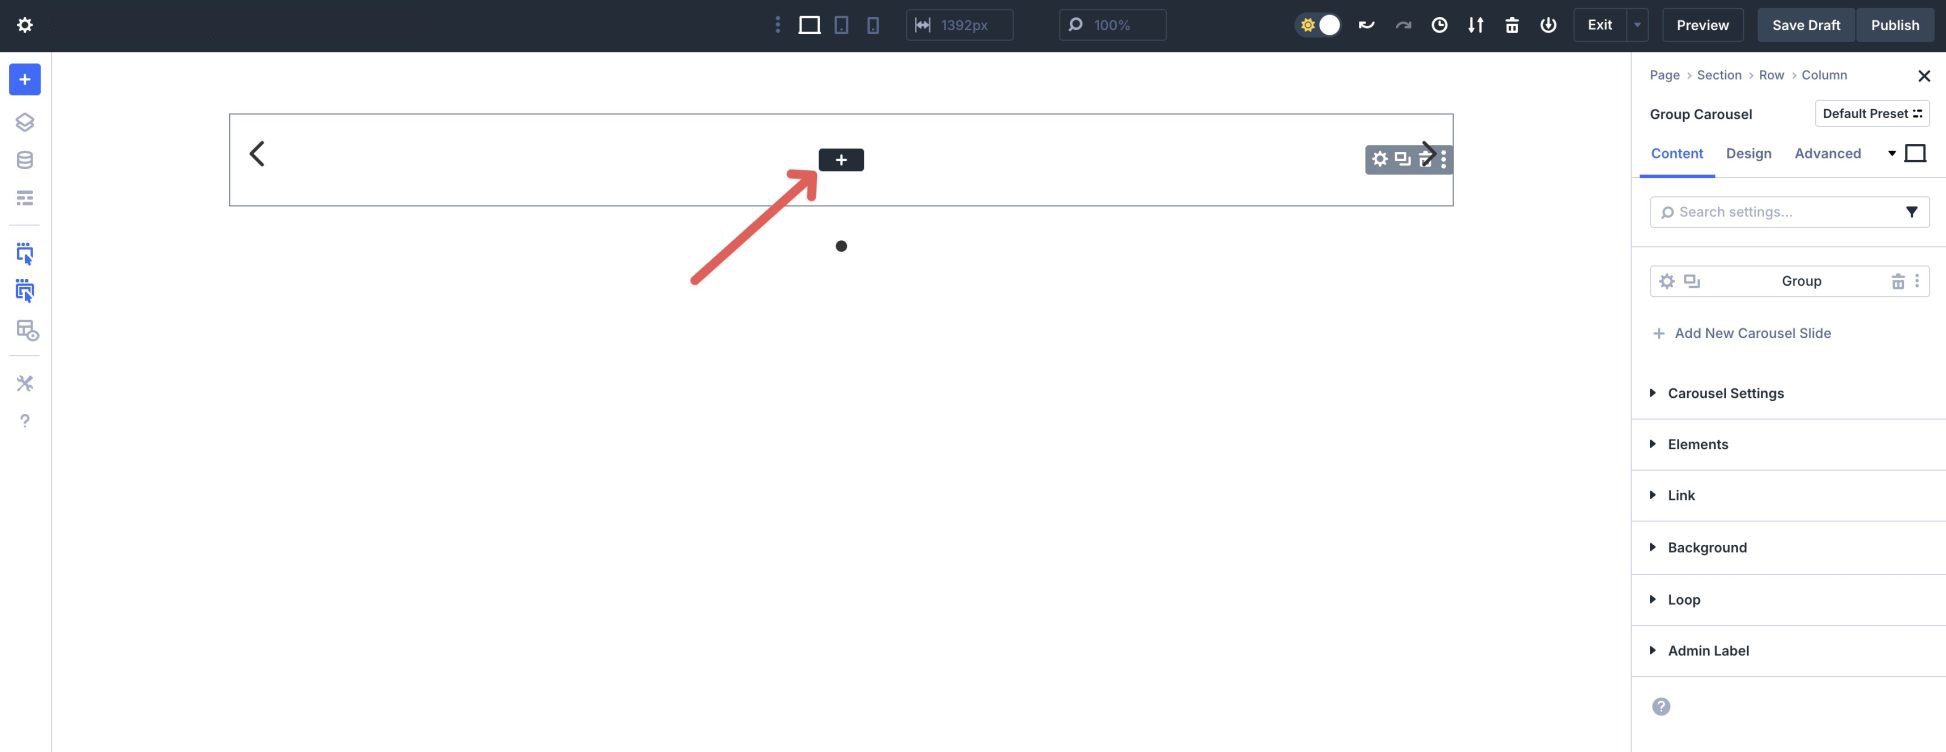
Click on at the New Row tab and select a three-column row.
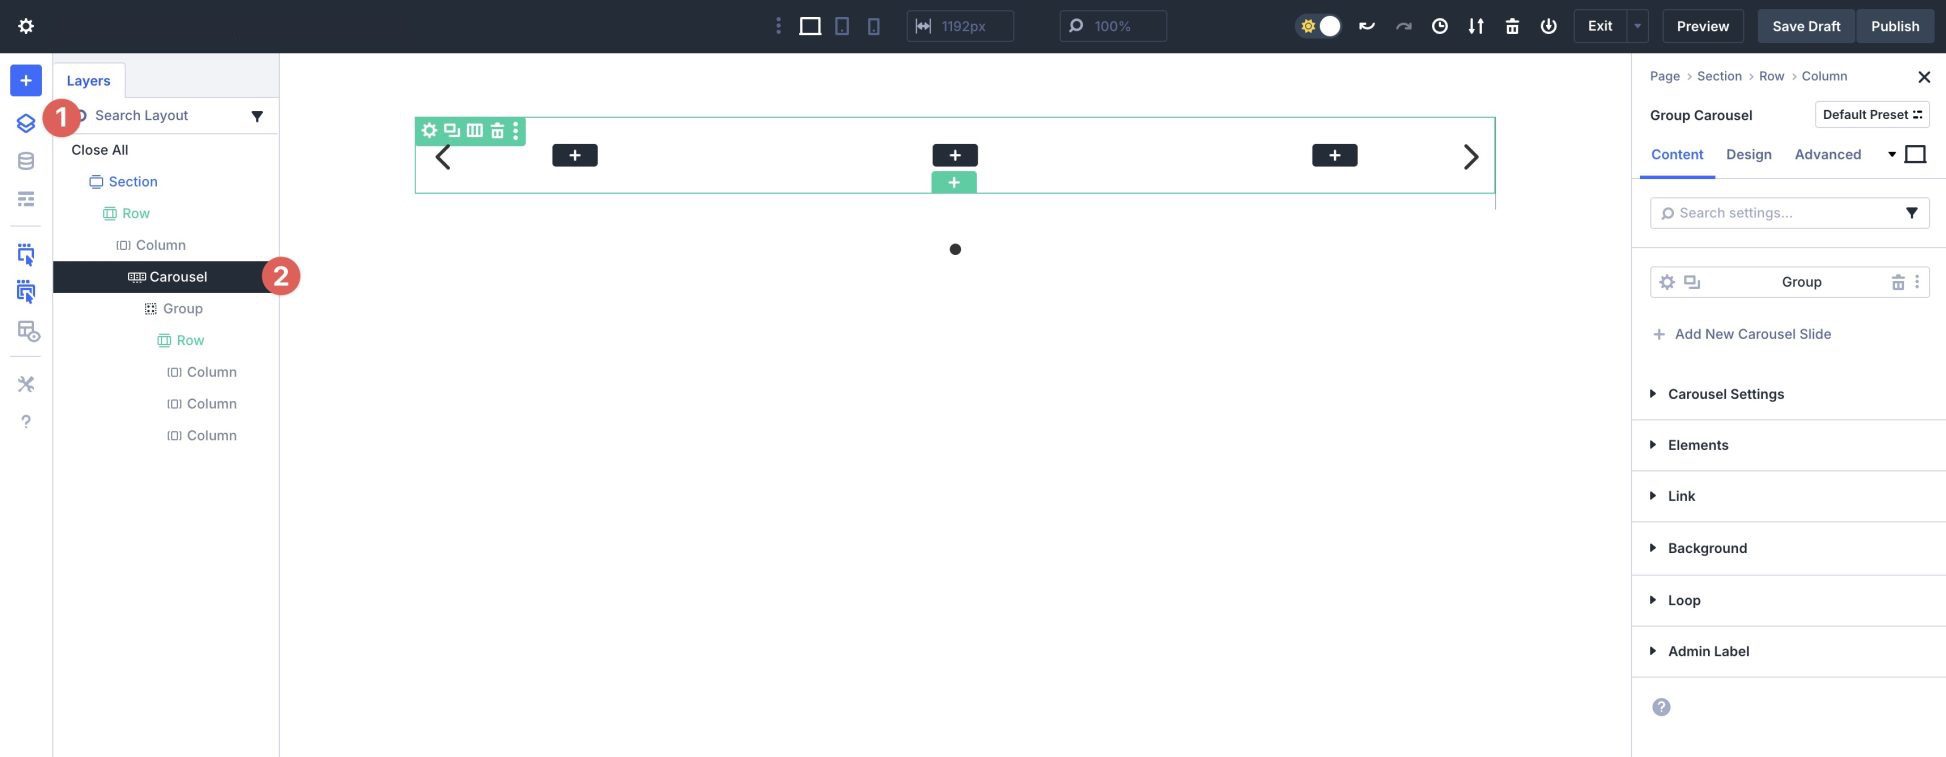
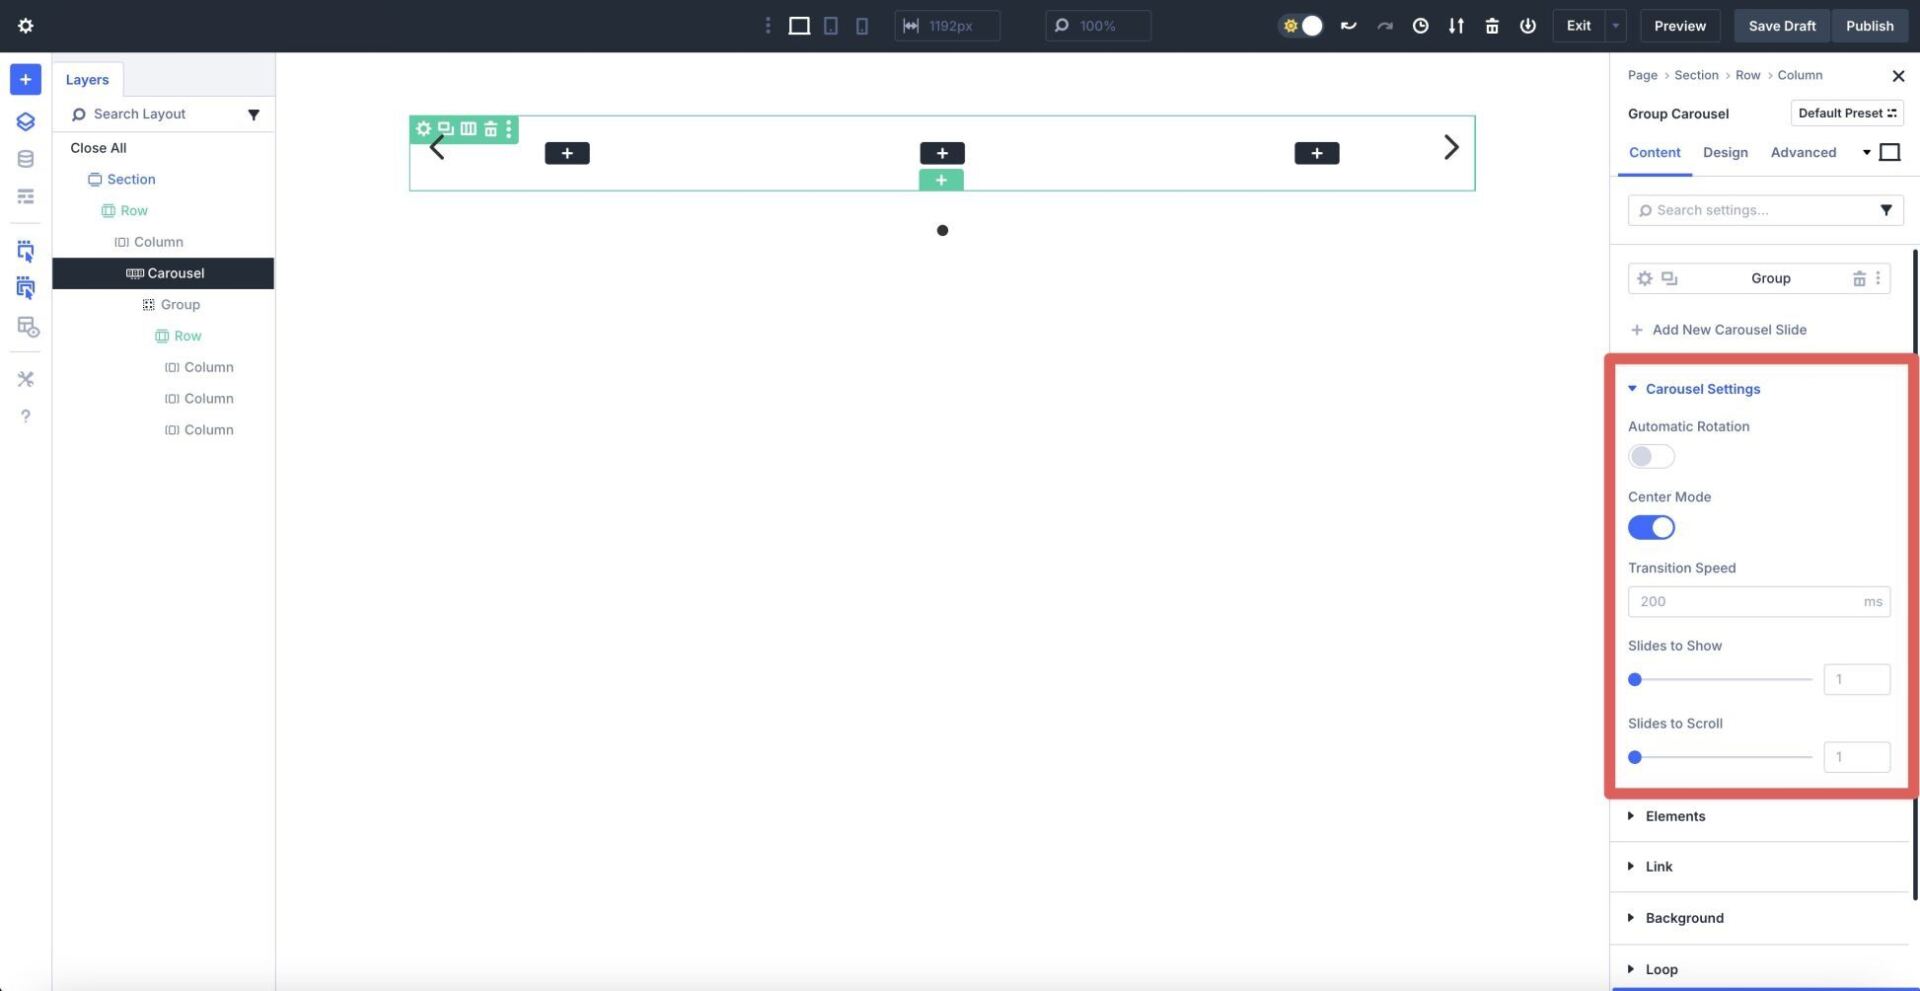
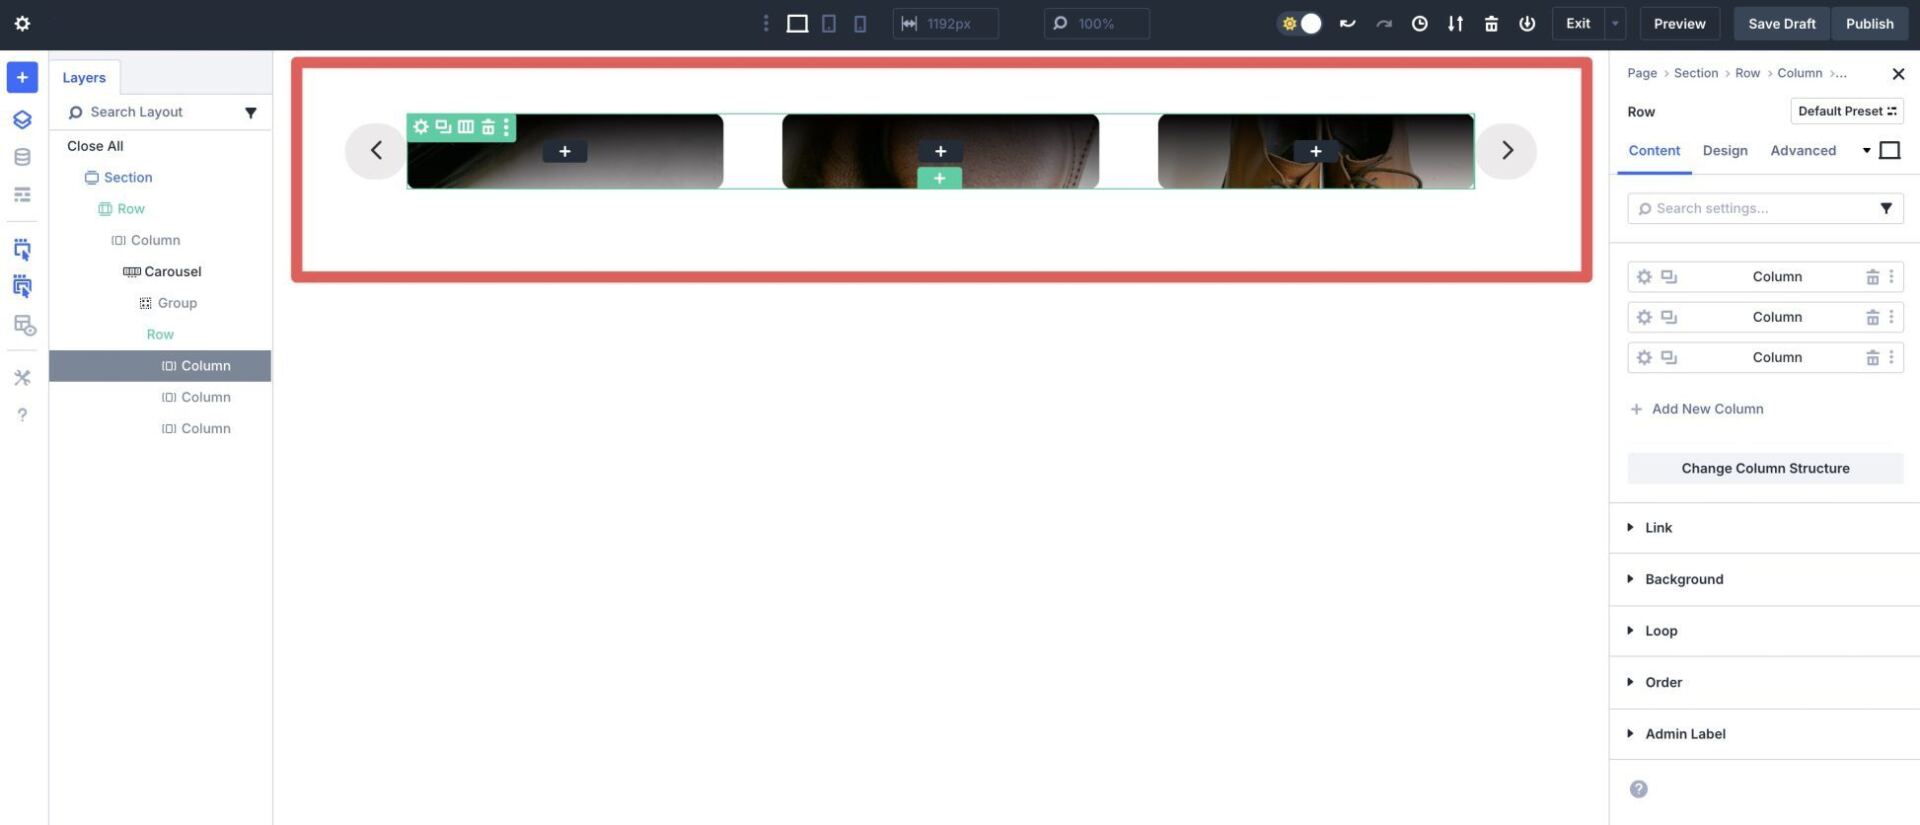
Previous than together with content material subject matter to our Team of workers Carousel, we wish to configure the module’s settings. Inside the Layers panel, select the Team of workers Carousel module. Amplify the Carousel Settings dropdown menu.
Leave Automatic Rotation toggled to off and make allowance Center Mode.
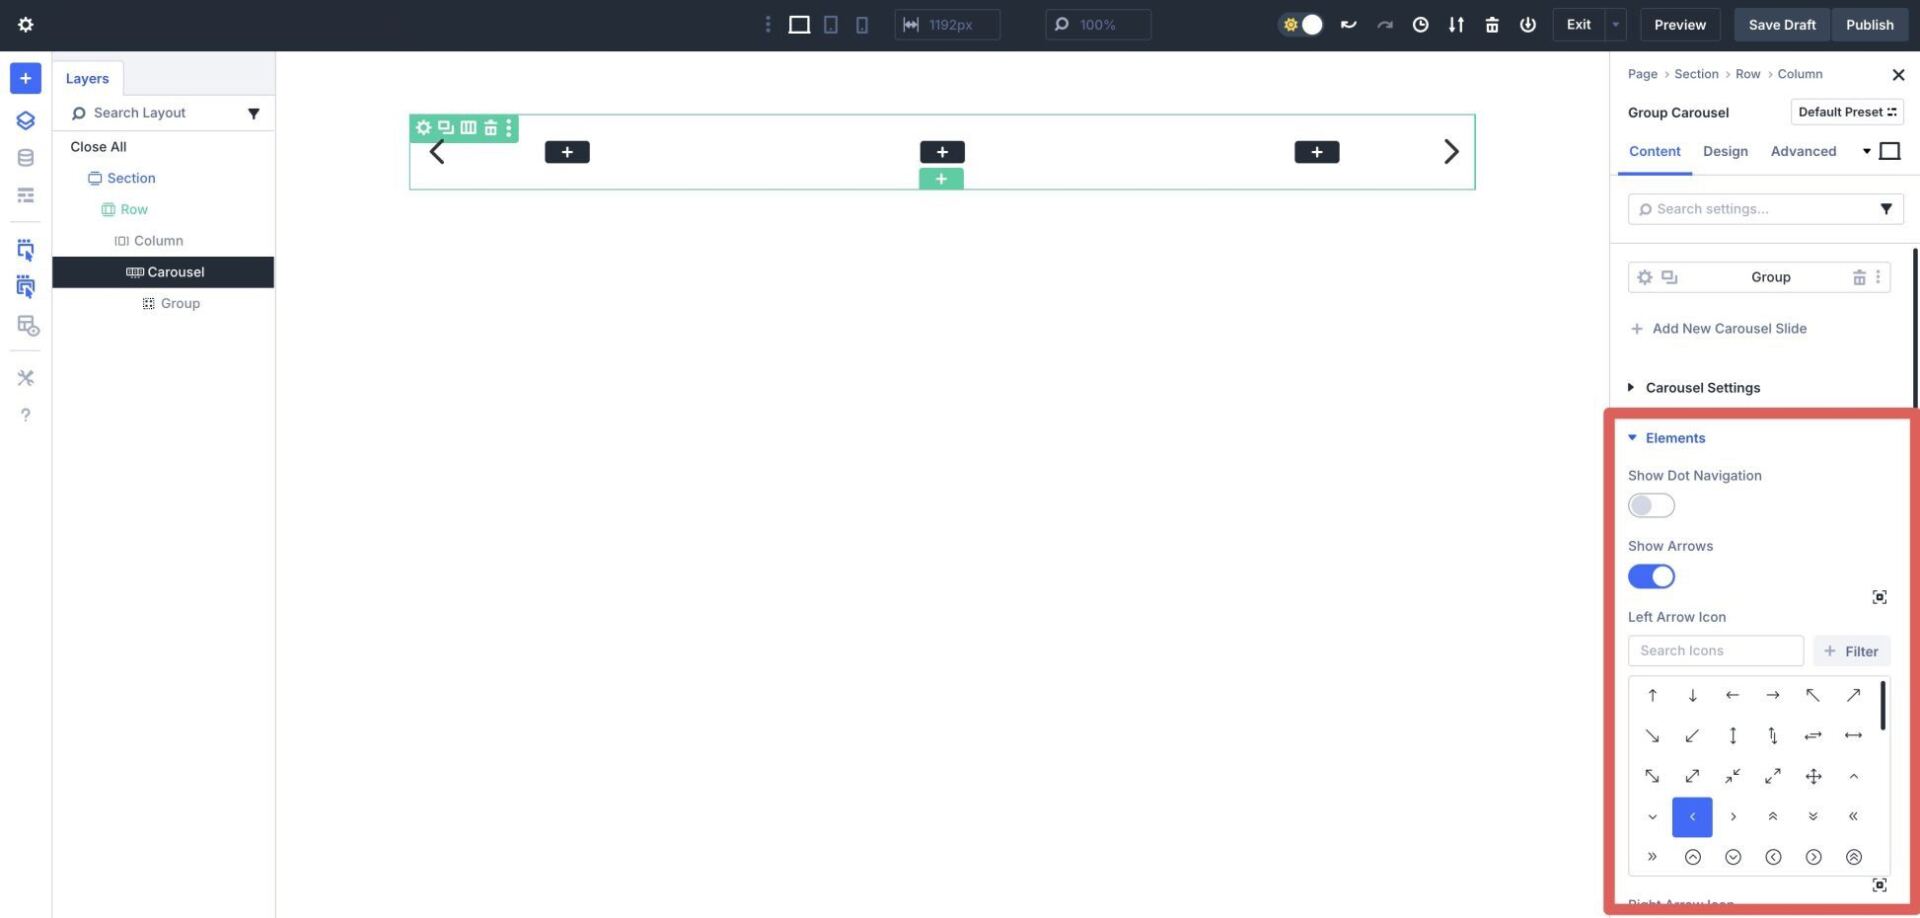
Next, build up the Parts dropdown menu. Turn Show Dot Navigation off on the other hand cross away Show Arrows enabled. Arrow icons are determined on by way of default, on the other hand you’ll be ready to choose the look you want from Divi’s massive icon library.
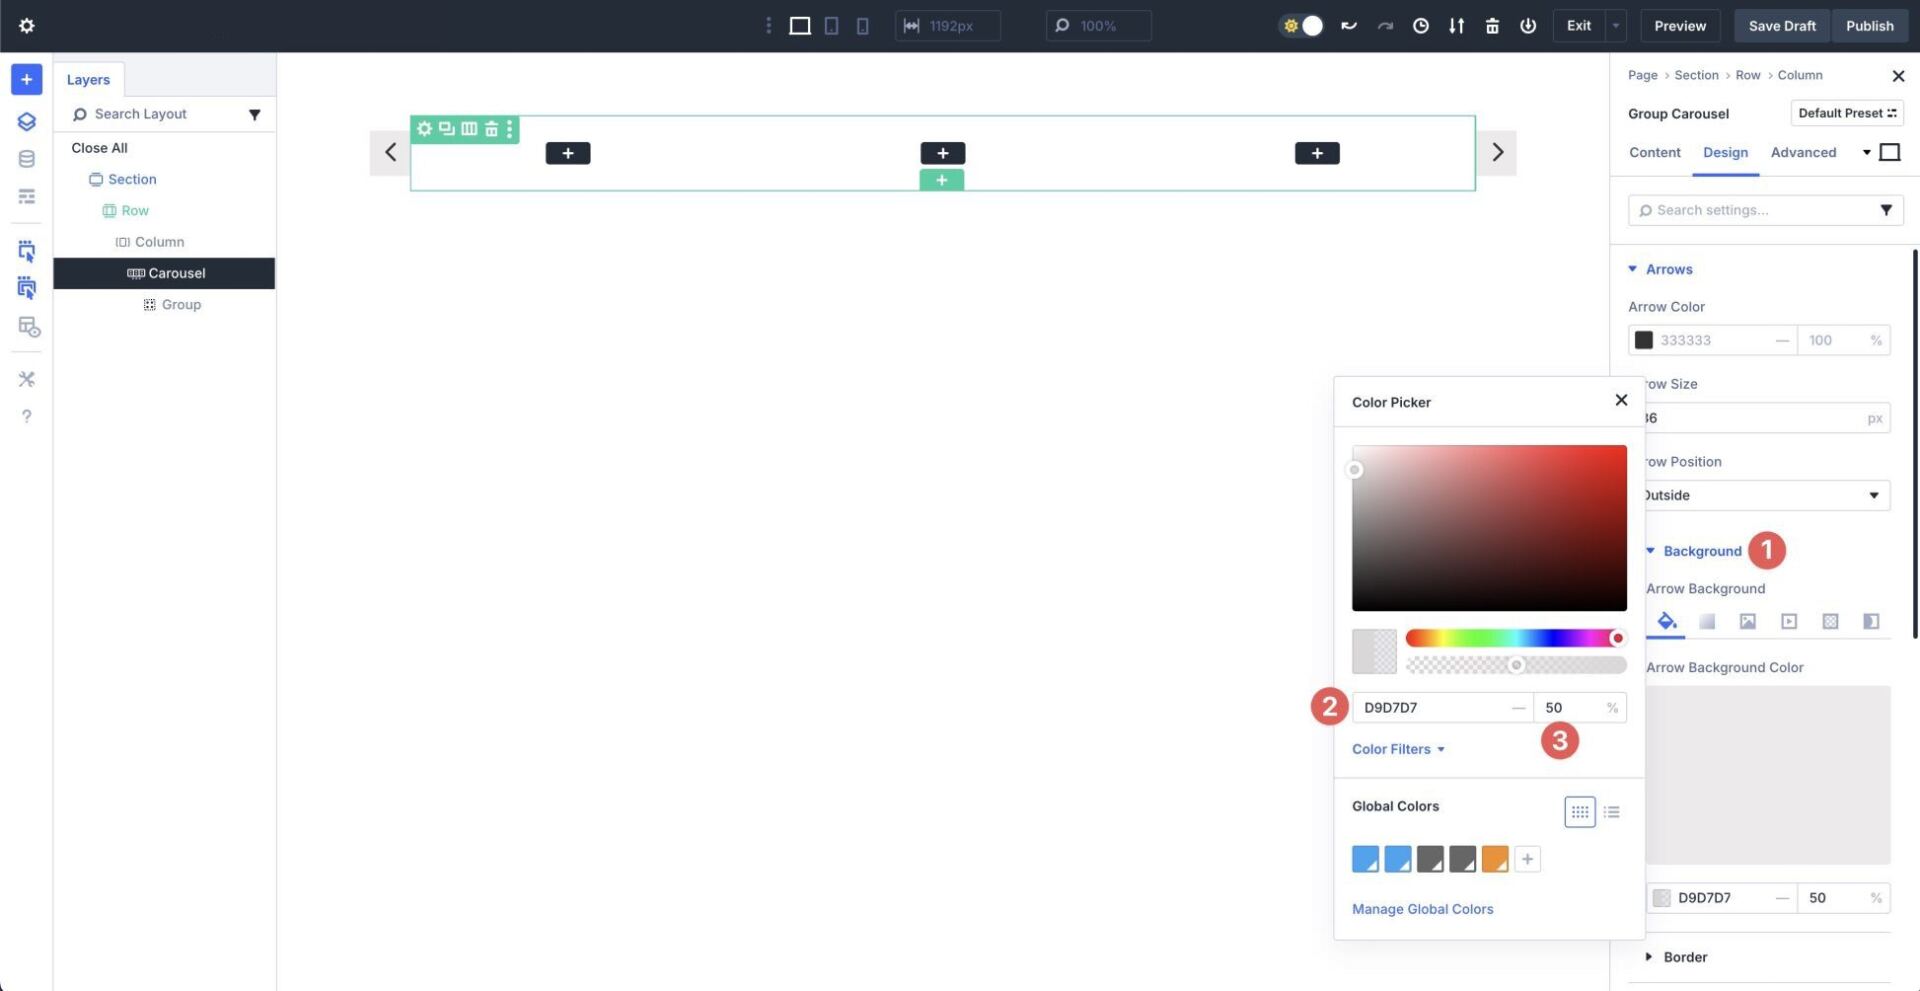
Navigate to the Design tab. Amplify the Arrows dropdown menu. Use #333333 for the reason that Arrow Color and set the Arrow Size to 36px. Set the Arrow Position to Outside.
![]()
Amplify the Background dropdown menu. Inside the Arrow Background Color tab, click on on + Add Background Color. Add #D9D7D7 for the reason that background colour and set the Opacity to 50%.
Inside the Border dropdown menu throughout the Arrows settings, assign a 100px Arrow Border Radius.
![]()
In any case, build up the Spacing dropdown menu throughout the Arrows settings. Add .75% Arrow Padding to the top & bottom and 1% to the left & right kind.
![]()
Step 2: Configure The Row’s Settings
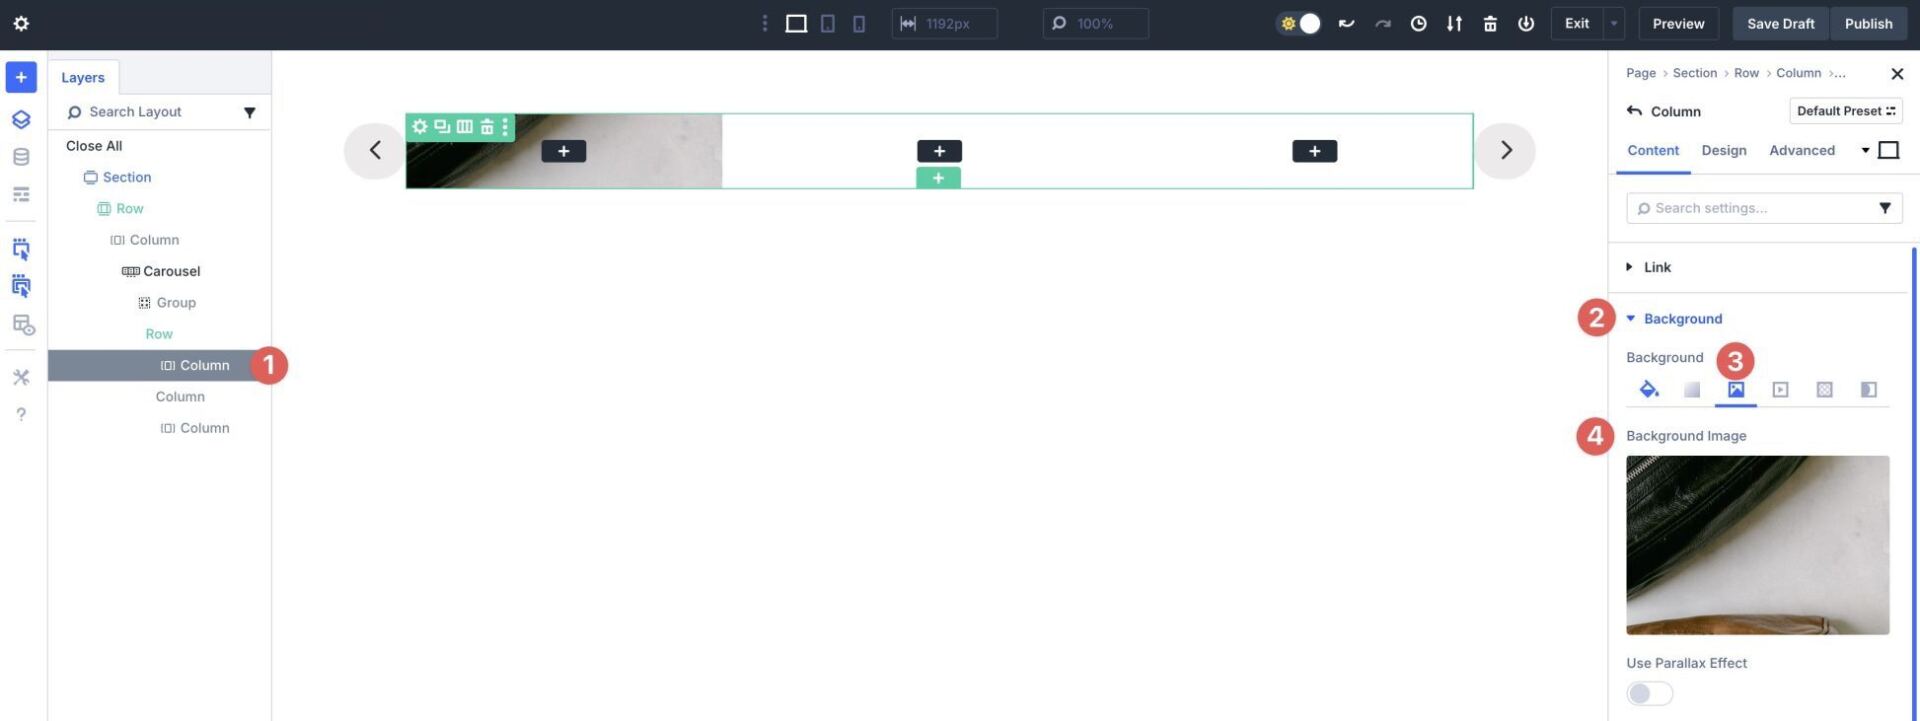
Now, we’ll get began together with content material subject matter to the row. Use the Layers panel to click on on into the first column. Amplify the Background tab and click on at the Background Image settings. Add an image to the background.
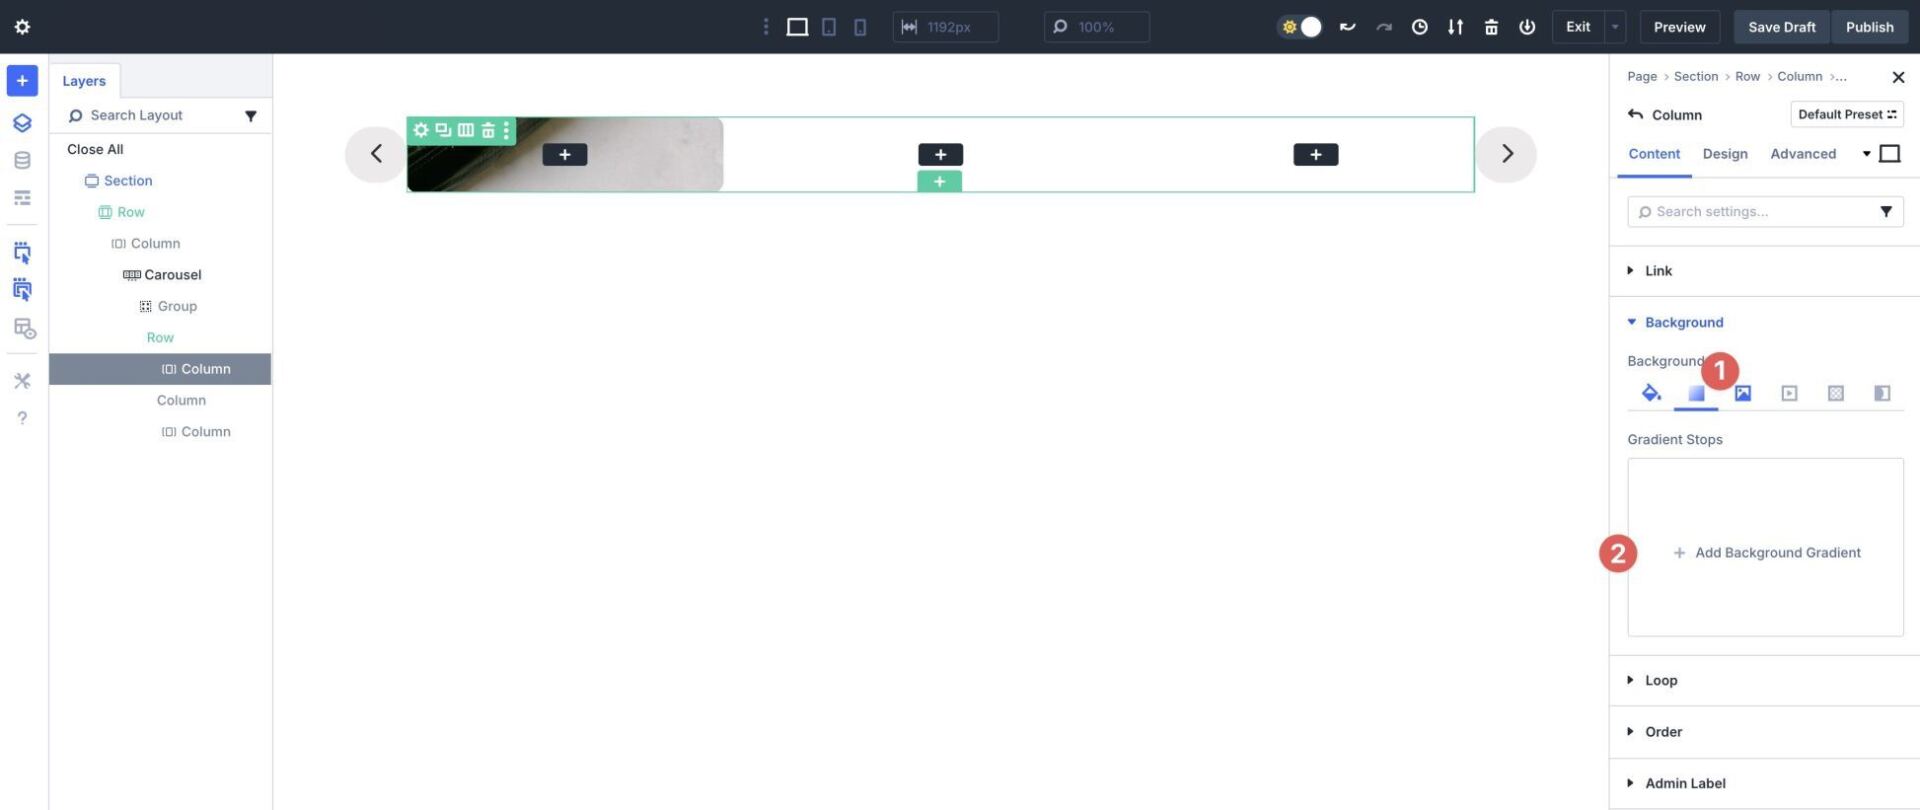
Open the Background Gradient settings. Click on on + Add Background Gradient.
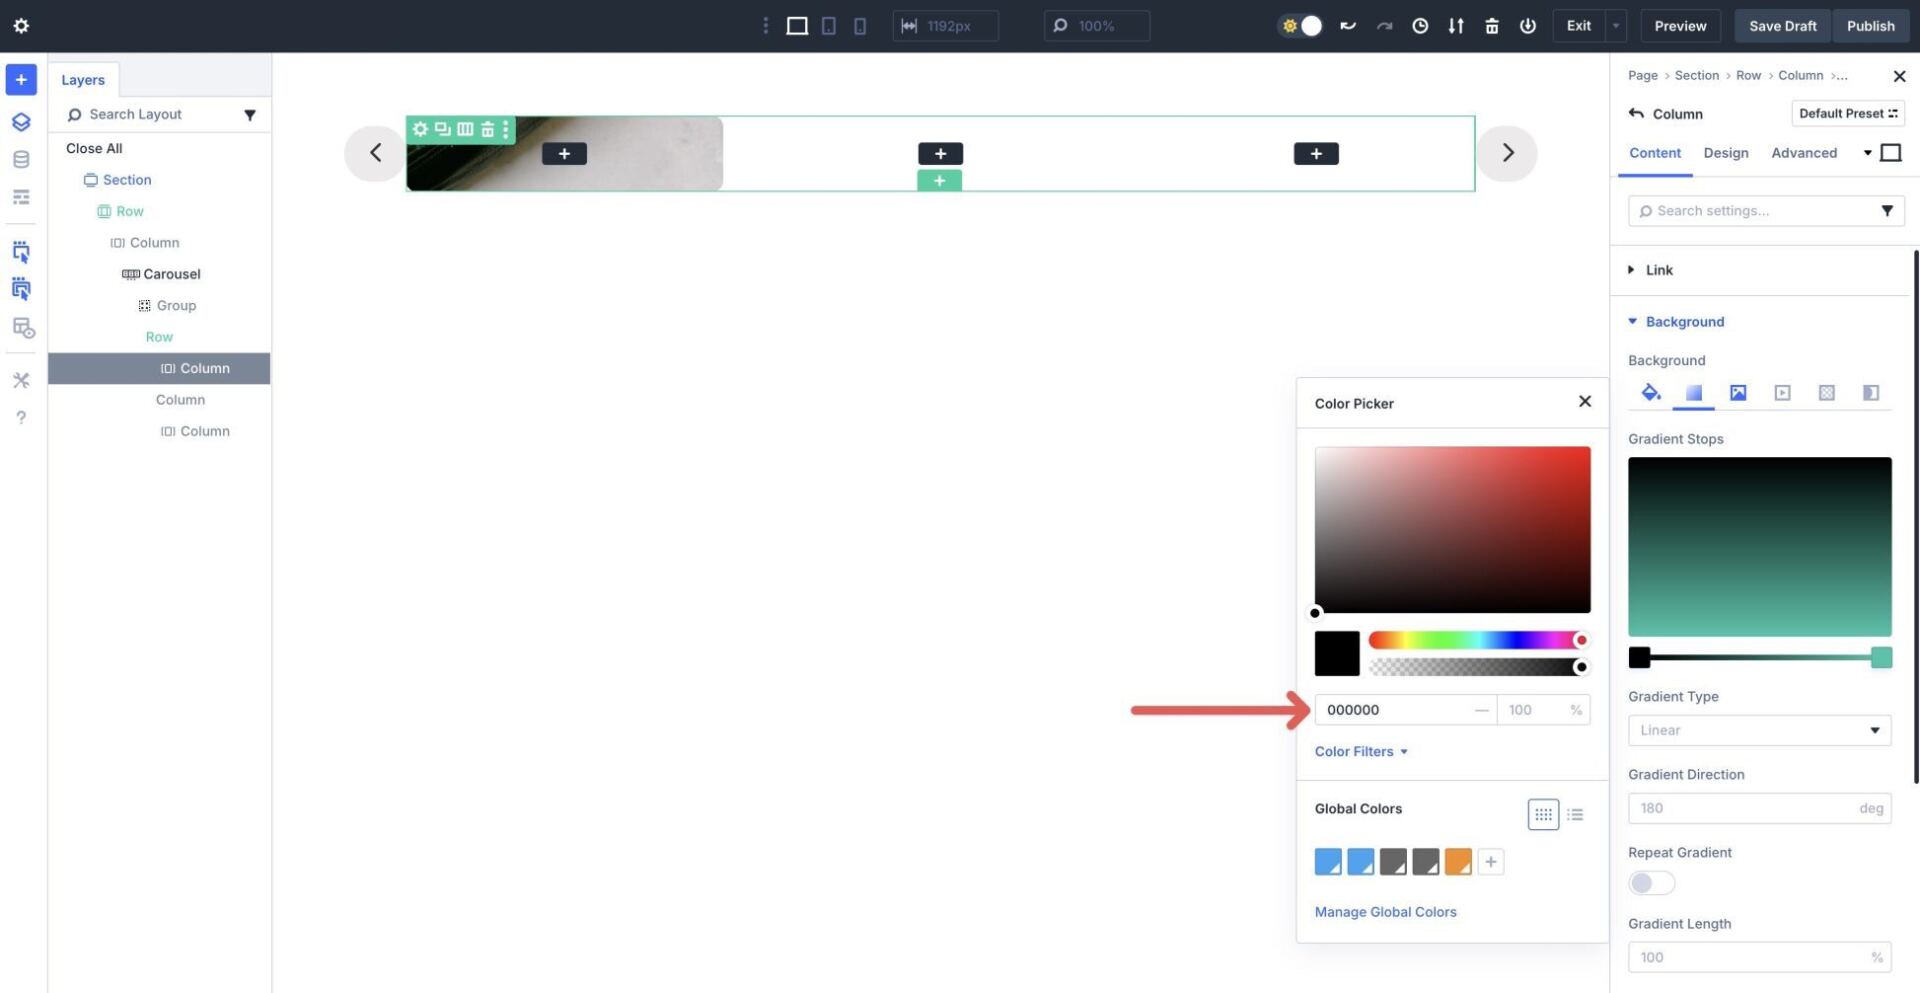
Click on at the number one Gradient Prevent to keep watch over the color.
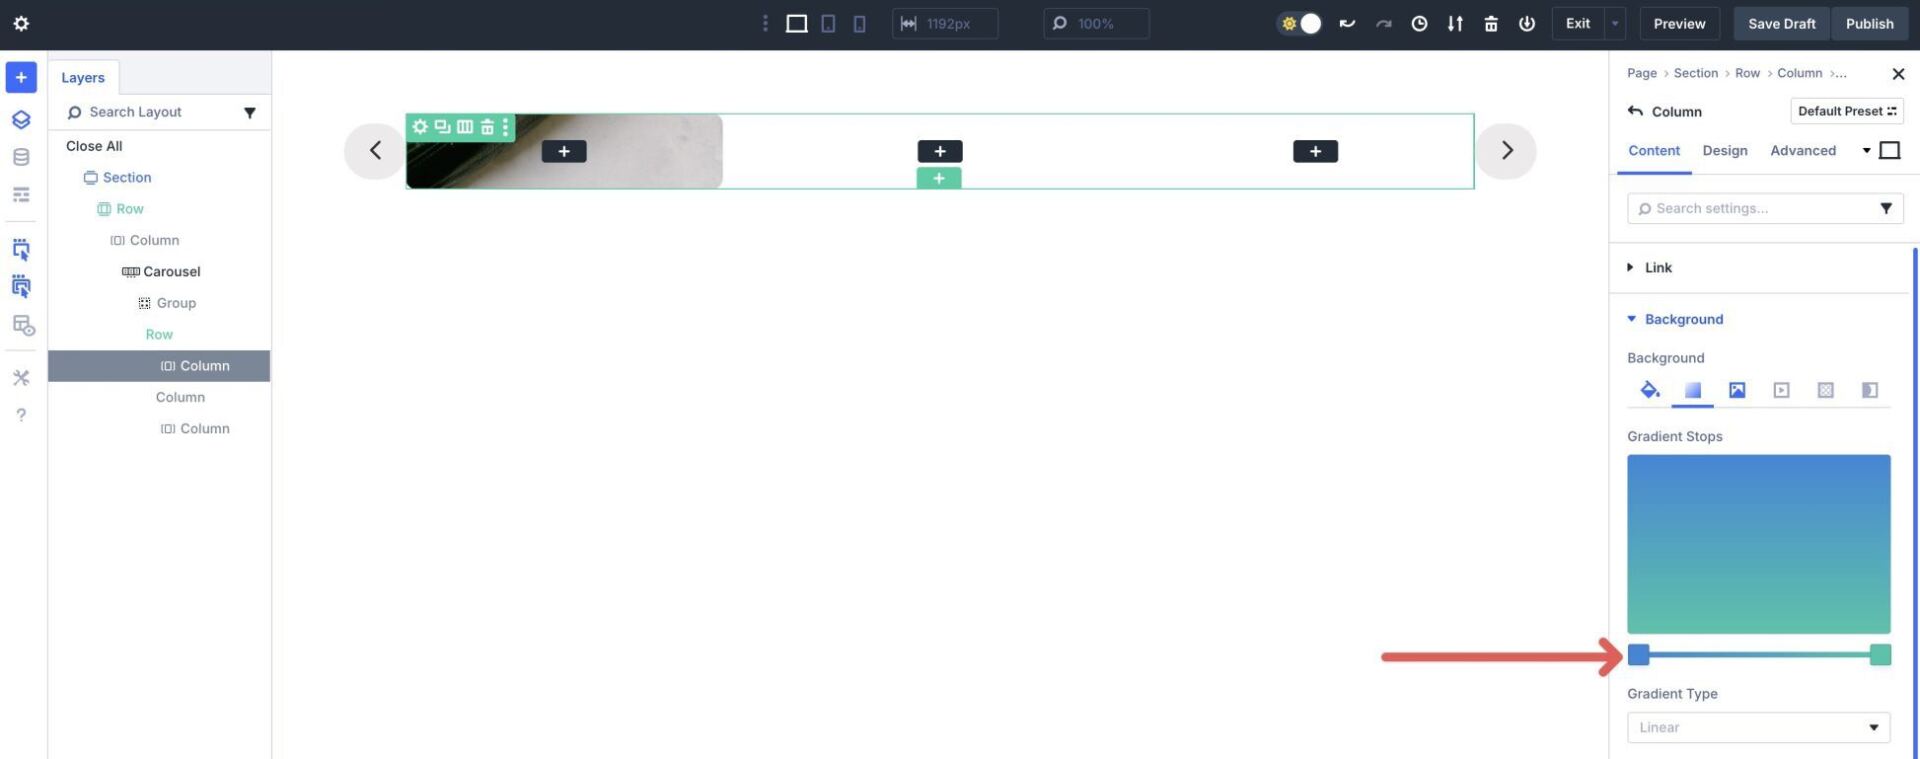
Choose #000000 as the color.
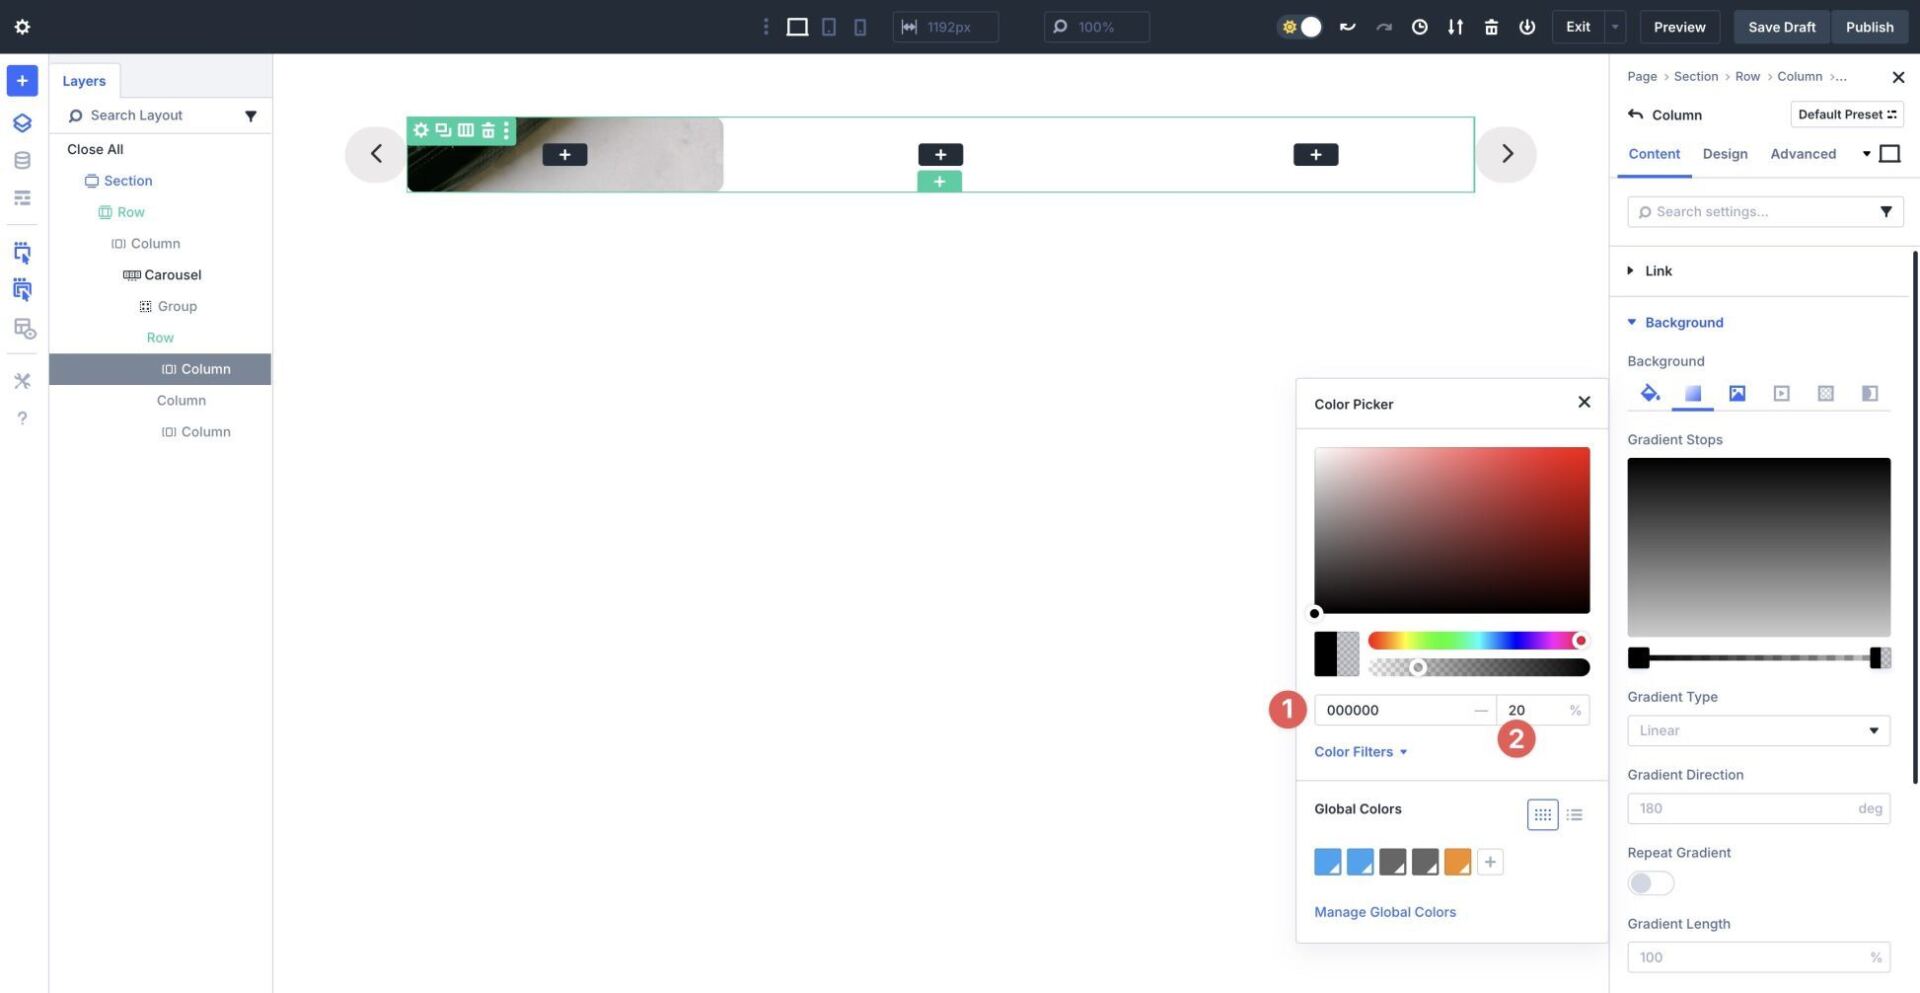
Next, click on on the second Gradient Prevent. Use #000000 as the color and set the Opacity to 20%.
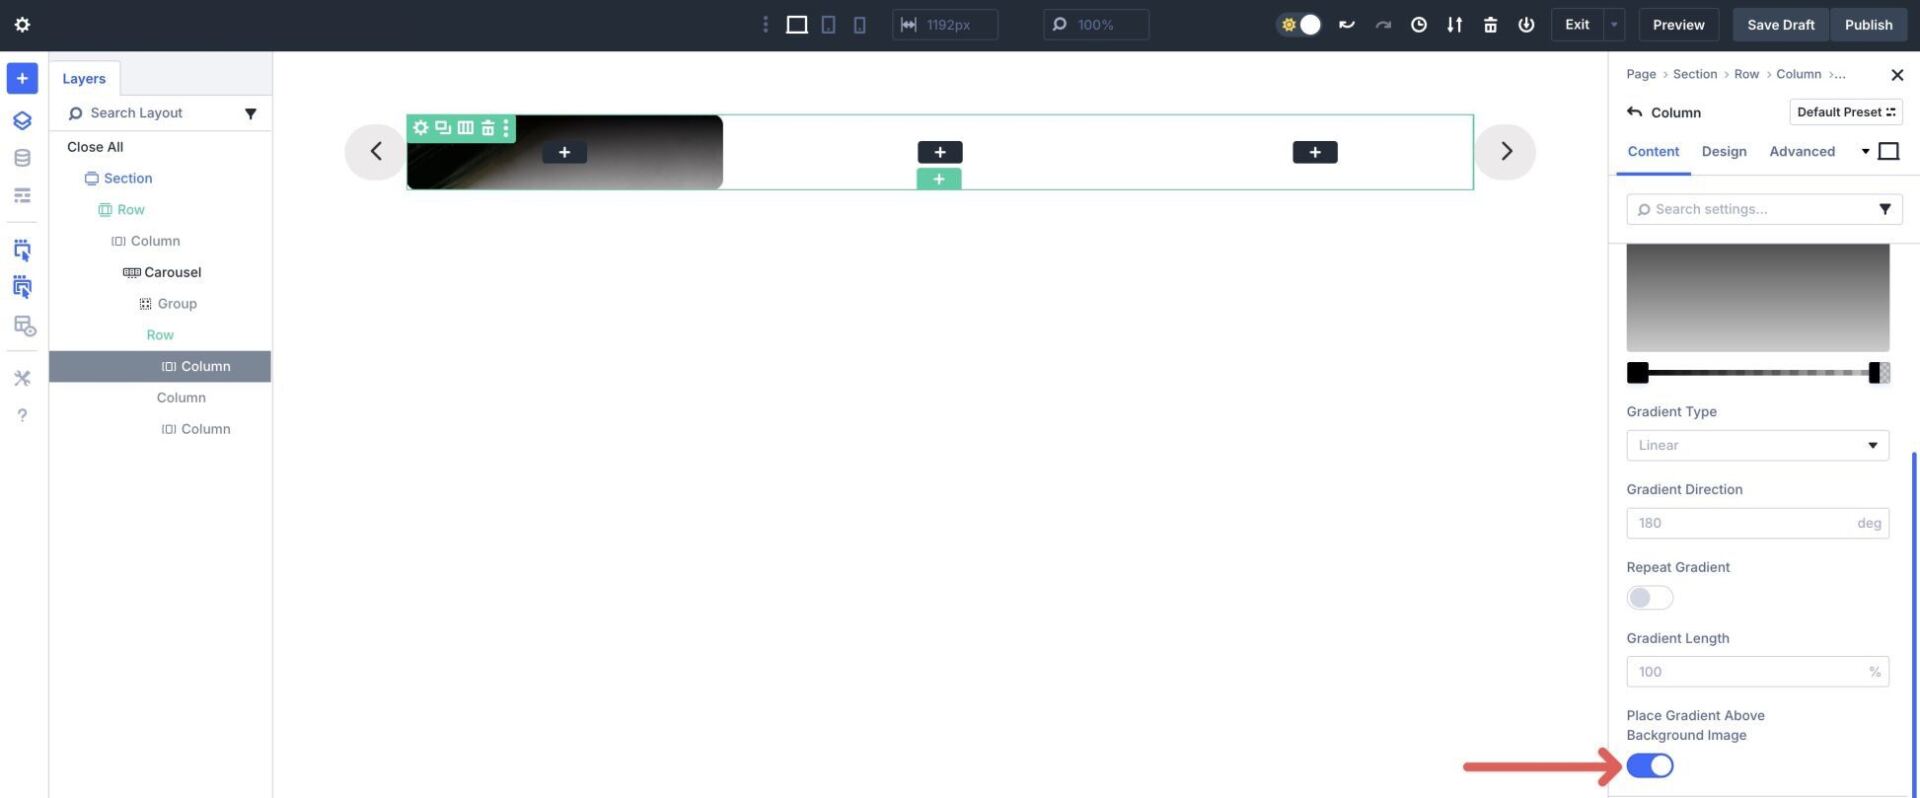
Scroll down and make allowance Place Gradient Above Background Image.
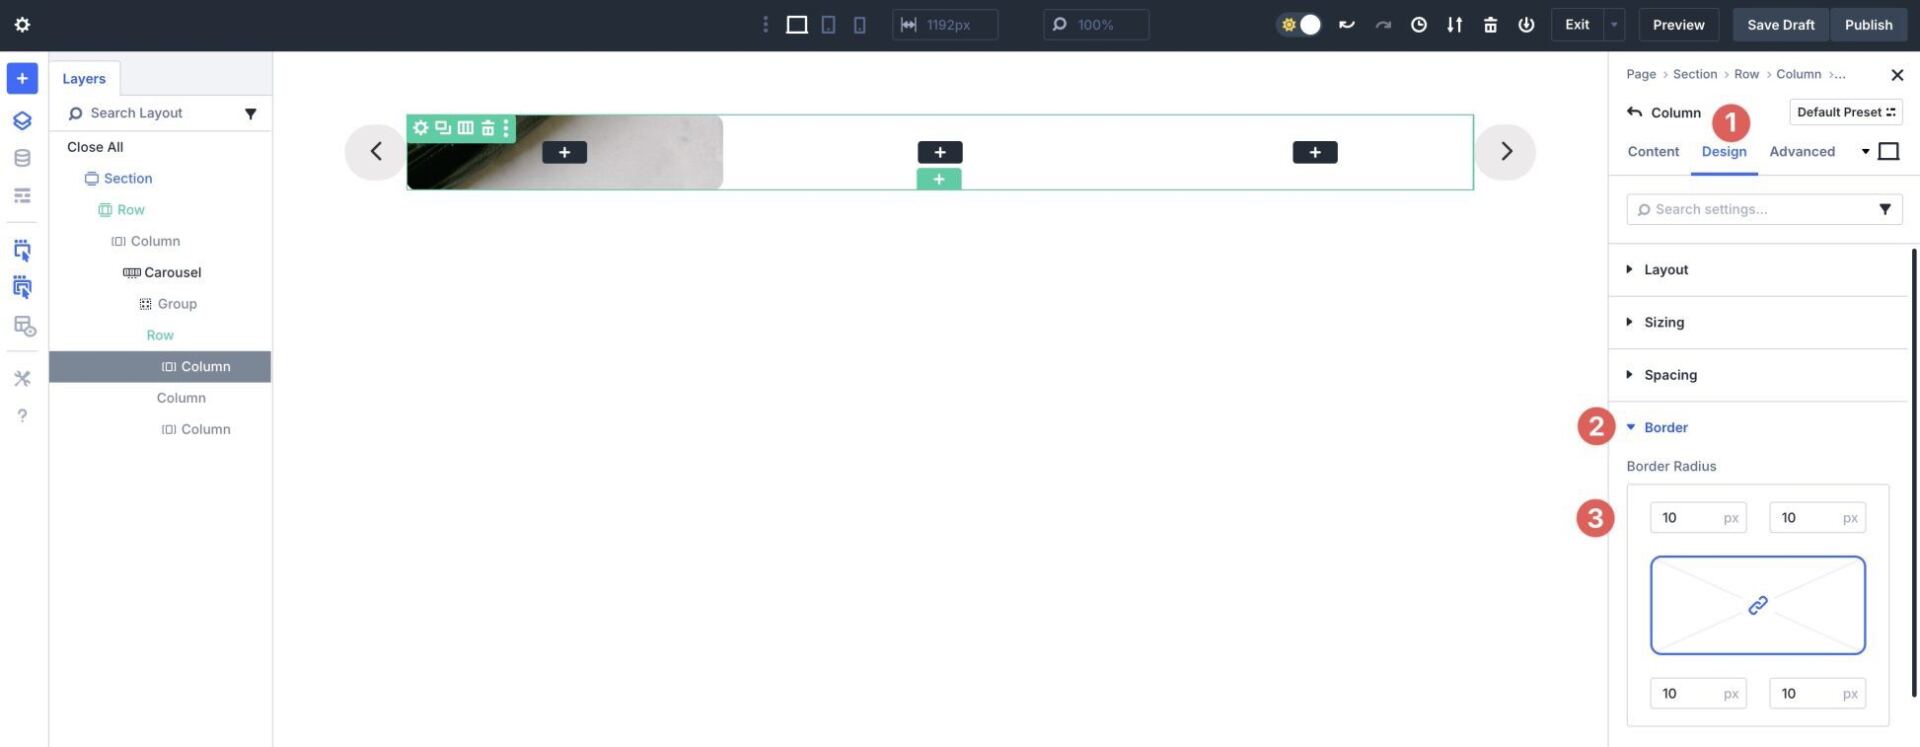
Next, click on at the Design tab. Amplify the Border dropdown menu to turn the settings. Assign a 10px Border Radius to the column.
Repeat the steps in an effort to upload a Background Image, Background Gradient, and Border Radius to columns two and three. Once completed, your layout must look similar to the image underneath.
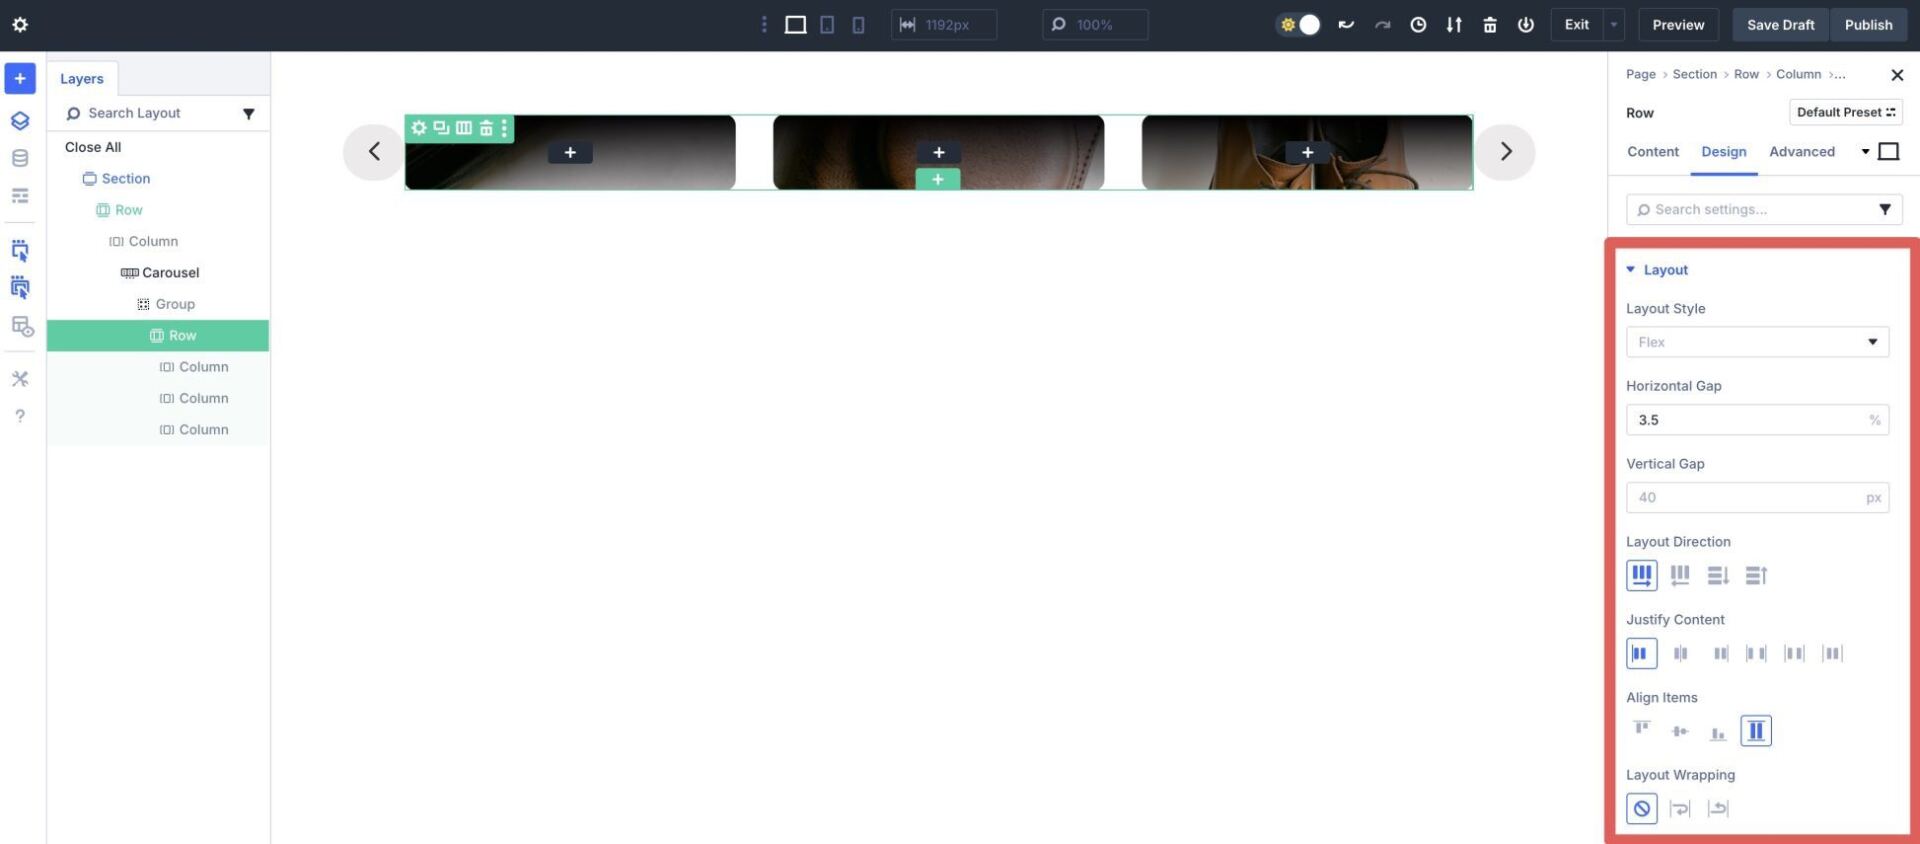
Now we will be able to must keep watch over the row’s width and Flex settings. Click on at the Design tab for the row. Amplify the Construction dropdown menu and keep watch over the Horizontal Hollow to 3.5. Leave all other settings as is.
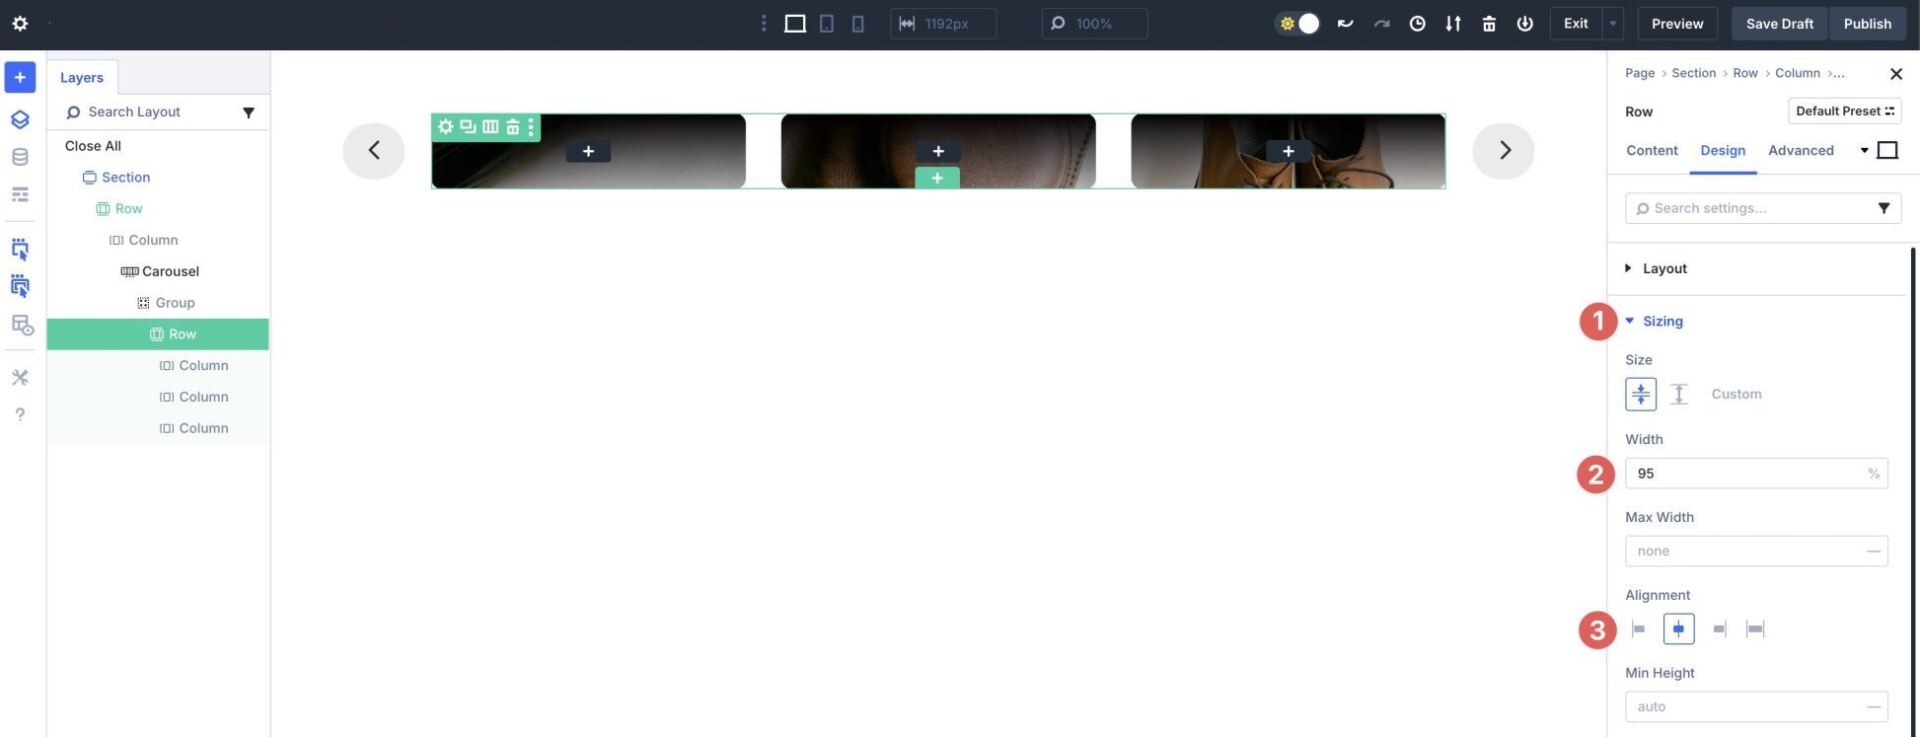
Amplify the Sizing dropdown menu. Set the Width to 95% and the Alignment to Center. This may occasionally most probably give the arrows throughout the slide a little bit of breathing room.
Step 3: Add Content material subject matter To The Row
Click on on on the black + icon throughout the first column in an effort to upload a brand spanking new module.
Click on at the New Row tab and select a single column row.
Add A Heading Module
In finding the Heading module and add it to the first column.

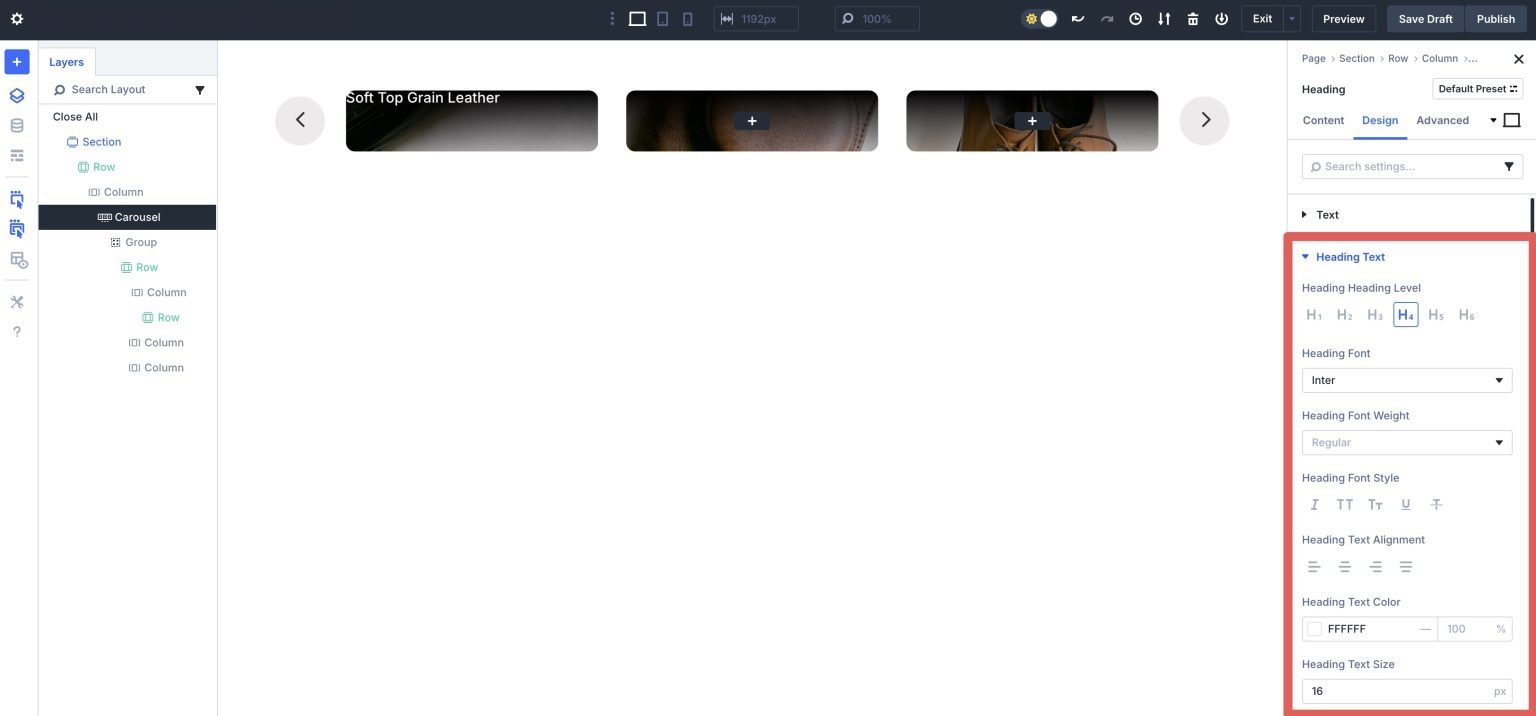
Give the Heading module a Identify and then click on at the Design tab.
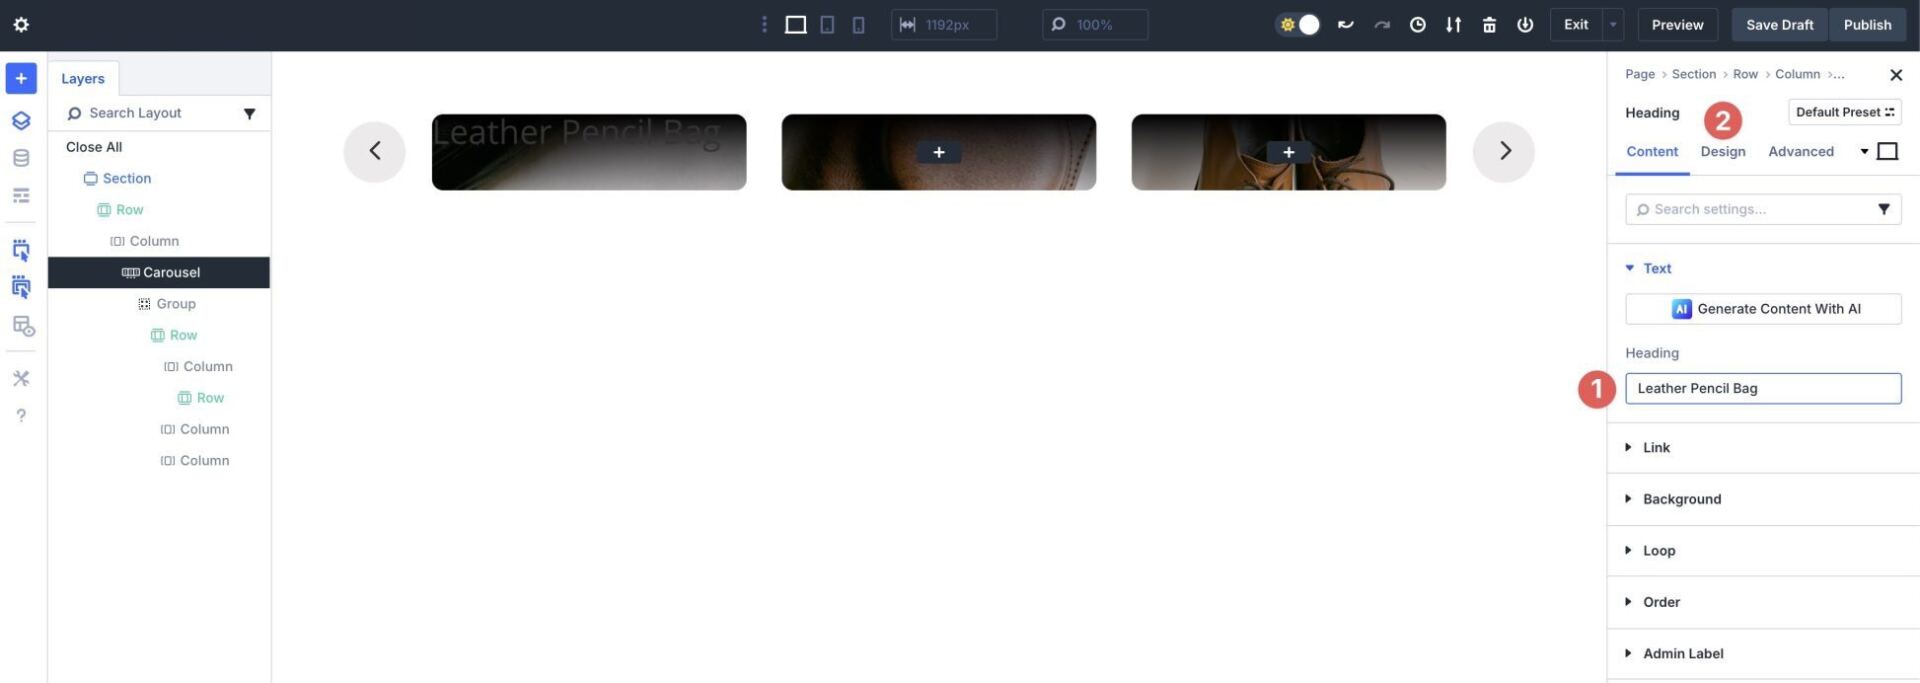
Amplify the Heading Text dropdown menu. Set the Heading Stage to H4. Make a choice Inter for the reason that Heading Font, and #ffffff for the reason that Heading Text Color. Set the Heading Text Size to 16px.
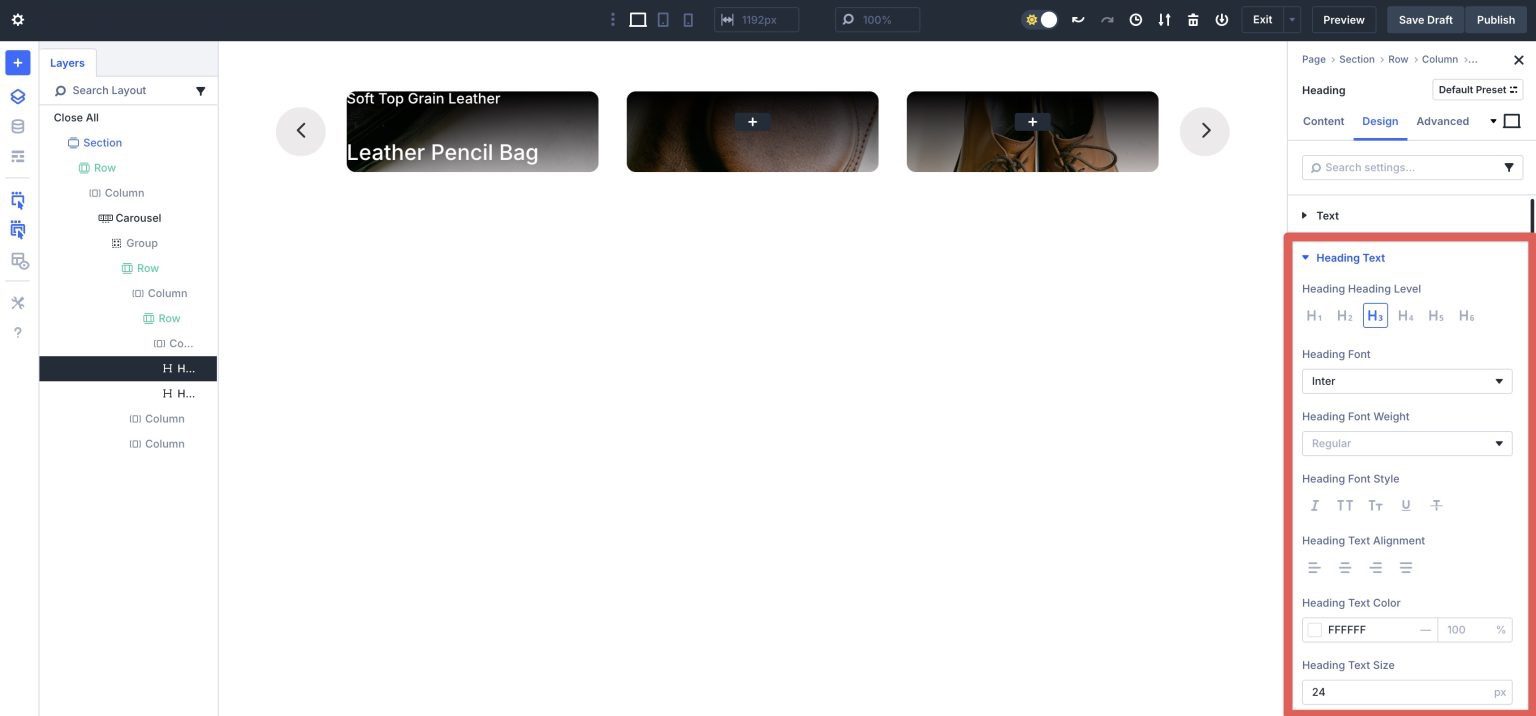
Add A second Heading Module
Add any other Heading module underneath the main one throughout the first column. Give it a Identify, and navigate to the Design tab. Set the Heading Heading Stage to H3, Heading Font to Inter, Heading Text Color to #ffffff, and the Heading Text Size to 24px.
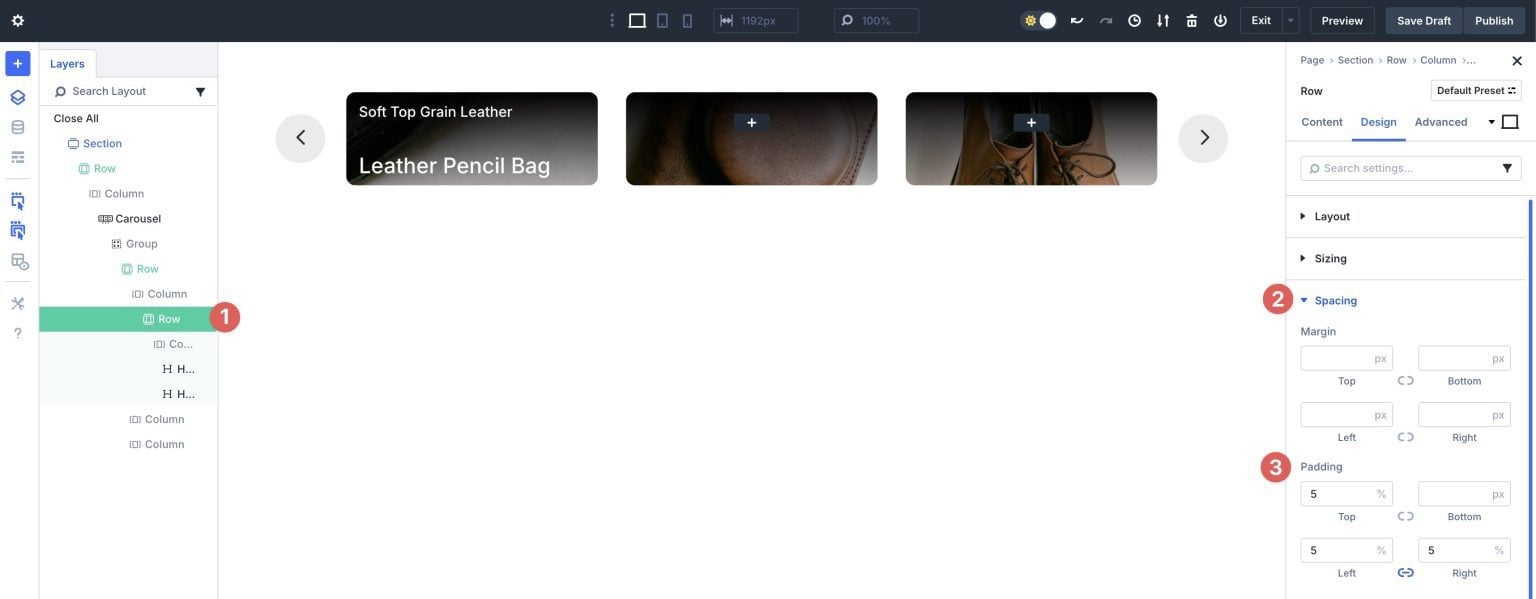
Use the Layers panel to make a choice the row we added to the first column. We will keep watch over the row’s spacing. Beneath the Spacing dropdown menu, add 5% padding to the top, left, and right kind.
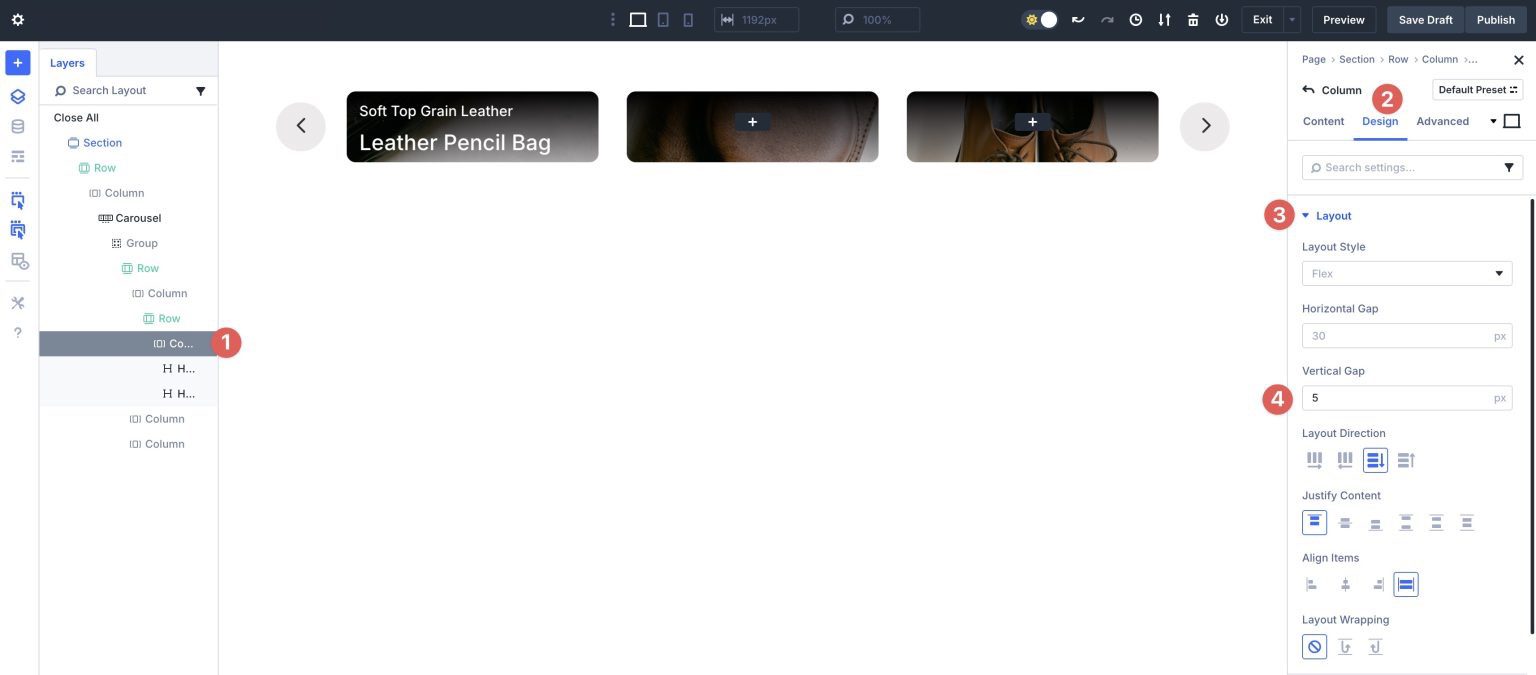
Now click on on into that row’s column. Click on on on the Design tab and build up the Construction settings. Inside the Vertical Hollow field, add 5px.
Reproduction this row and add it to the second and third columns. Trade the titles for each and every of the heading modules.
Add An Icon Module
Add a brand spanking new single column row to the main column. Click on at the black + icon in an effort to upload a brand spanking new module and select the Icon module.
![]()
When the Icon module’s settings appear, select the + icon from the Divi icon library.
![]()
Inside the Background dropdown menu, select #000000 for the reason that Background Color.
![]()
Navigate to the Design tab. Amplify the Icon dropdown menu. Assign #d9d7d7 for the reason that Icon Color and set the Icon Size to 42px.
![]()
Amplify the Alignment tab and set the Icon Alignment to Correct.
![]()
Amplify the Spacing dropdown menu. Add 5% Margin to the bottom and right kind for the icon.
![]()
In any case, build up the Border dropdown menu and assign a 100px Border Radius to the icon.
![]()
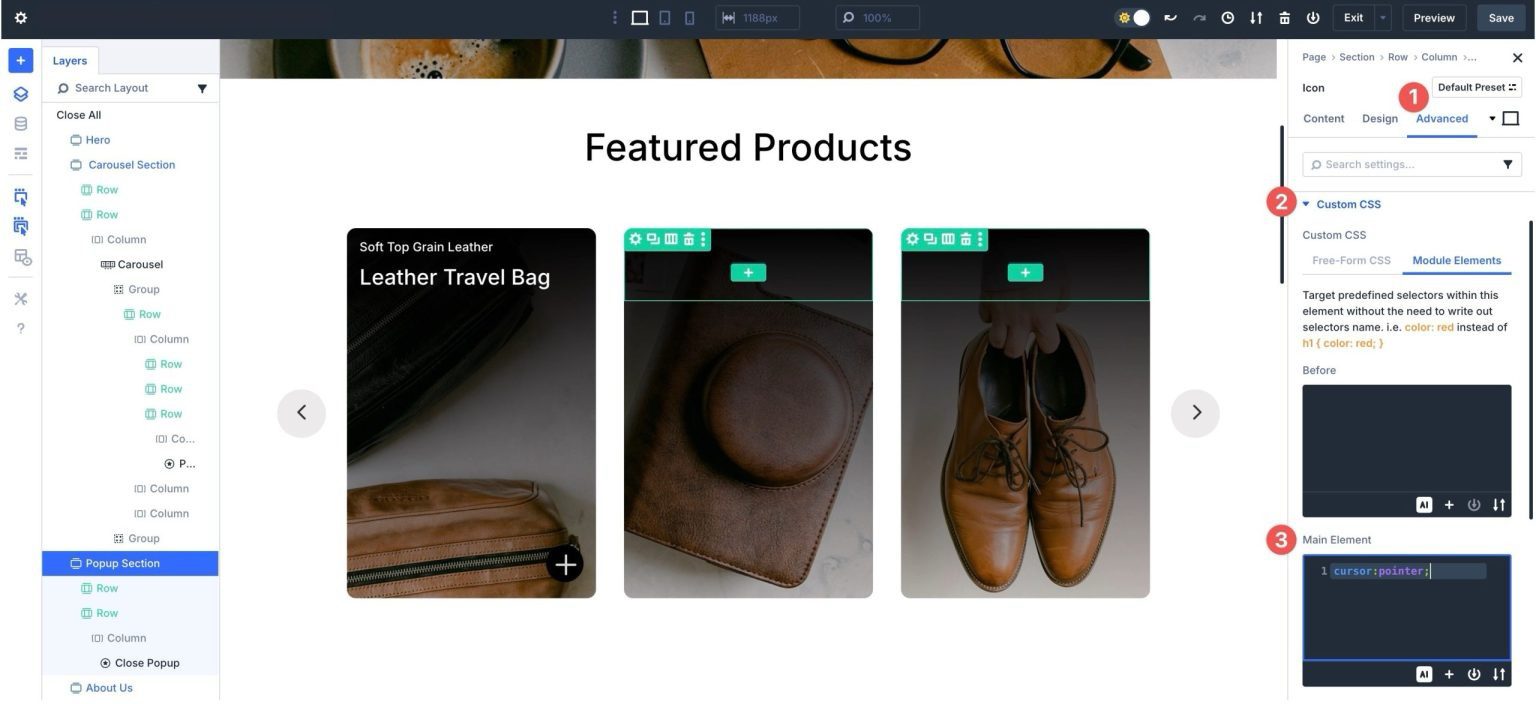
Because of we’ll use the Icon module to close the content material subject matter reveal phase, we’ll wish to add a little bit of CSS to let the shopper realize it’s a clickable products. Navigate to the Difficult tab and build up the Custom designed CSS dropdown menu. Click on on Module Parts and add cursor:pointer; into the Number one Section field:
Reproduction the row with the Icon module and add it to the second and third columns.
Step 4: Reproduction The First Team of workers
Once the main Team of workers is added and styled, you’ll be capable to merely copy it and change footage and headlines. In the main settings panel for the Team of workers Carousel module, click on at the Reproduction icon to copy the main Team of workers.
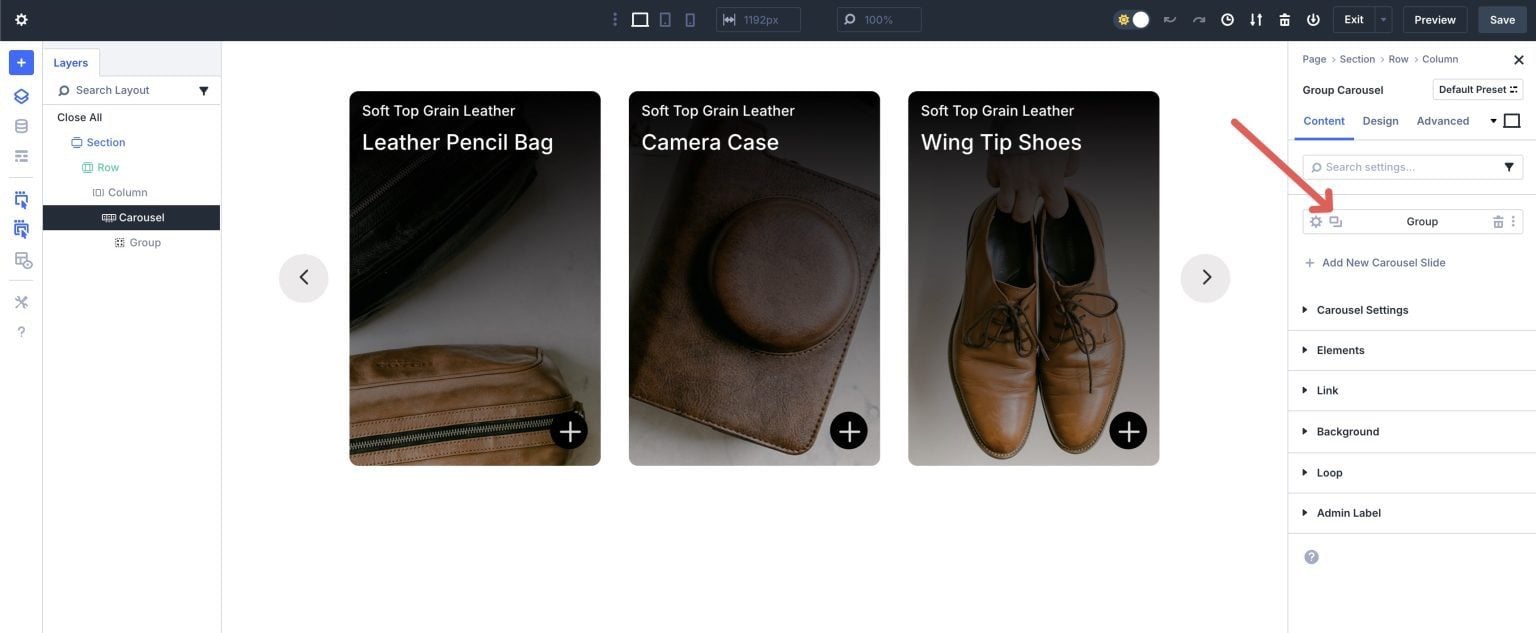
Click on at the Layers view to make a choice the second Team of workers.

Repeat the steps above to interchange background footage and text. Once entire, preview the Team of workers Carousel to ensure it actually works as intended.
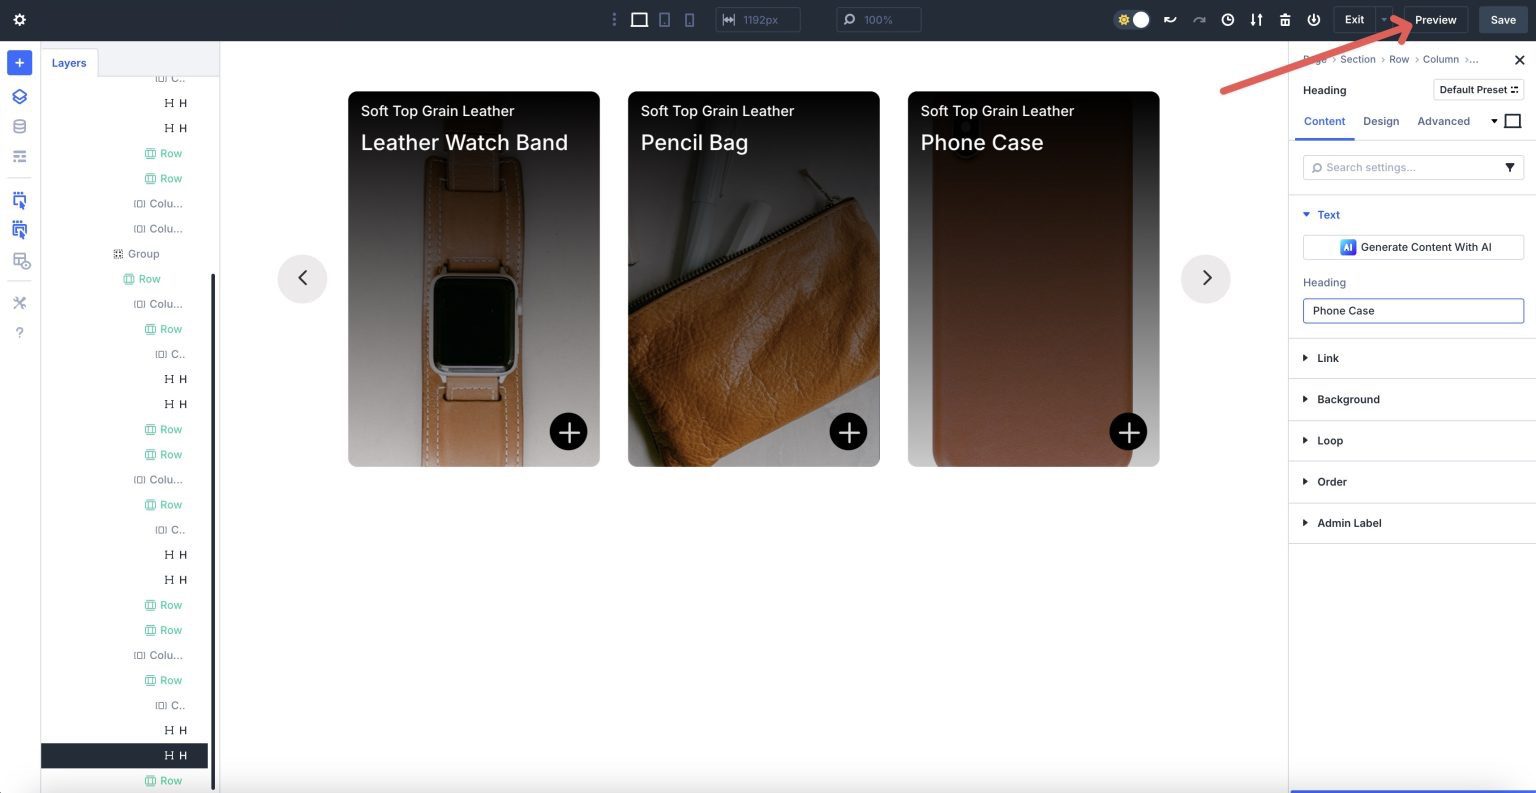
Divi will open the internet web page in a brand spanking new tab, allowing you to view the layout.
Once more throughout the Visual Builder, use Divi 5’s Customizable Responsive Breakpoints to make any changes important to the Team of workers Carousel previous than we proceed with the next step.
Step 5: Create The Content material subject matter Reveal Segment
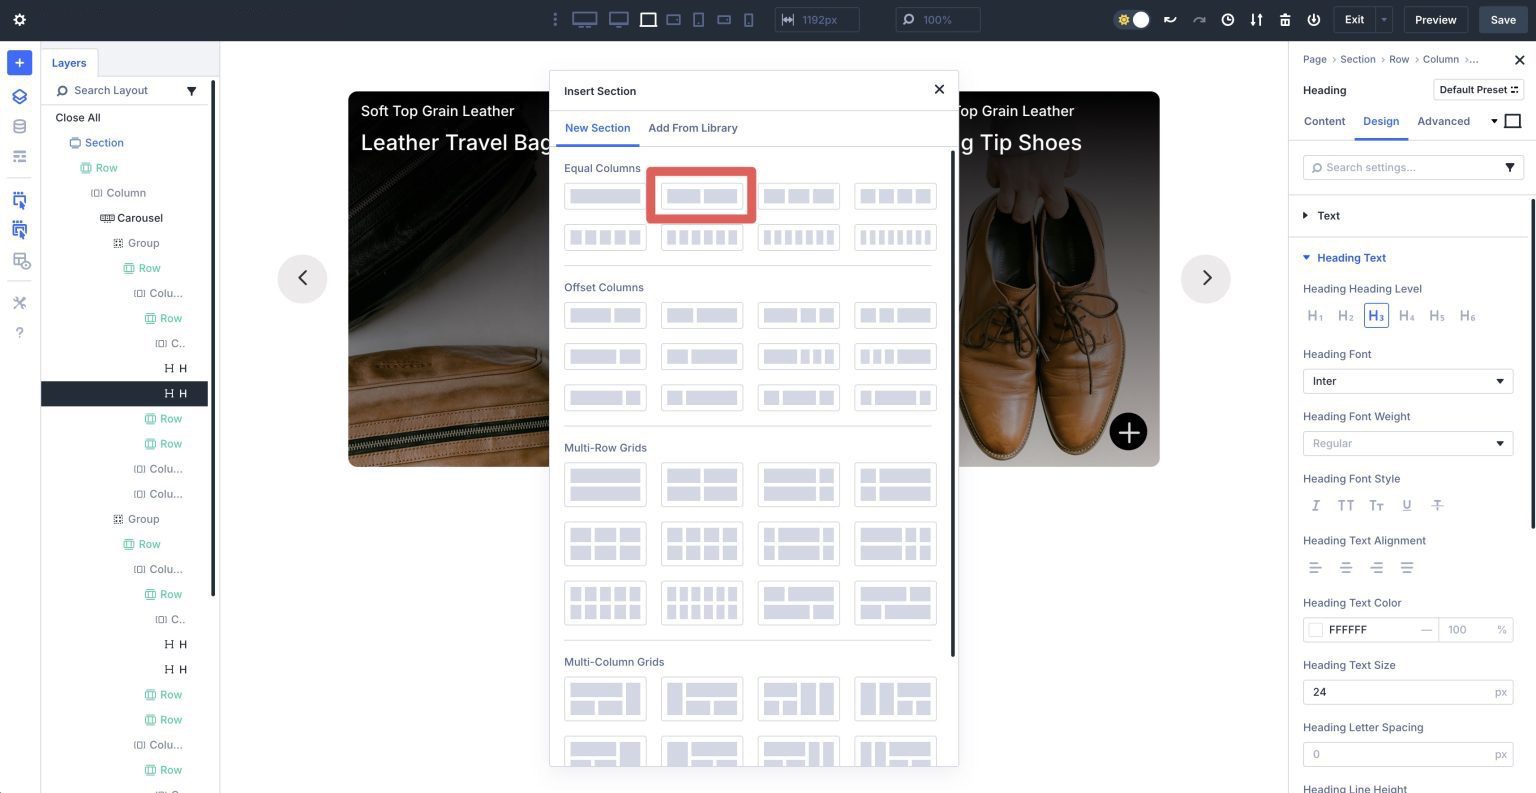
Get began by way of growing a brand spanking new phase underneath our Team of workers Carousel phase. When the Insert Segment dialog box turns out, click on on in an effort to upload a two-column row.
Add An Image Module
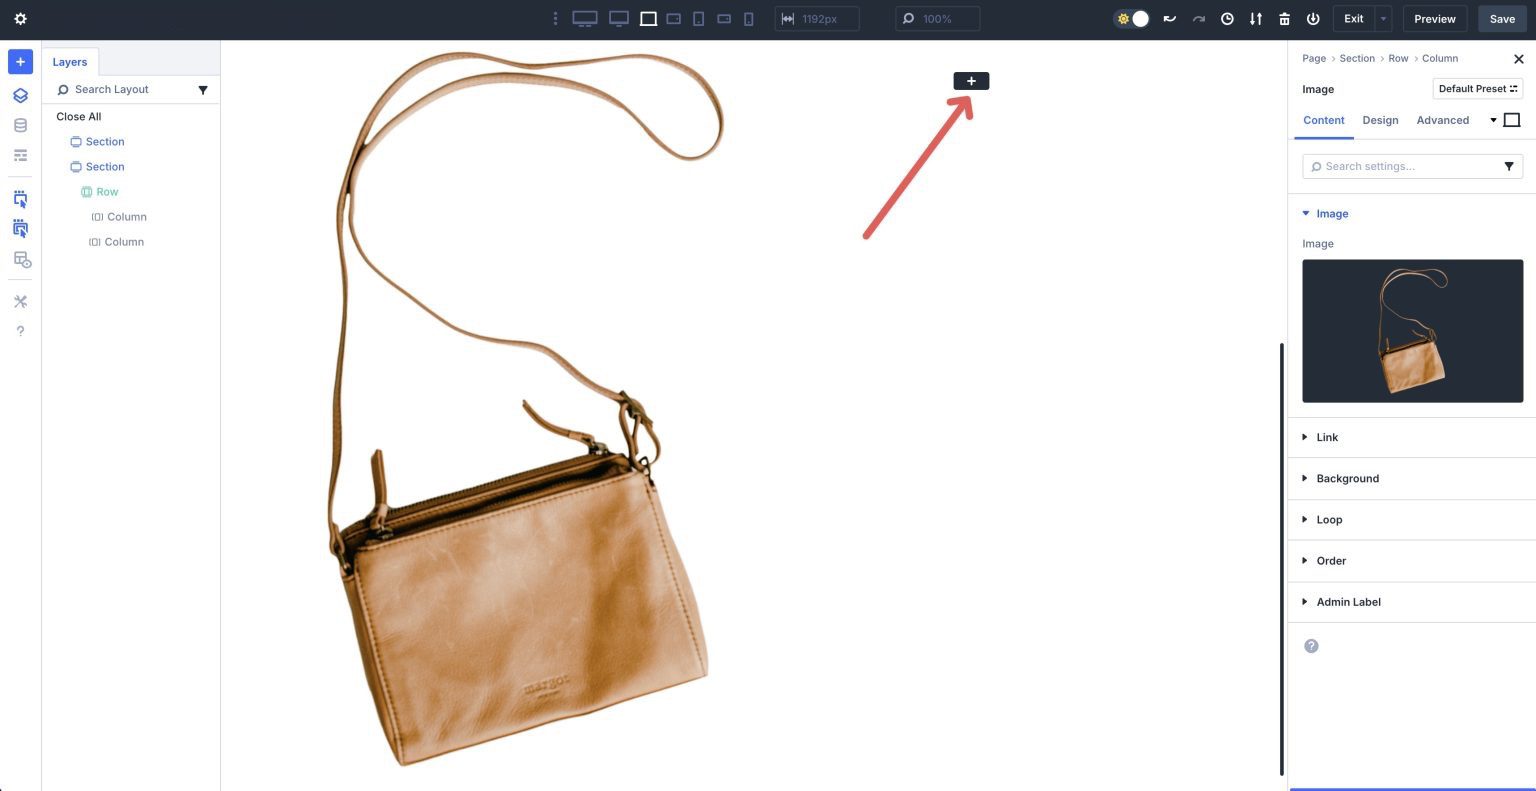
Make a choice the Image module and add it to the first column.

Click on at the black + icon in an effort to upload a module to the second column.
Add Text Modules
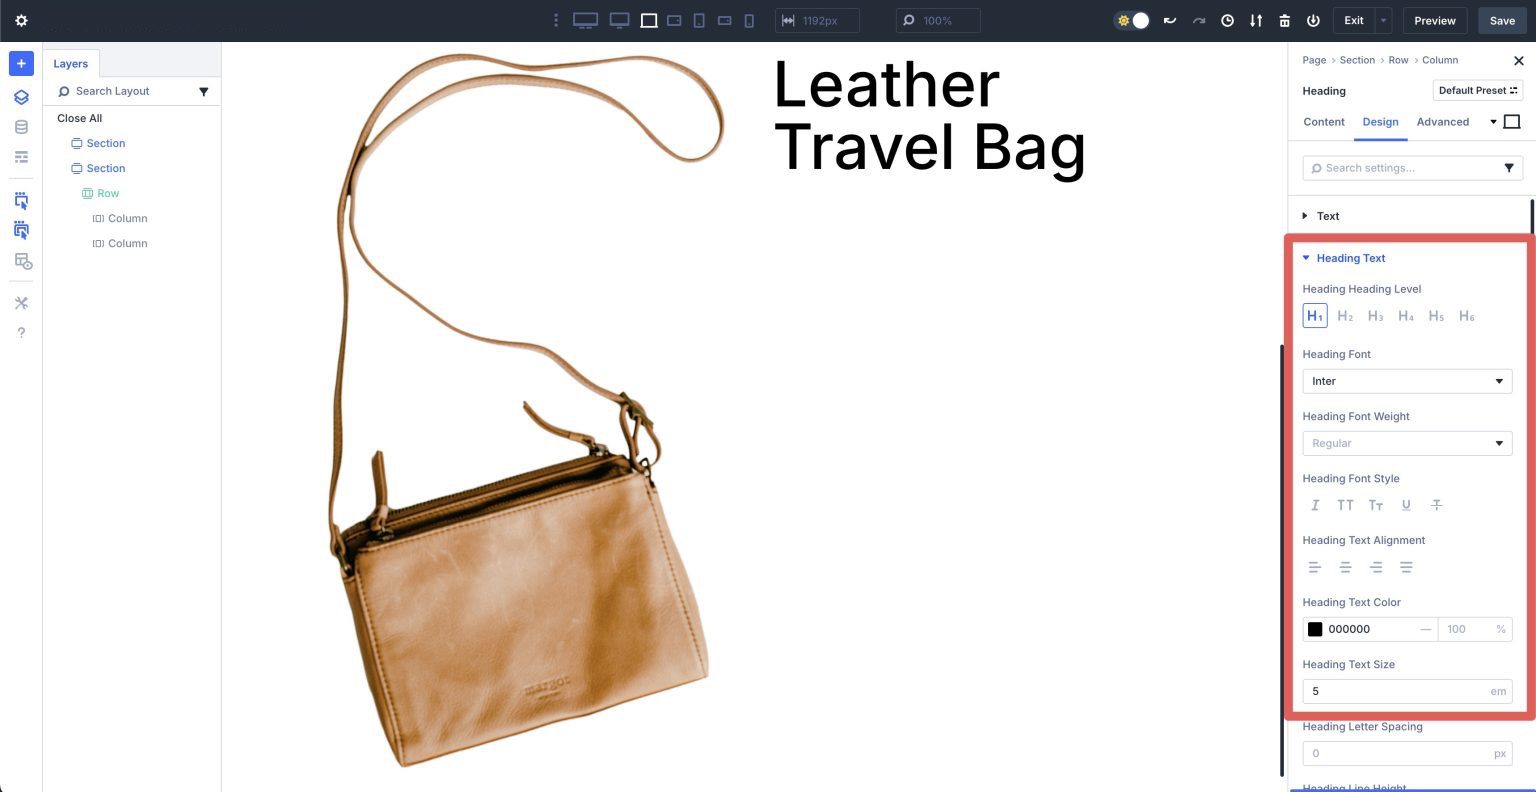
Add a Heading module, give it a Identify, and build up the Heading Text dropdown menu. Set the Heading Heading Stage to H1, Heading Font to Inter, Heading Text Color to #000000, and the Heading Text Size to 5em.
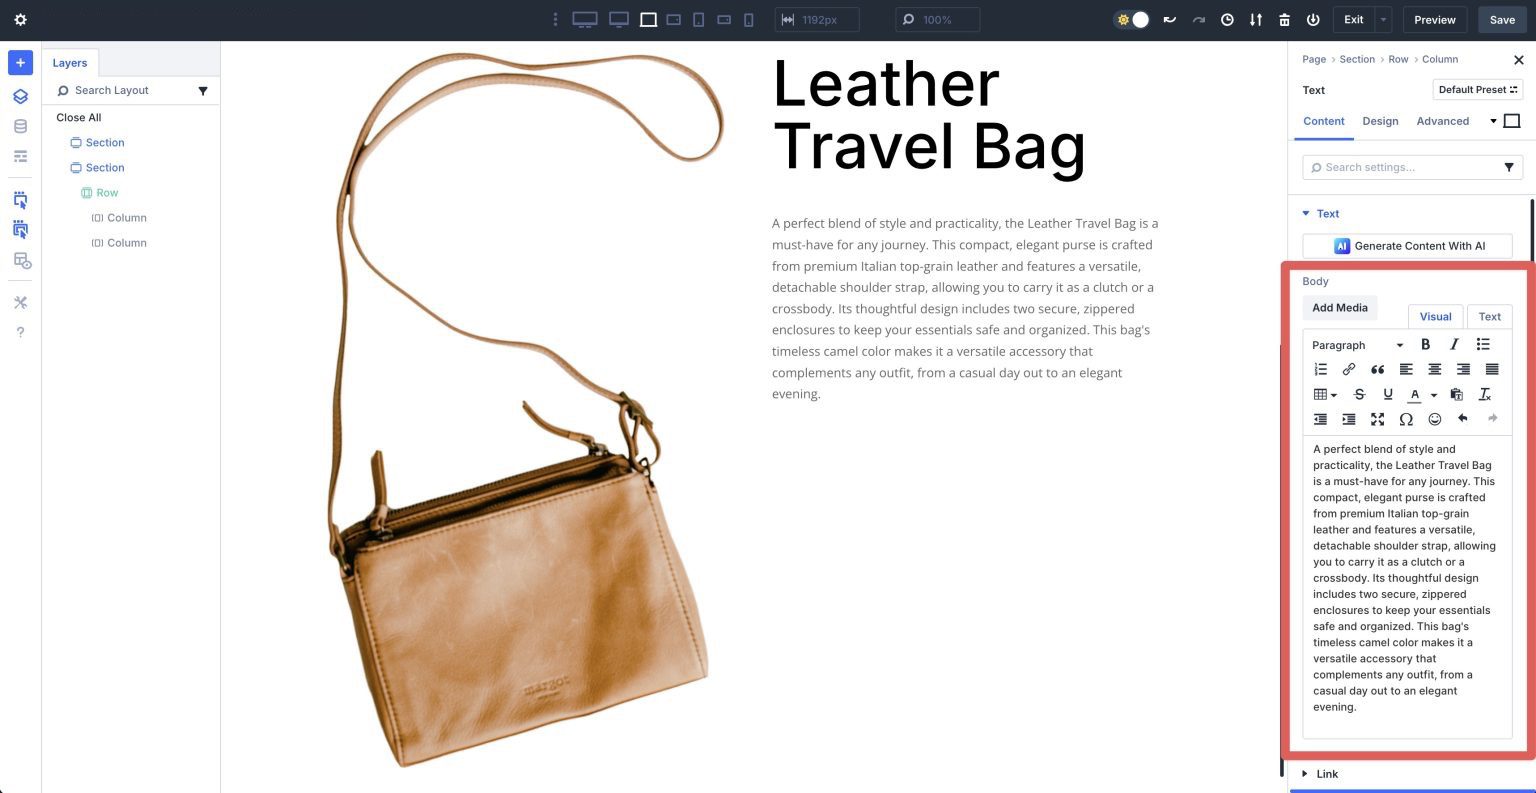
Add a Text module underneath the Heading module.
Enter text throughout the Body field or use Divi AI to help you generate an overview.
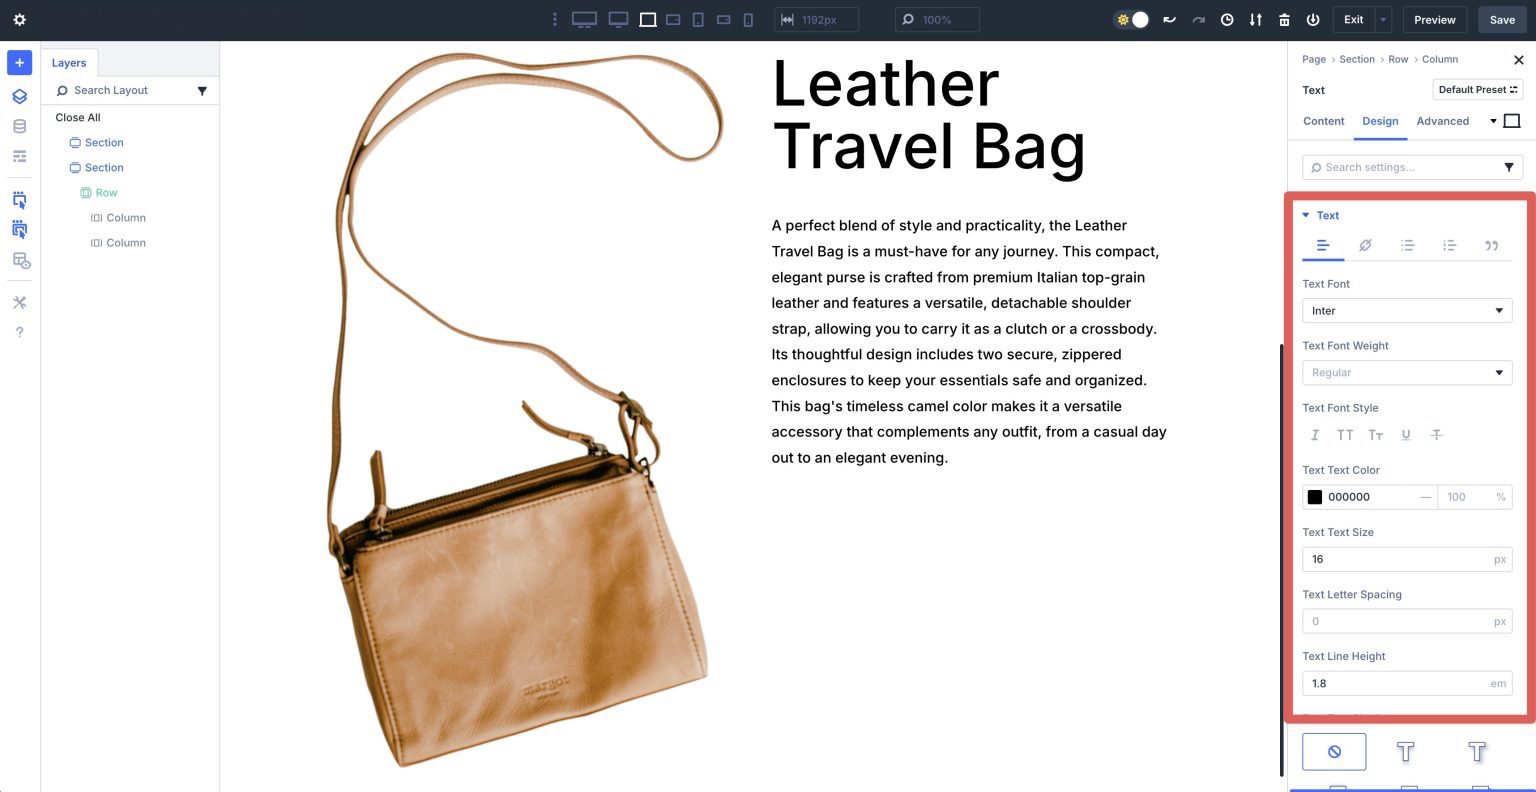
Trade to the Design tab. Amplify the Text dropdown menu. Set the Text Font to Inter, the Text Text Color to #000000, and the Text Text Size to 16px. Alter the Text Line Height to 1.8em.
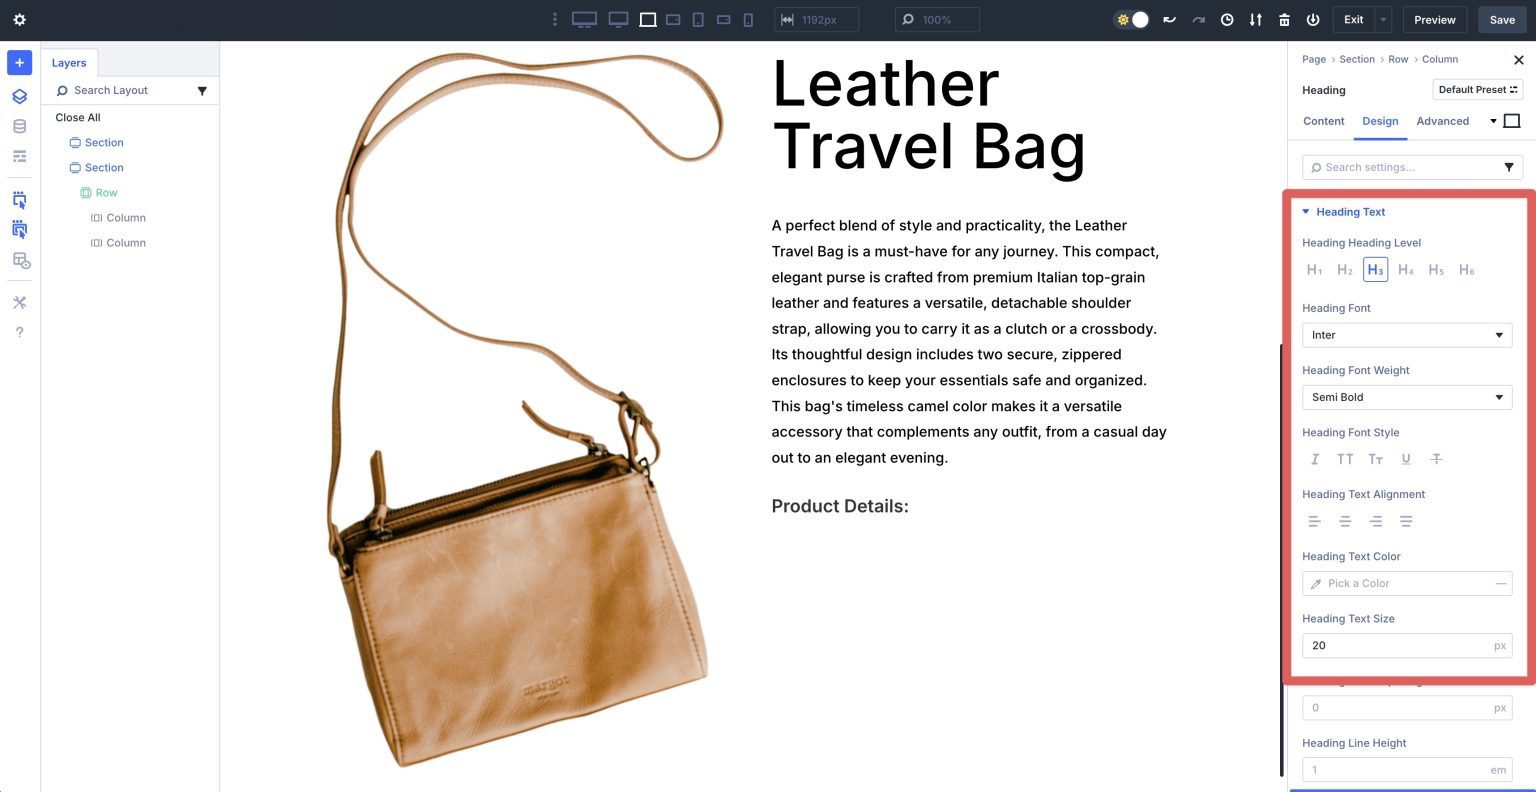
Add a brand spanking new Heading module underneath the Text module. Add a Identify and alter to the Design tab. Amplify the Heading Text dropdown menu. Assign H3 for the reason that Heading Heading Stage, Inter for the reason that Heading Font, Semi Bold for the reason that Heading Font Weight, and 20px for the reason that Heading Text Size.
Add An Icon Tick list Module
Next, find and select the Icon Tick list module in an effort to upload it to the second column.
![]()
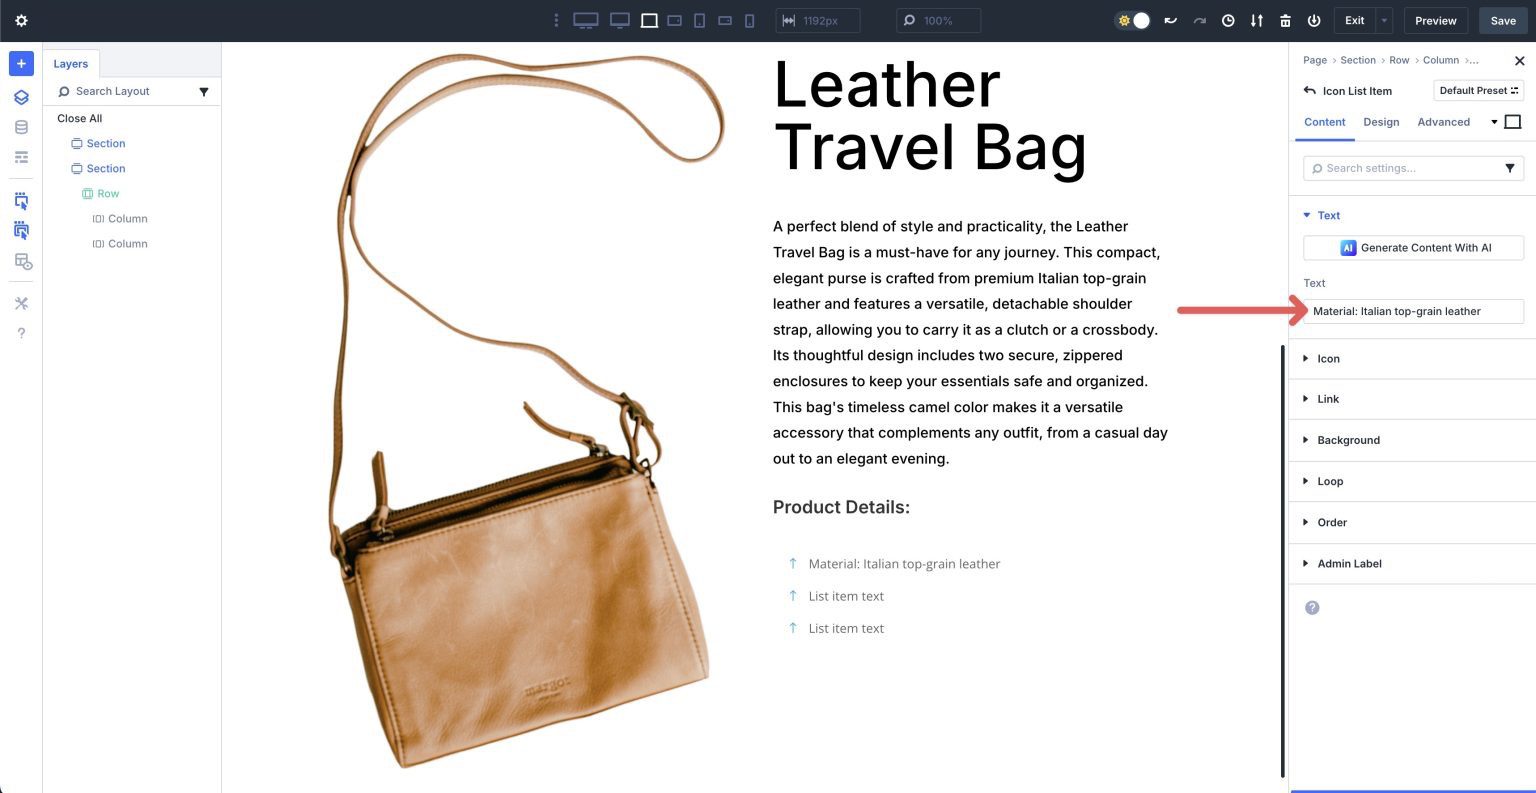
The Icon Checklist module settings reveal 3 tick list items. To edit its content material subject matter, click on on on the Settings Icon throughout the first Icon Tick list Products.
![]()
Amplify the Text dropdown menu and assign text to the Text field.
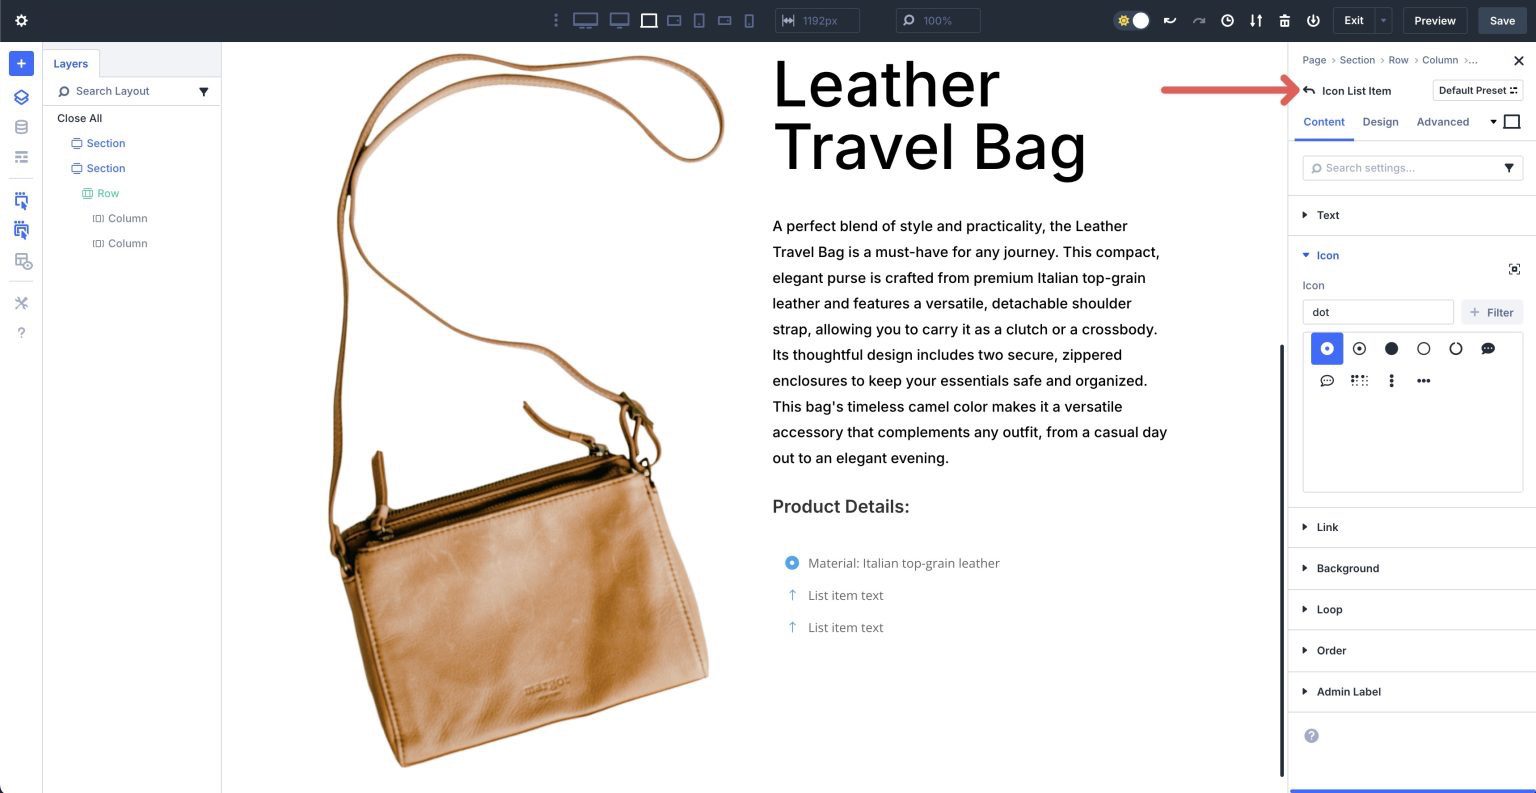
Make a choice an icon for the Icon Tick list Products throughout the Icon dropdown menu.
![]()
Click on at the return arrow at the top left of the Icon Tick list Products’s settings to return to the module’s main settings.
Repeat the steps above in an effort to upload text and assign an icon for the remaining Icon Tick list Items. Click on at the Reproduction icon in an effort to upload additional Icon Tick list Items as important.
![]()
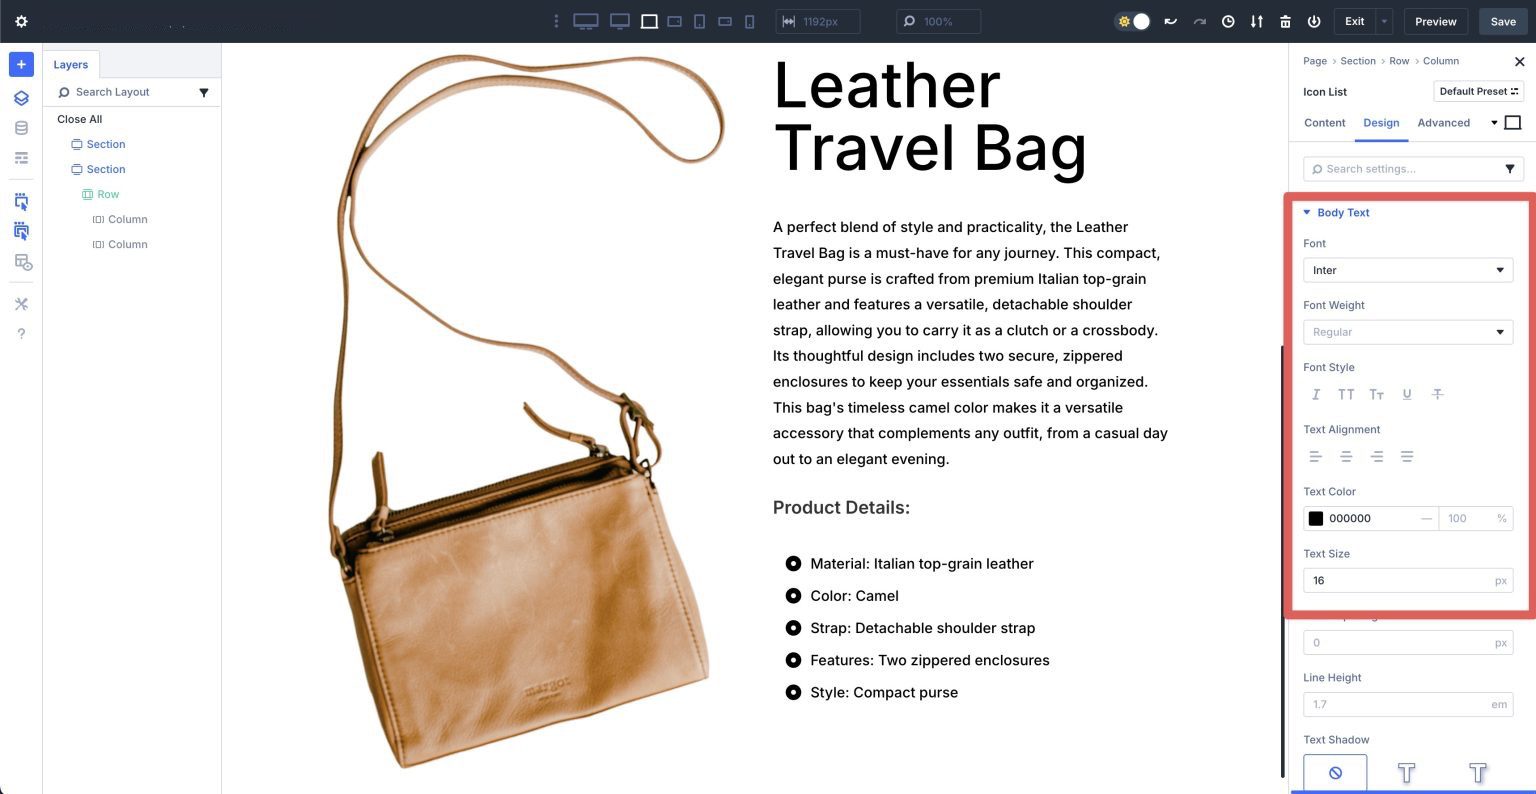
Once all tick list items are in place, click on at the Design tab to make style changes. Amplify the Icon dropdown menu and assign #000000 to the Icon Color field. Set the Icon Size to 18px.
![]()
Amplify the Body Text dropdown menu. Assign Inter for the reason that Font, #000000 for the reason that Text Color, and 16px for the reason that Text Size.
Reproduction The Heading And Icon Tick list Modules
Next, copy the H3 Heading module we created and drag it underneath the Icon Tick list module in the second column.
Leave all design settings the equivalent, on the other hand give the Heading module a unique determine. Reproduction the Icon Tick list module and drag it underneath the new Heading module we merely created. Trade the text for each and every of the Icon Tick list Items. Leave all style settings as is.
Repeat the steps above to duplicate the Heading and Icon Tick list modules yet again.
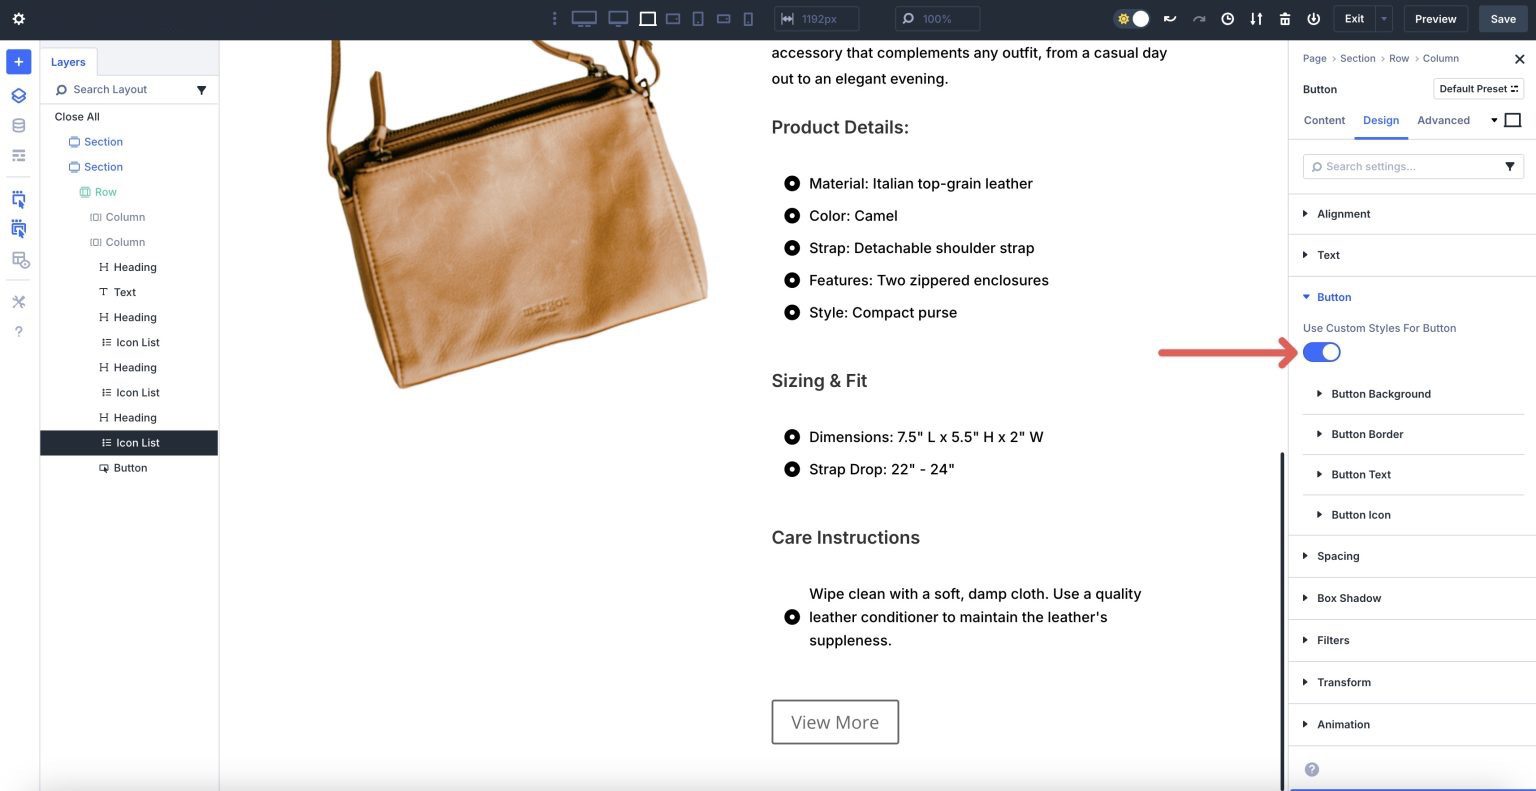
Add A Button Module
Add a Button underneath the remainder Icon Tick list module throughout the second column. When the Button’s settings appear, add Button Text and click on at the Design tab. Amplify the Button dropdown menu and make allowance Use Custom designed Types For Button.
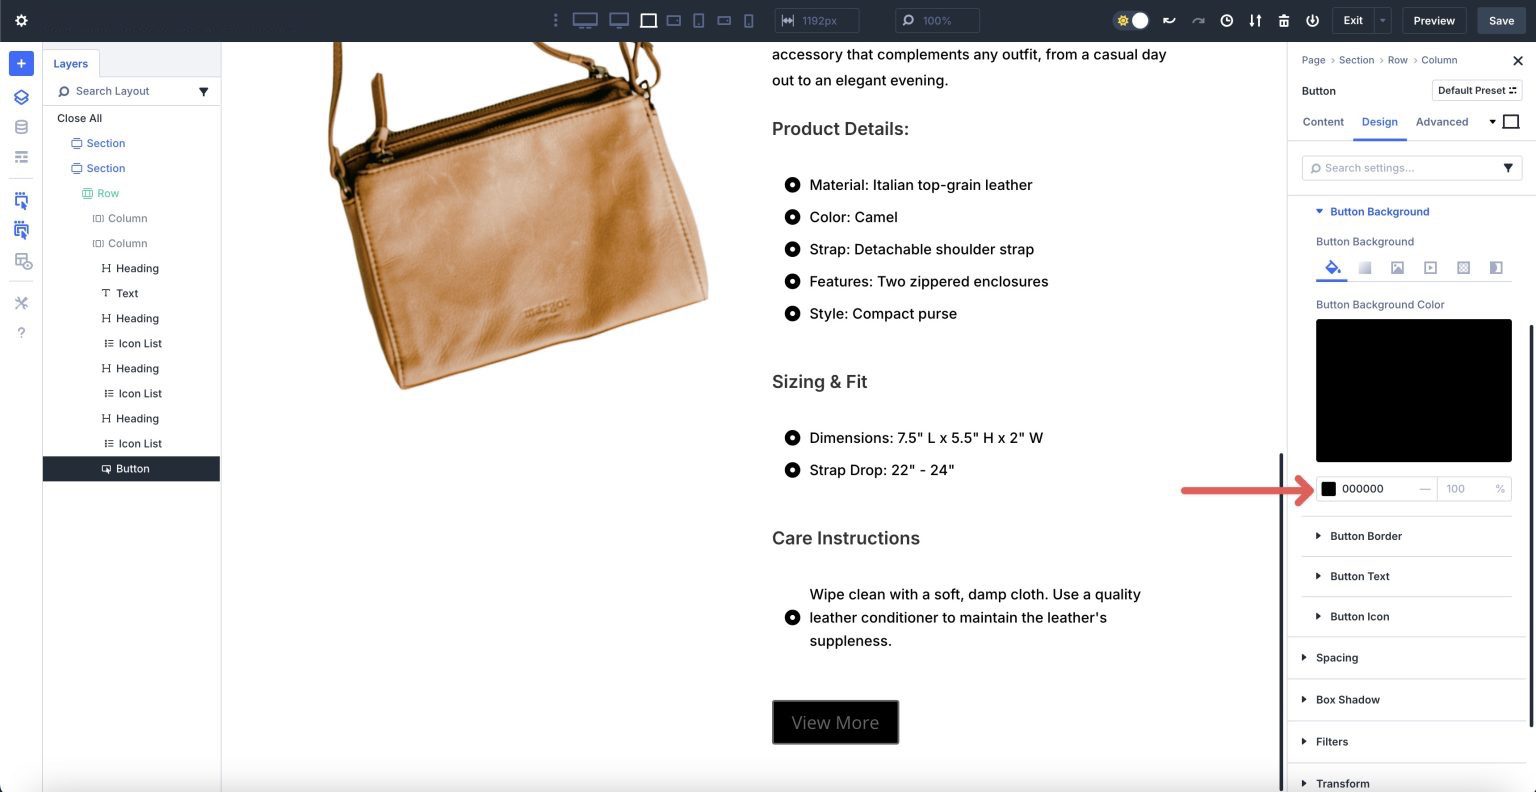
Amplify the Button Background dropdown menu and assign #000000 for the reason that Background Color.
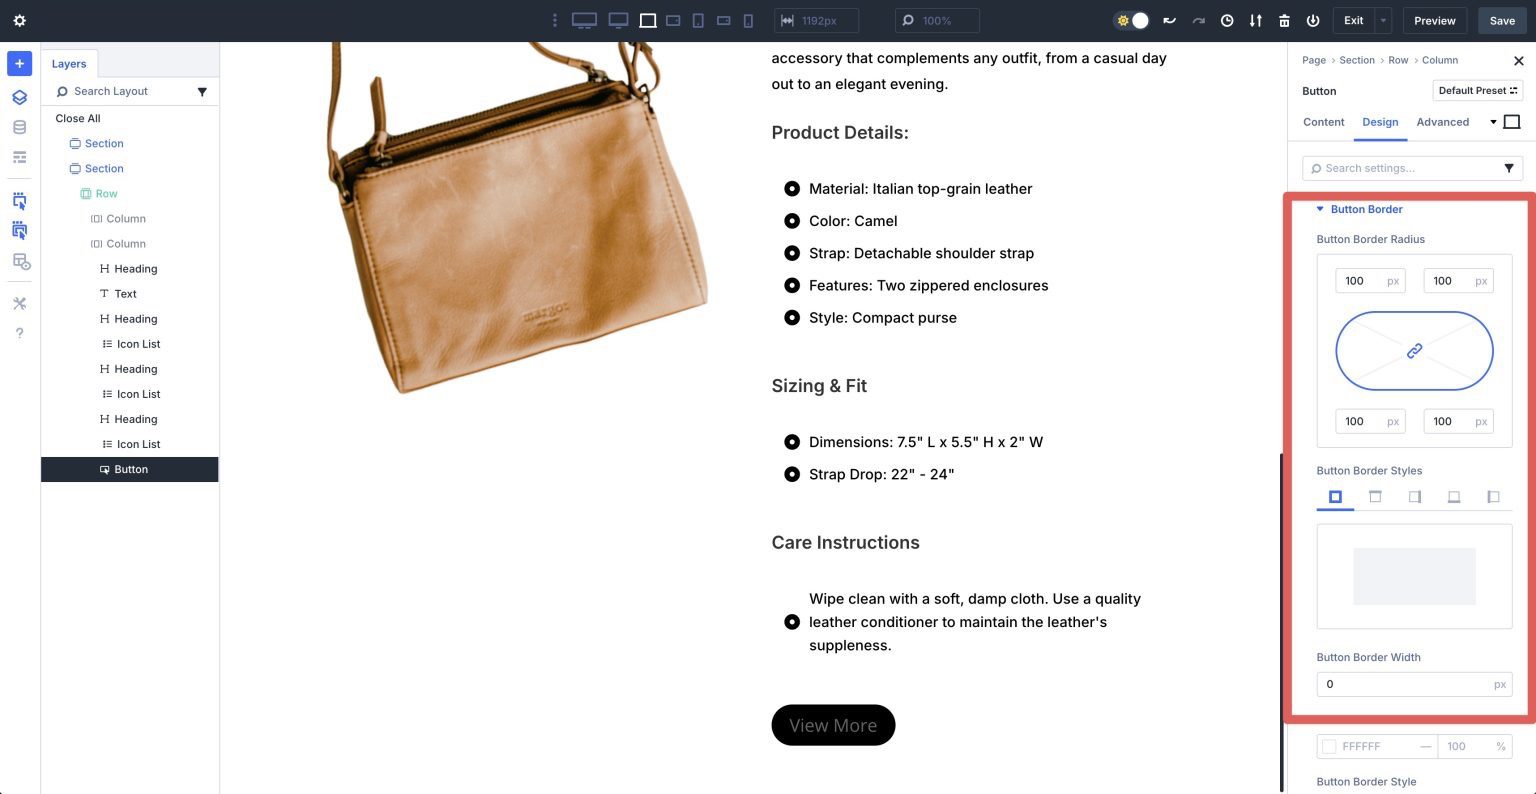
Next, build up the Button Border dropdown menu. Assign a 100px Button Border Radius. Add 0px to the Button Border Width underneath Button Border Types.
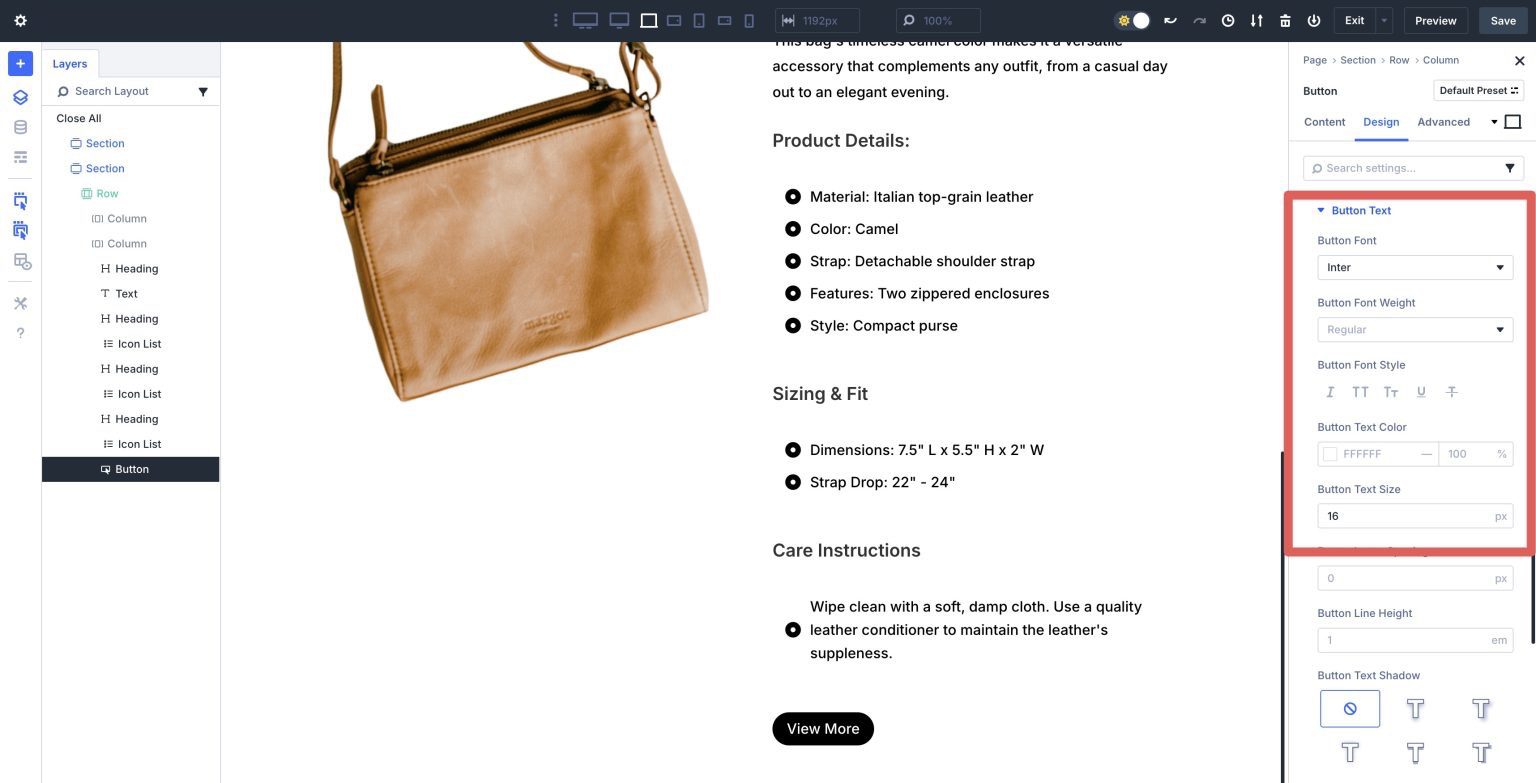
Inside the Button Text dropdown menu, set the Button Font to Inter, Button Text Color to #ffffff, and Button Text Size to 16px.
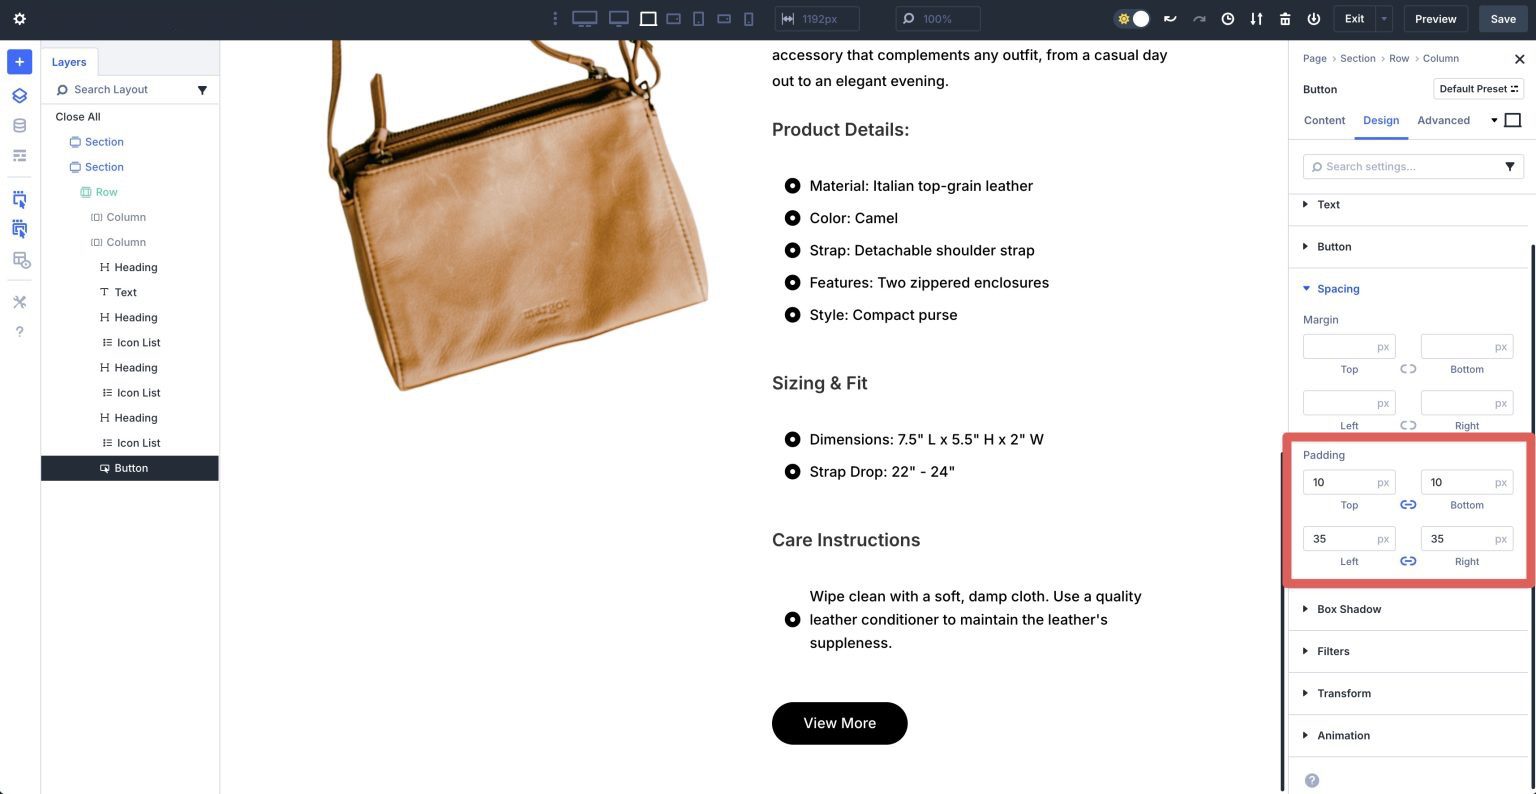
In any case, build up the Spacing dropdown menu. Inside the Padding settings, assign 10px padding to the top and bottom and 35px to the left and right kind.
Add A New Row
Click on on in an effort to upload a brand spanking new single column row underneath the row containing our product.
Add An Icon Module
Add an Icon module. Inside the module’s settings, select an icon for the module.
![]()
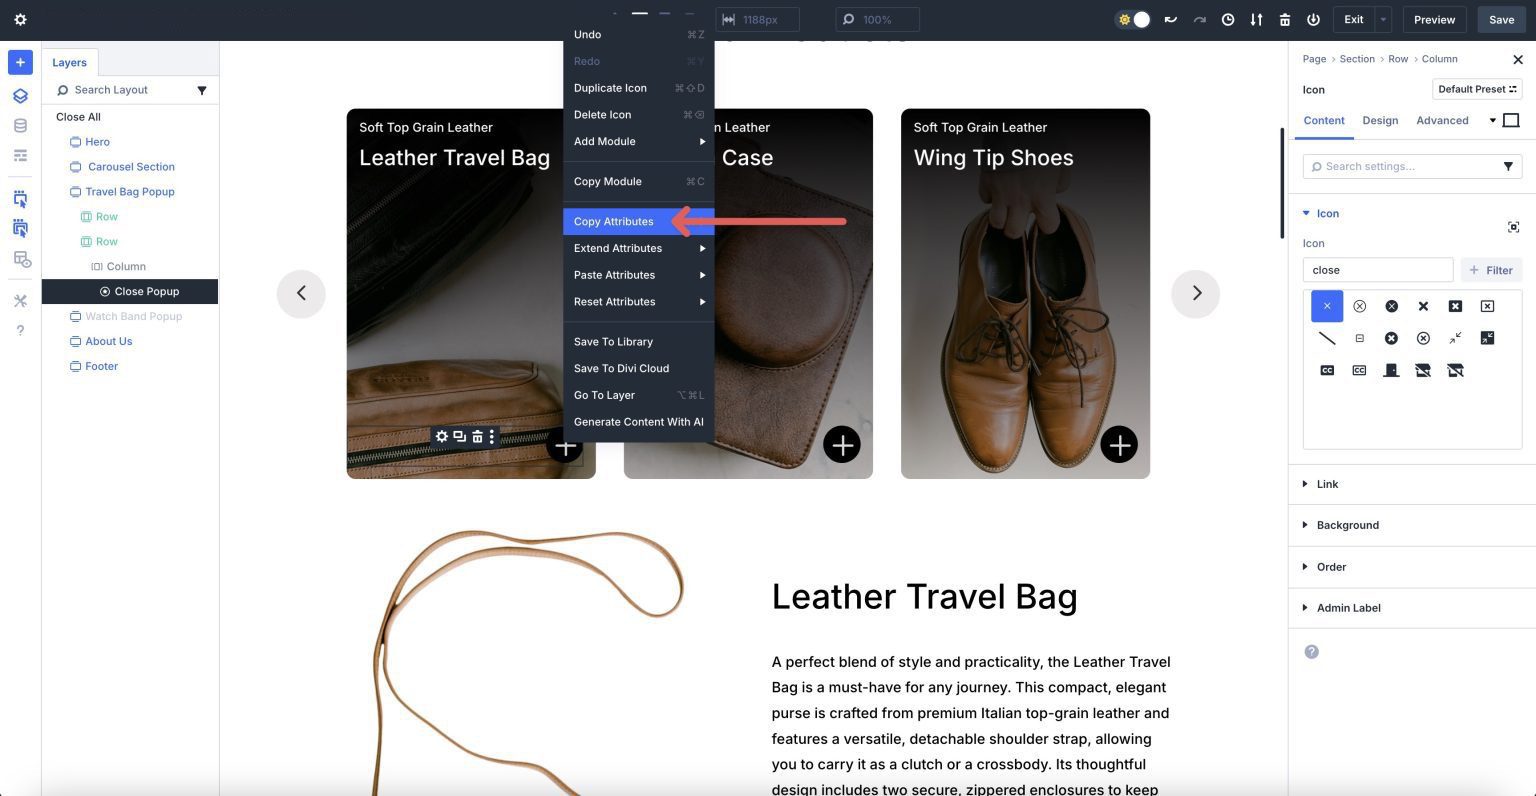
Moderately than style the Icon module, scroll up, select an Icon module throughout the Team of workers Carousel, right kind click on on to turn the settings menu, and click on on Copy Attributes.
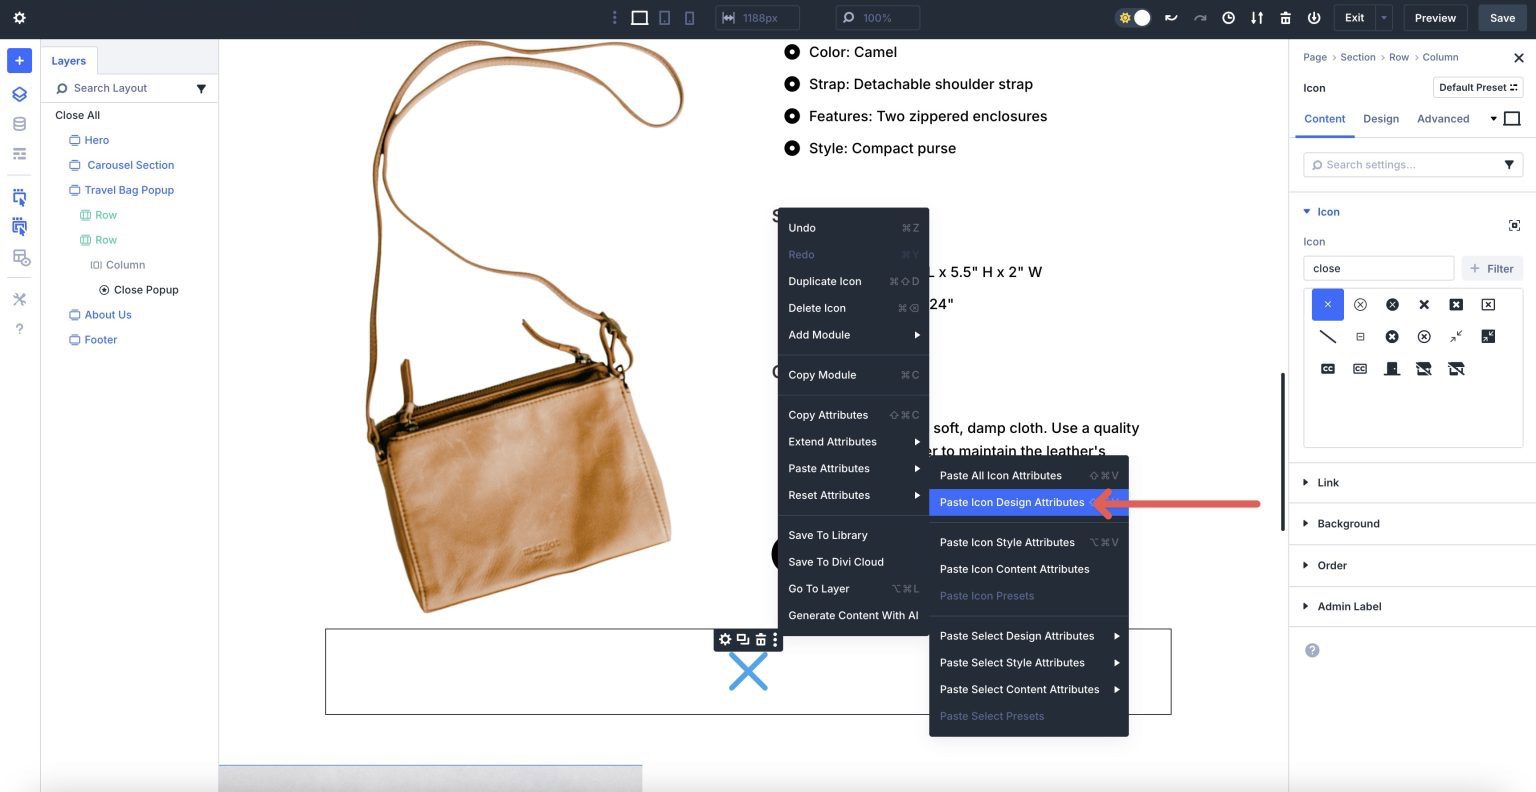
Scroll back down to the Icon module we added to the new row, right kind click on on, and select Paste Icon Style Attributes.
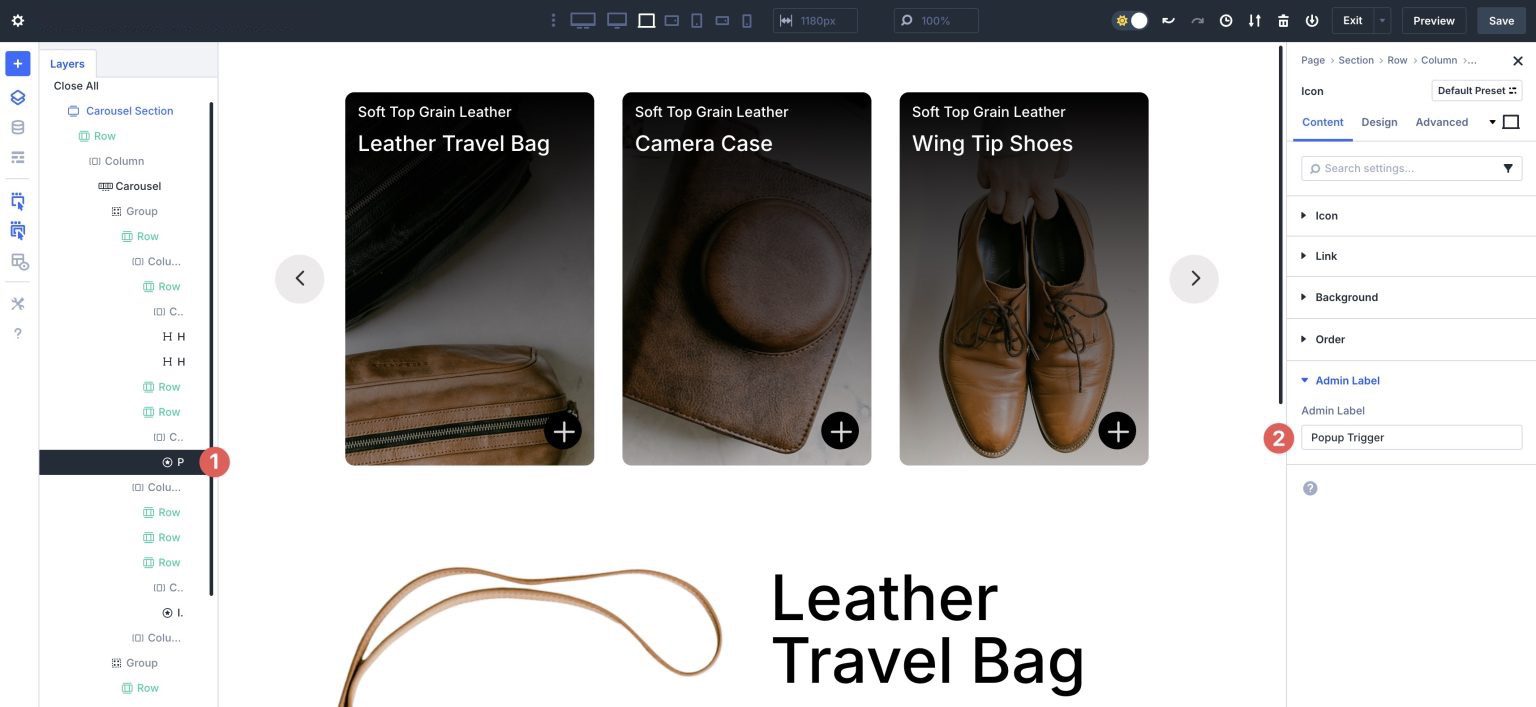
Assign Names To The Content material subject matter Reveal Parts
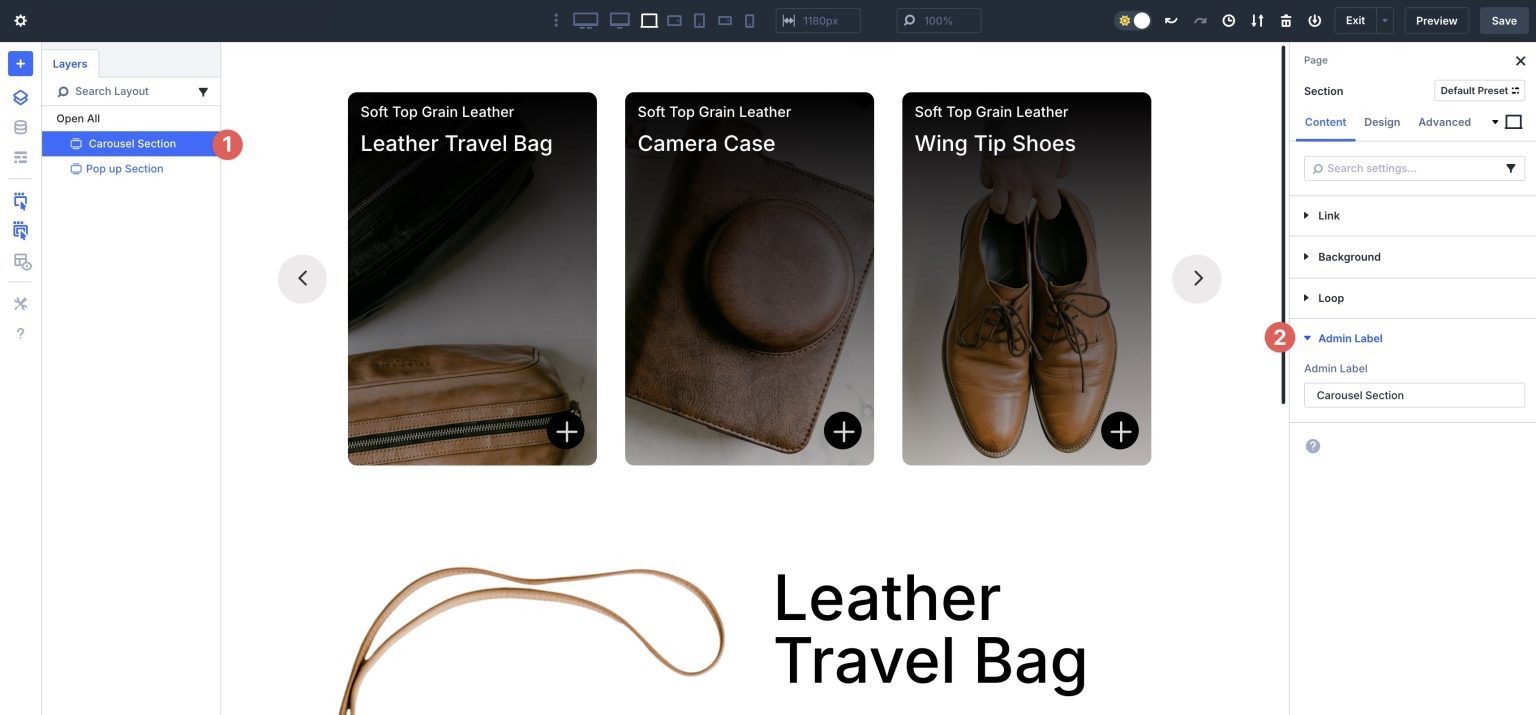
Previous than environment Interactions for the content material subject matter reveal, we wish to be sure that the whole thing is appropriately classified. This may occasionally most probably be in agreement us resolve which modules to concentrate on when environment the Interactions. Name the main Segment Carousel Segment. This can also be carried out throughout the Layers view or the Admin Label field of the phase’s settings.
Amplify the Carousel Segment and to find the Icon module throughout the first column of the Team of workers Carousel module. Inside the Admin Label field, enter Content material subject matter Reveal Reason.
Repeat the steps above to name the second phase of the layout to Content material subject matter Reveal Segment and the remainder Icon module throughout the second phase to Close Content material subject matter Reveal .

Step 6: Create The Interactions
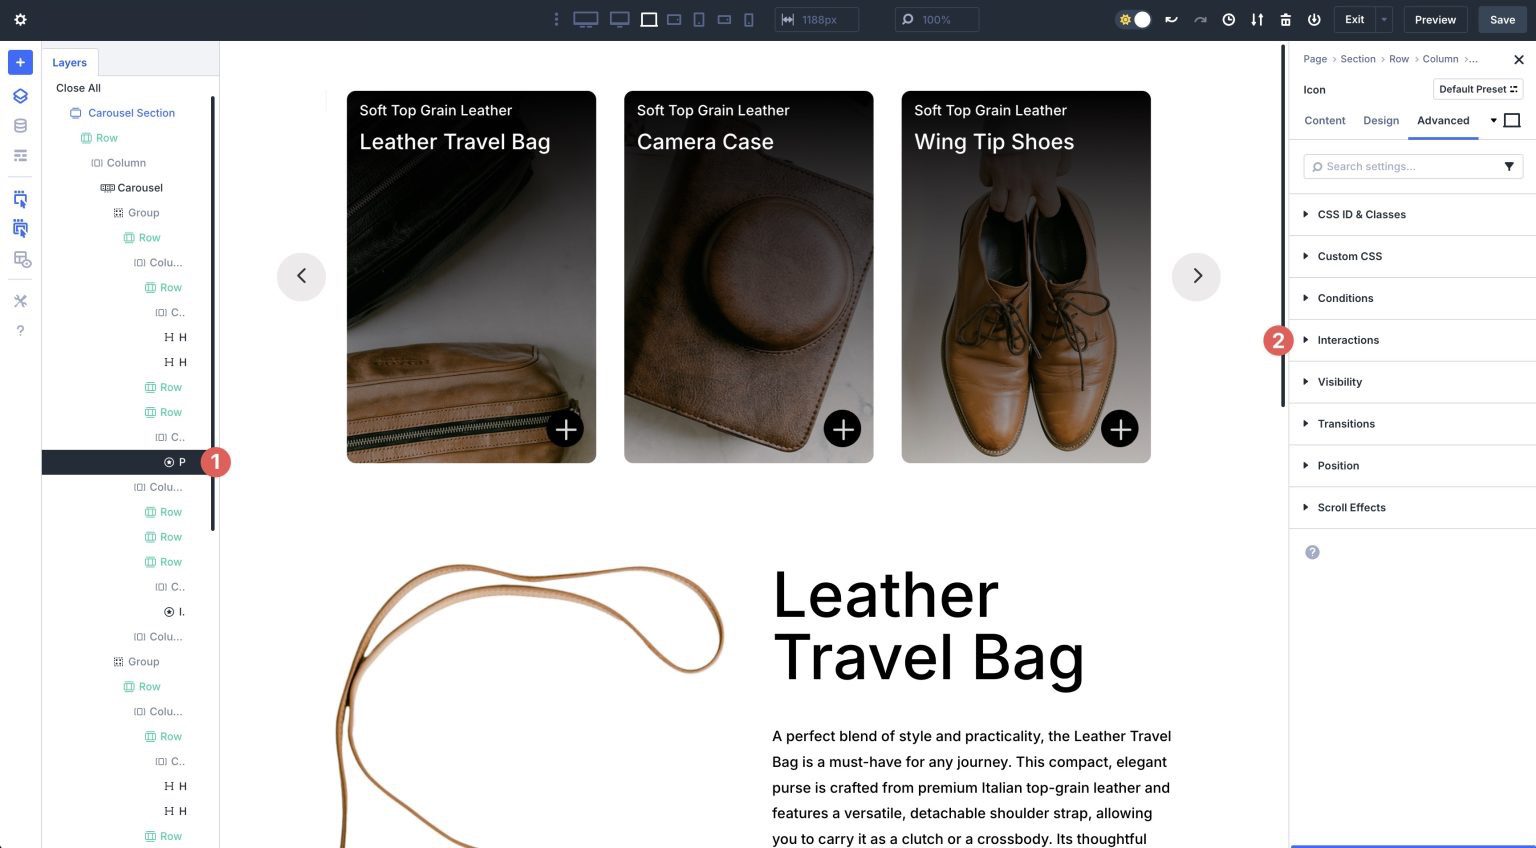
We can have to prepare a few interactions to make the whole thing art work seamlessly. First, select the Icon module throughout the first phase, situated throughout the first column of the Team of workers Carousel module. Navigate to the Difficult tab and build up the Interactions dropdown menu.
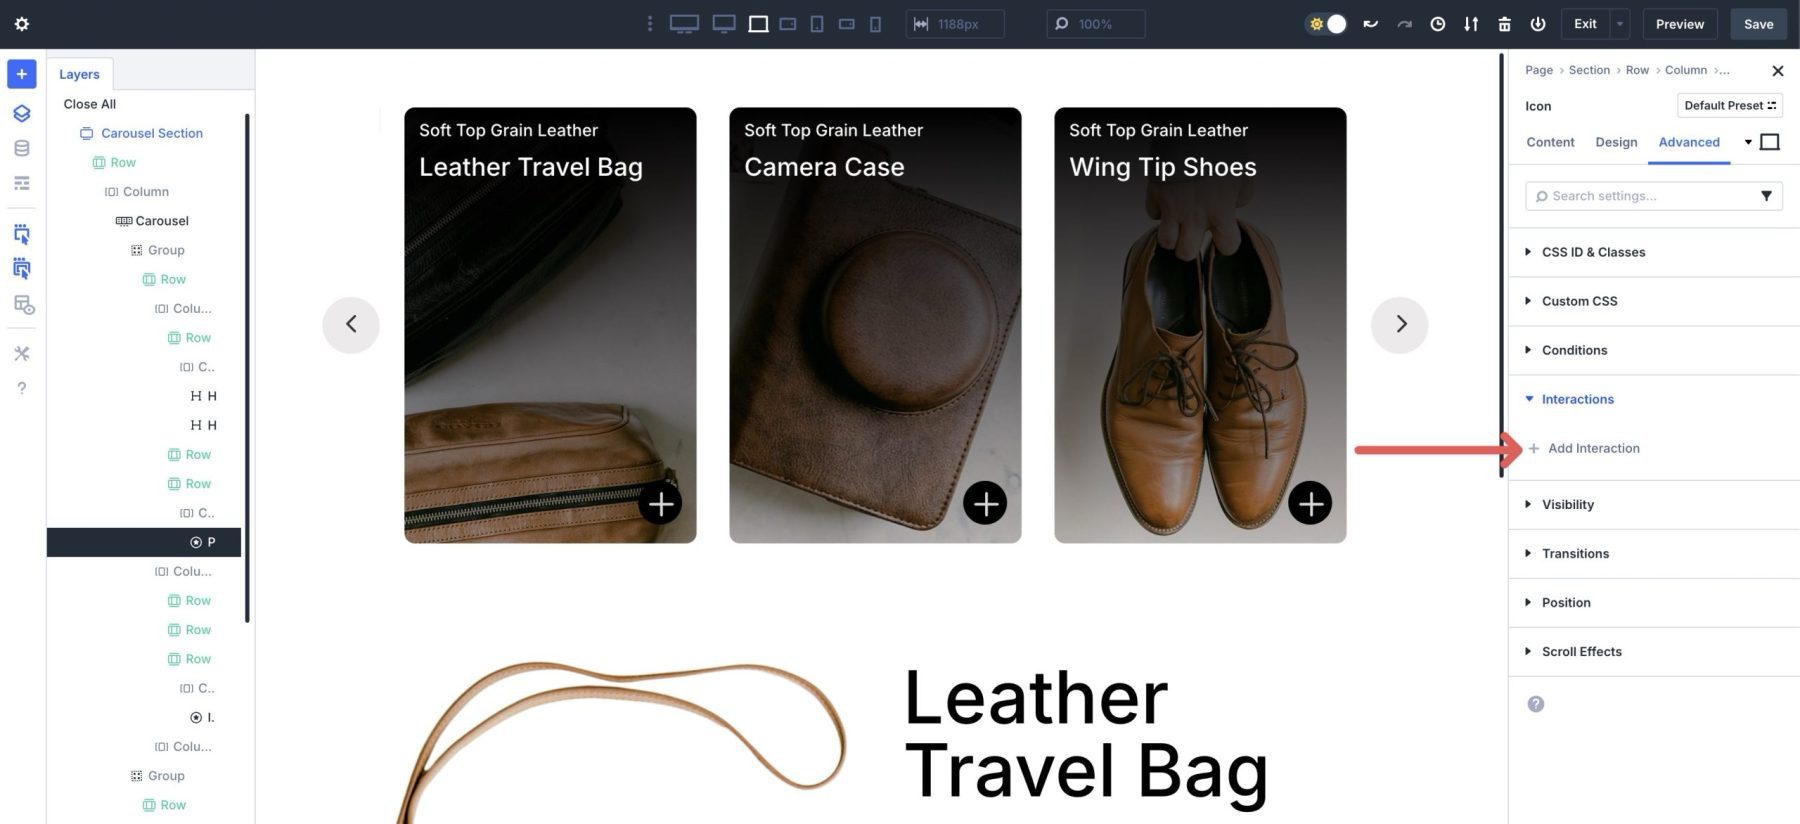
Click on at the + Add Interaction button in an effort to upload a brand spanking new Interaction.
When the dialog box turns out, use the following settings:
- Admin Label: Free up content material subject matter reveal
- Reason Match: Click on on
- Have an effect on Movement: Toggle Visibility
- Objective Module: Segment (Content material subject matter Reveal Segment)
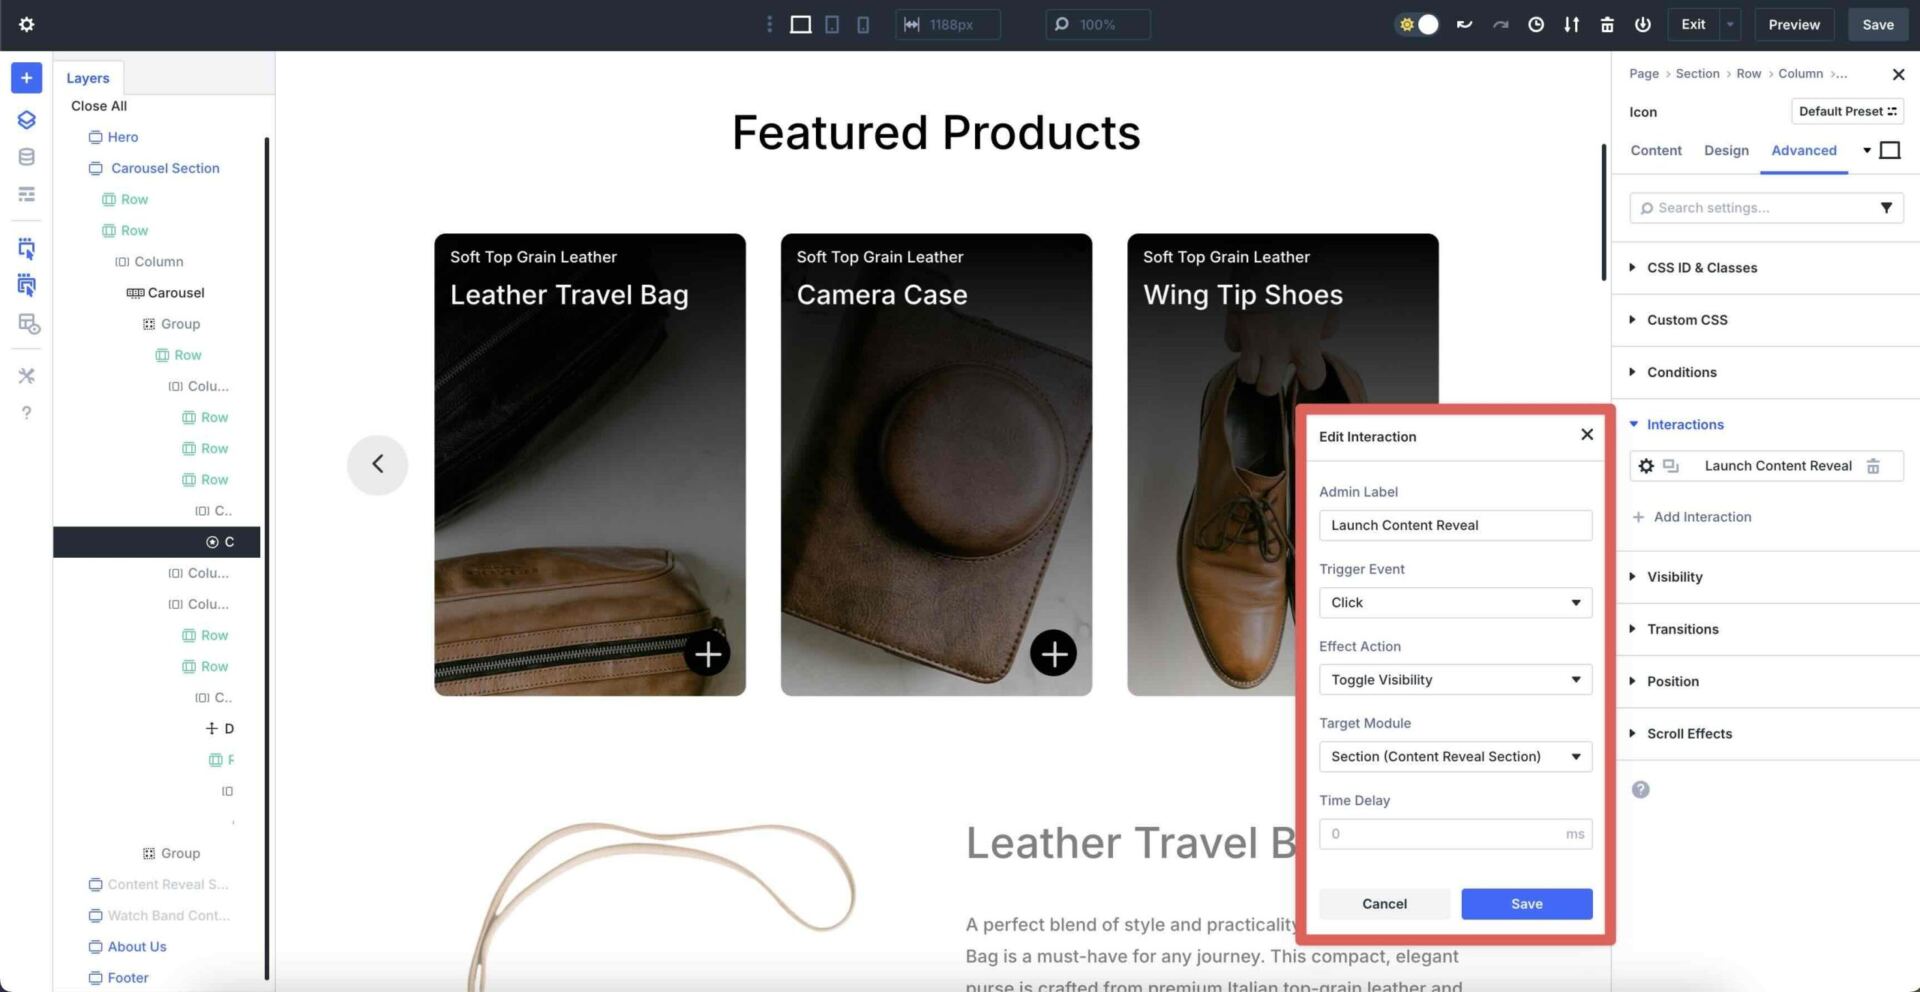
You’ll wish to Save the Interaction.
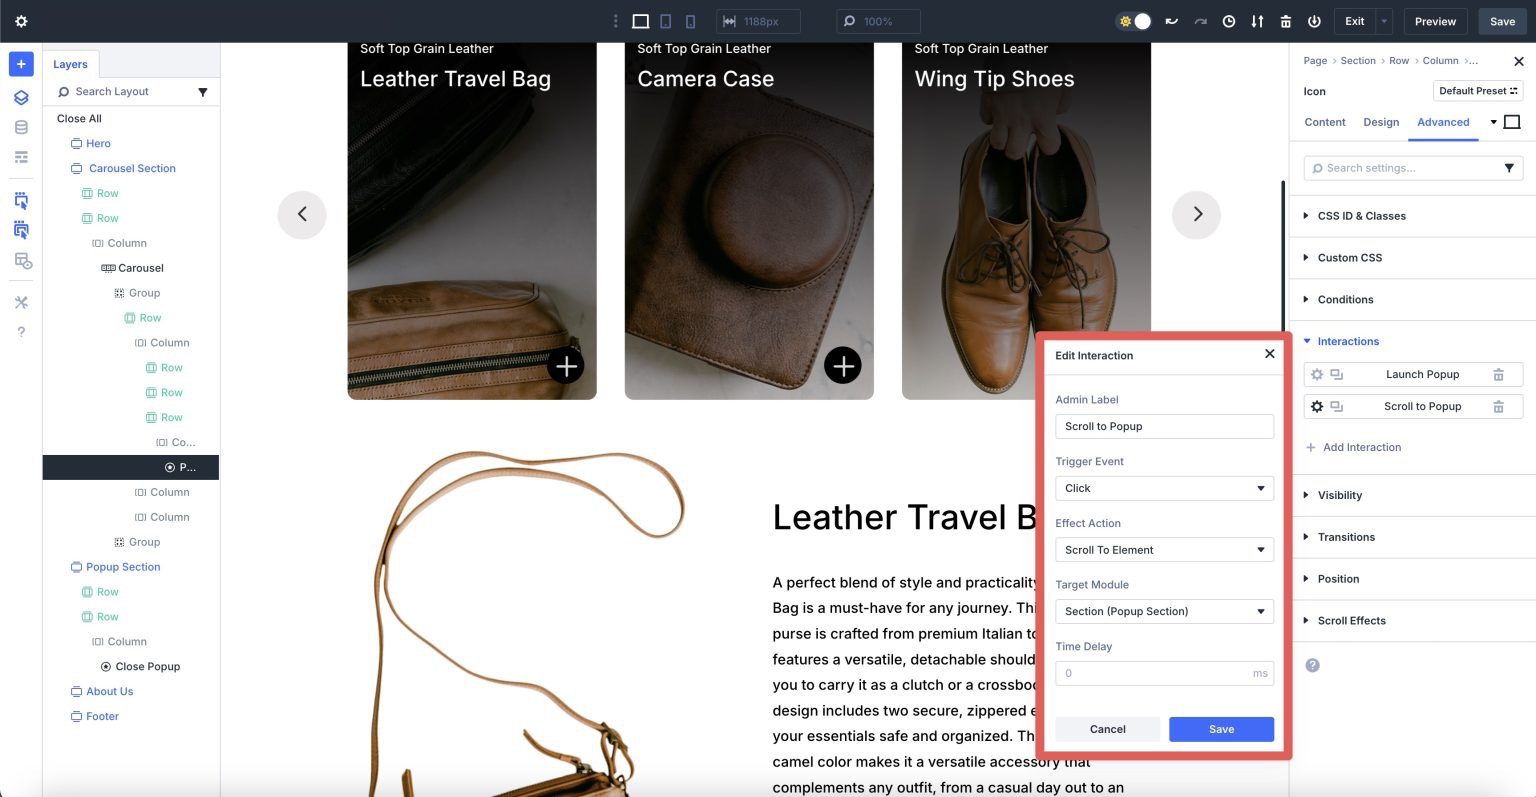
Create A Scroll To Content material subject matter Reveal Interaction
We will create any other Interaction that can scroll the shopper to the content material subject matter reveal phase. This may occasionally most probably keep shoppers from having to scroll unnecessarily to view the content material subject matter reveal’s content material subject matter. Click on on in an effort to upload a brand spanking new Interaction. Enter the following settings:
- Admin Label: Scroll to Content material subject matter Reveal
- Reason Match: Click on on
- Have an effect on Movement: Scroll To Section
- Objective Module: Segment (Content material subject matter Reveal Segment)
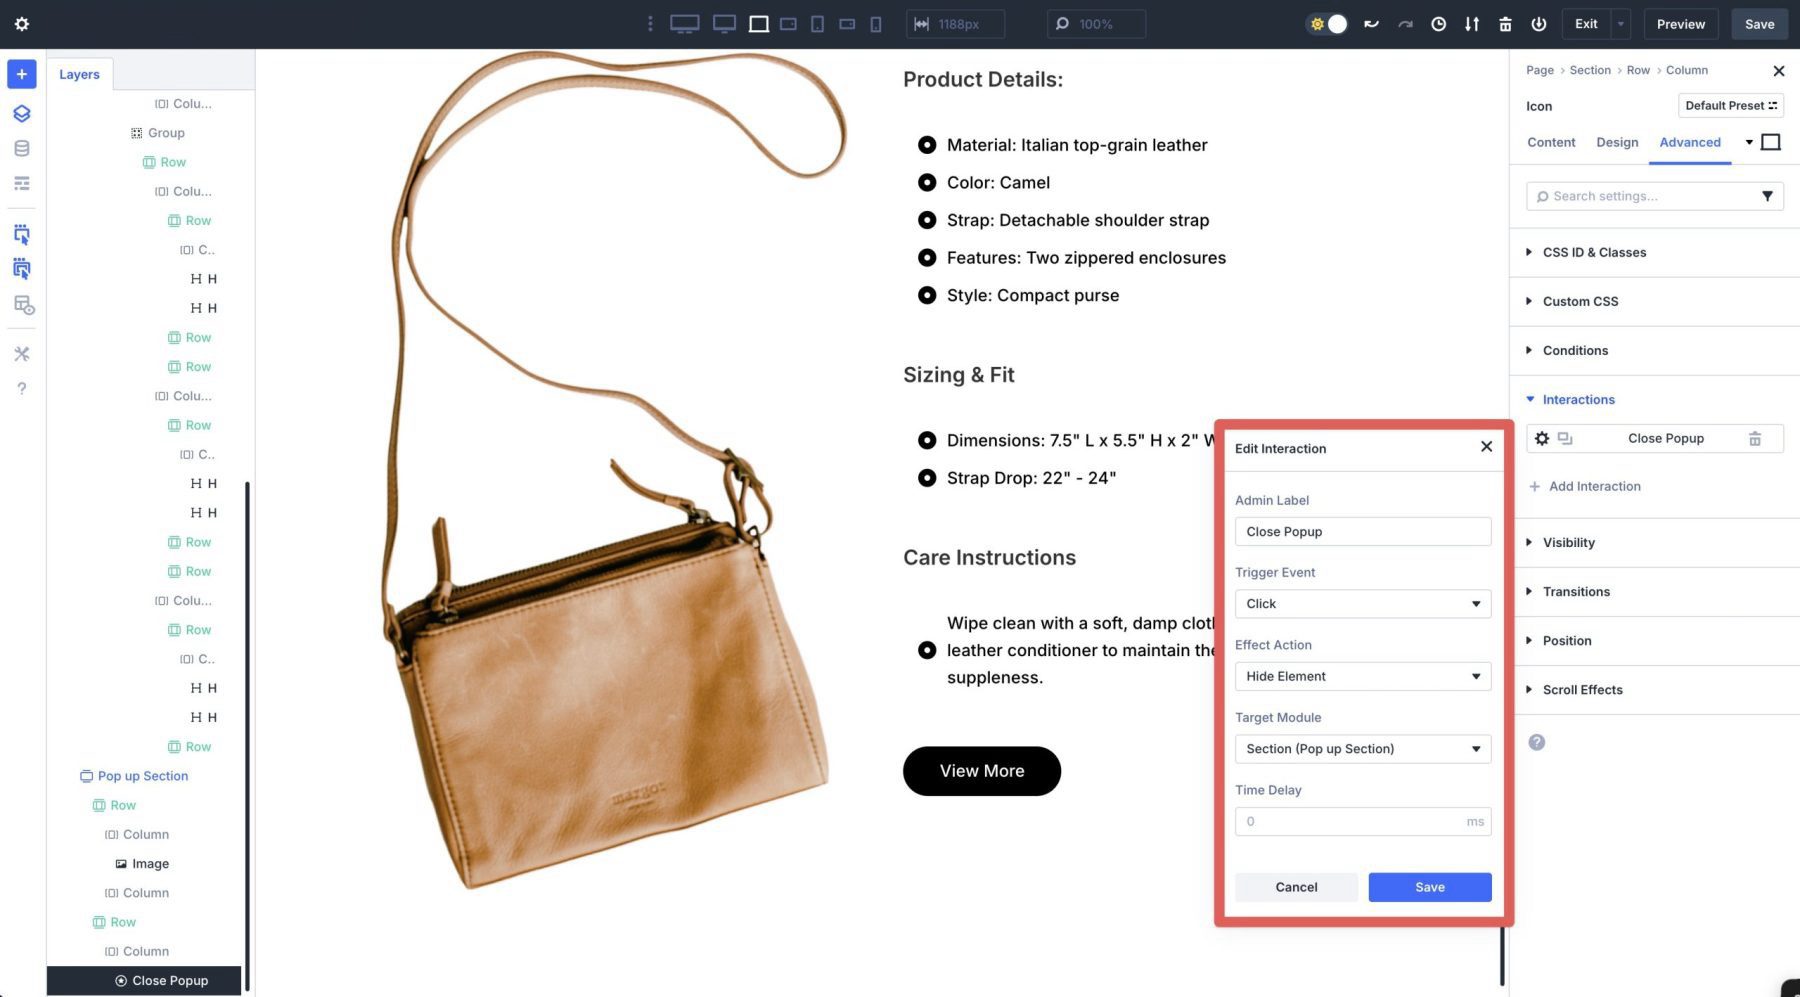
Create A Close Content material subject matter Reveal Interaction
Next, we will be able to must create an Interaction to close the content material subject matter reveal. Navigate to the row that homes our close button. Open the Difficult tab, add a brand spanking new Interaction, and enter the following settings:
- Admin Label: Close Content material subject matter Reveal
- Reason Match: Click on on
- Have an effect on Movement: Duvet Section
- Objective Module: Segment (Content material subject matter Reveal Segment)
Click on at the Save button to permit the Interaction.
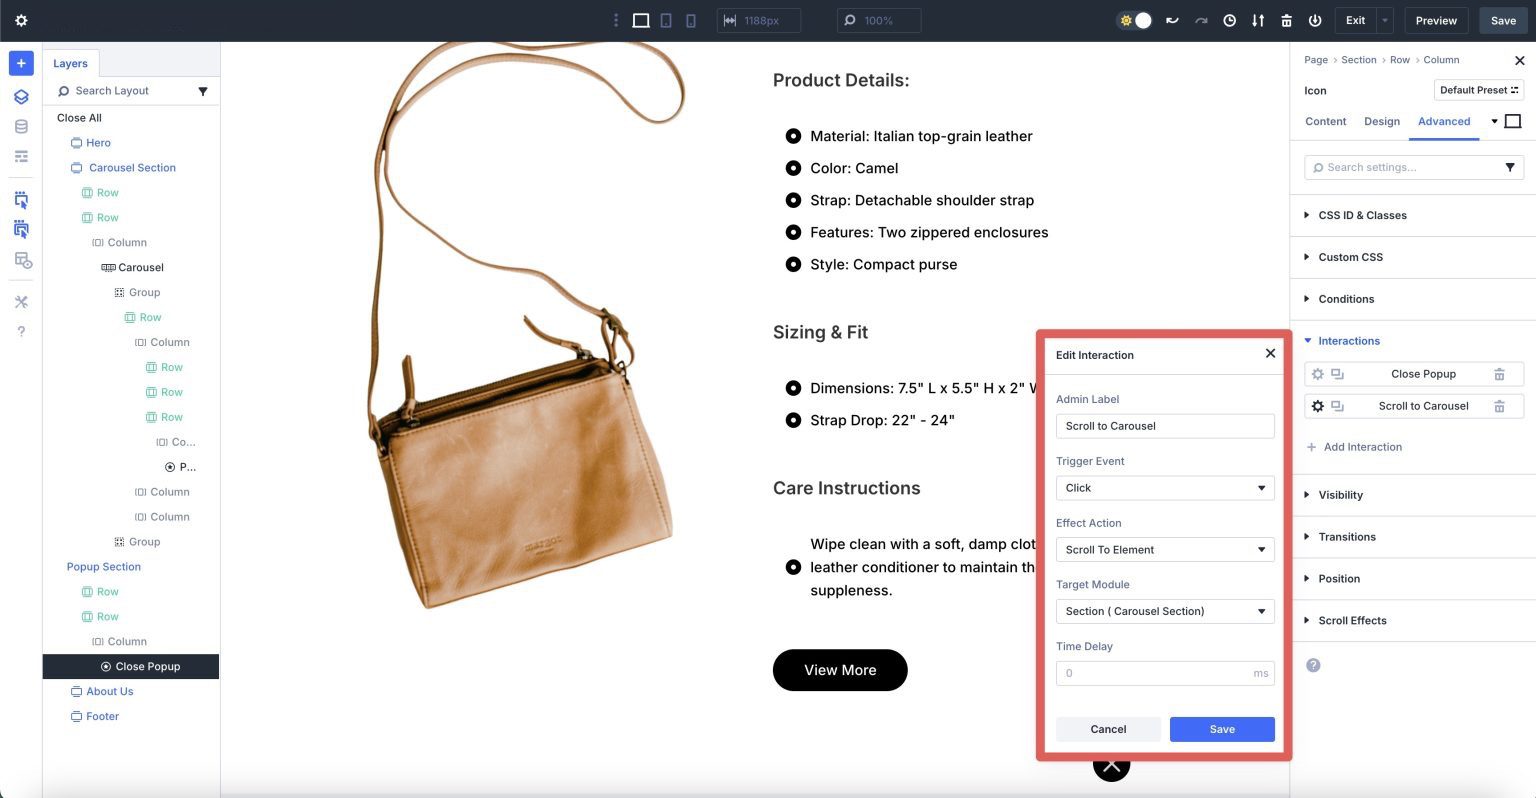
Create A Scroll To Section Interaction
We’ll create a second Interaction that can take shoppers once more to the Carousel Segment once they close the content material subject matter reveal. This is the most important step, in particular for cell shoppers who would otherwise will have to scroll once more to the easiest of the internet web page to view additional slides.
Create a brand spanking new Interaction and enter the following settings:
- Admin Label: Scroll to Carousel
- Reason Match: Click on on
- Have an effect on Movement: Scroll To Section
- Objective Module: Segment (Carousel Segment)
Duvet The Content material subject matter Reveal Segment
The rest step is to hide the content material subject matter reveal phase until a reason is clicked. Inside the Difficult tab, click on at the Visibility dropdown menu. Make a choice all 3 breakpoints — Phone, Tablet, and Desktop — to disable them.
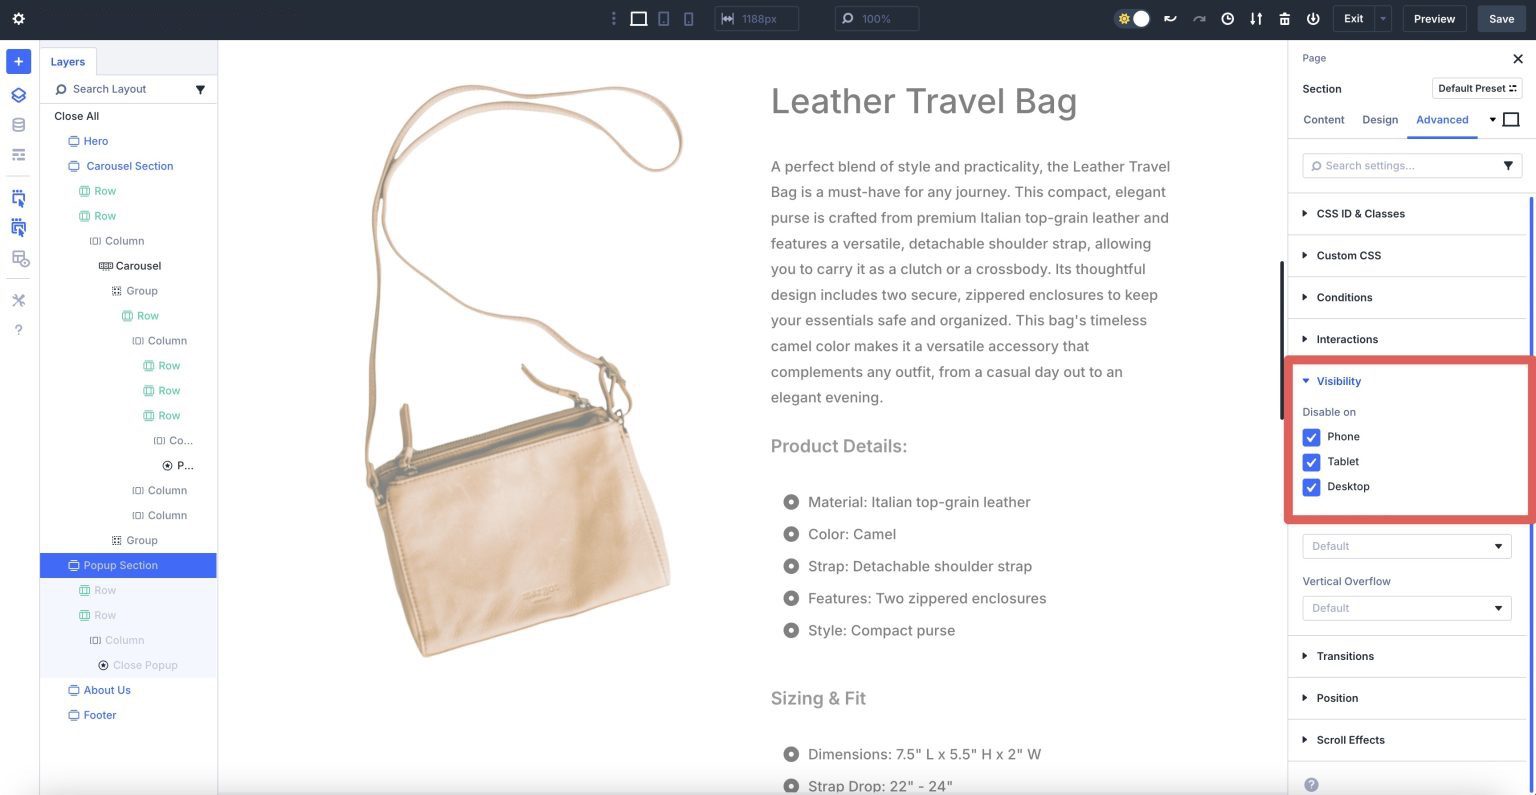
Make responsive adjustments and preview the internet web page in a brand spanking new browser tab. The layout must look similar to this:
To create content material subject matter reveals for the additional products throughout the Team of workers Carousel, copy the Content material subject matter Reveal Segment using the Layers view and change the content material subject matter.
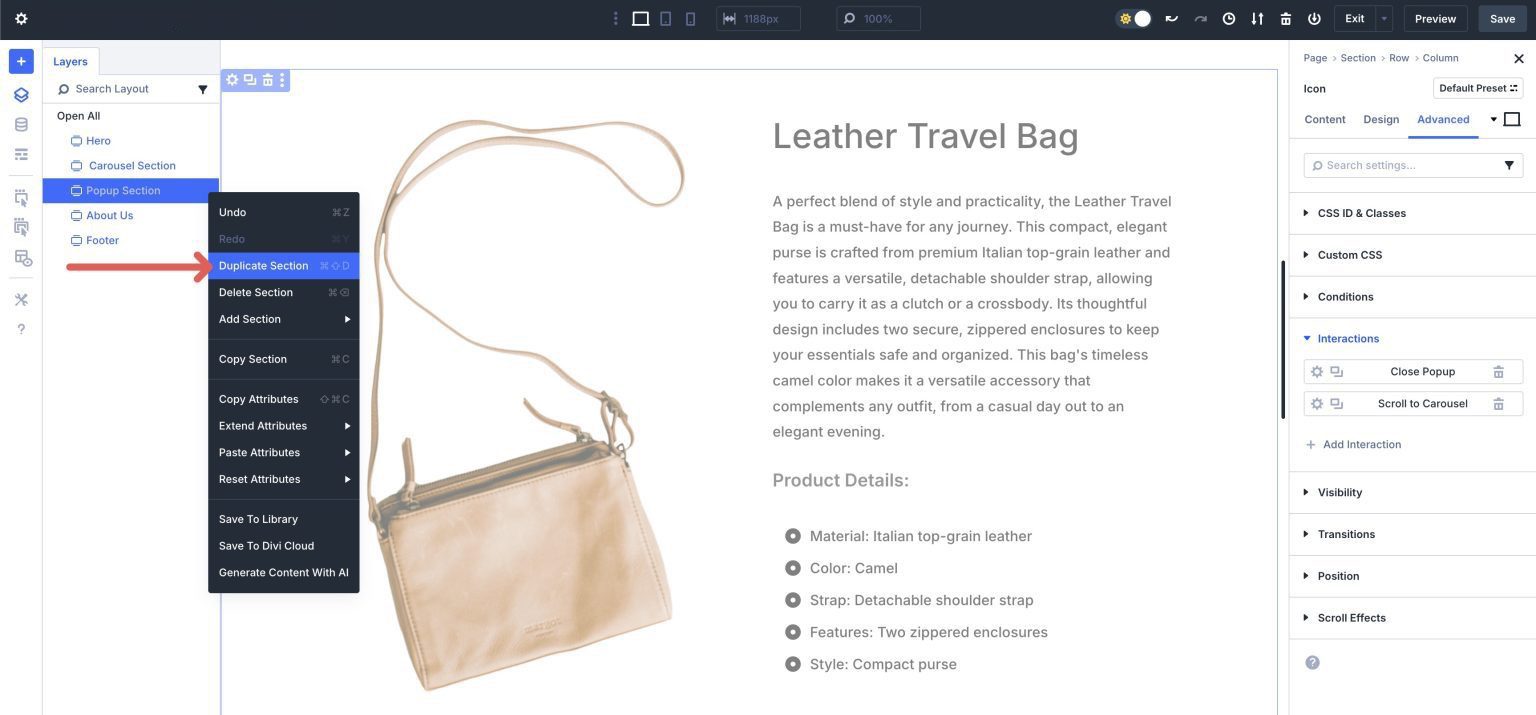
You’ll moreover wish to keep watch over the Interaction triggers when you add new content material subject matter reveal sections. For example, we added a brand spanking new content material subject matter reveal for the leather watch band in our Team of workers Carousel module. To choose the second Team of workers throughout the Carousel, use the Layers view.
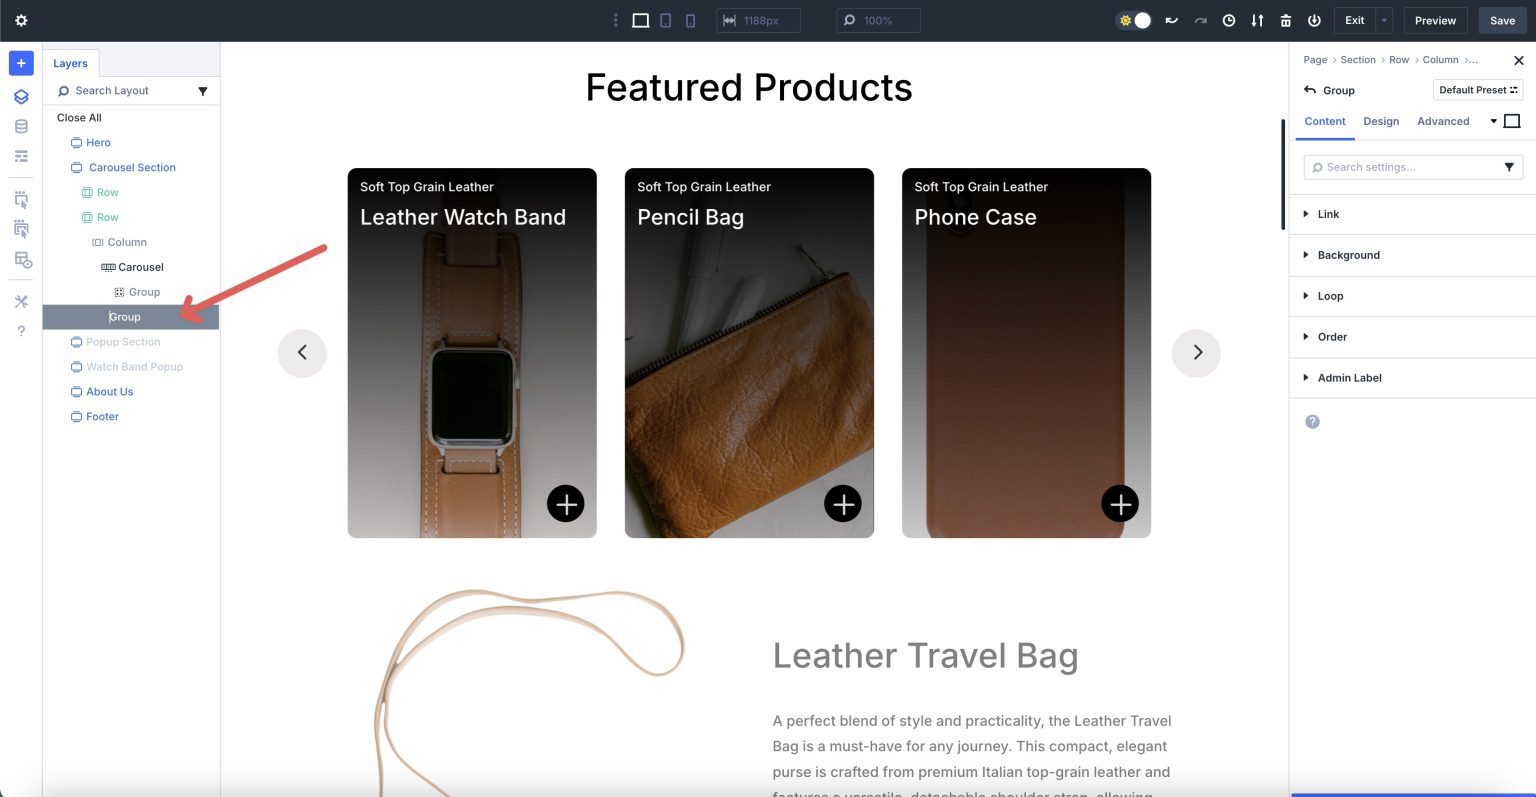
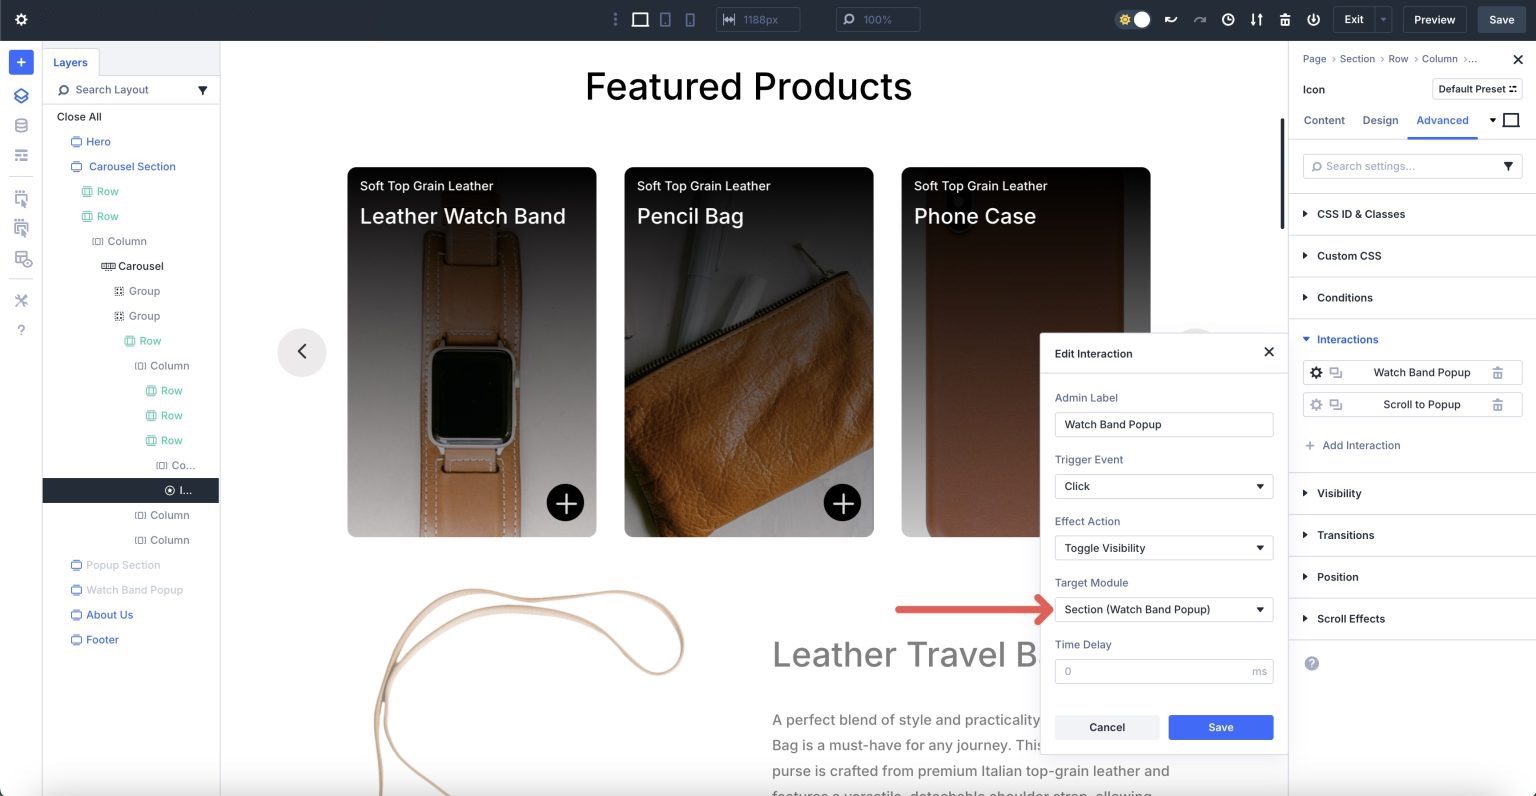
Click on at the Icon module throughout the first column of the second Team of workers and navigate to the Difficult tab. Amplify the Interactions dropdown menu and click on on on the first Interaction. Trade the Admin Label to some other identify and select Segment (Watch Band content material subject matter reveal) in Objective Module.
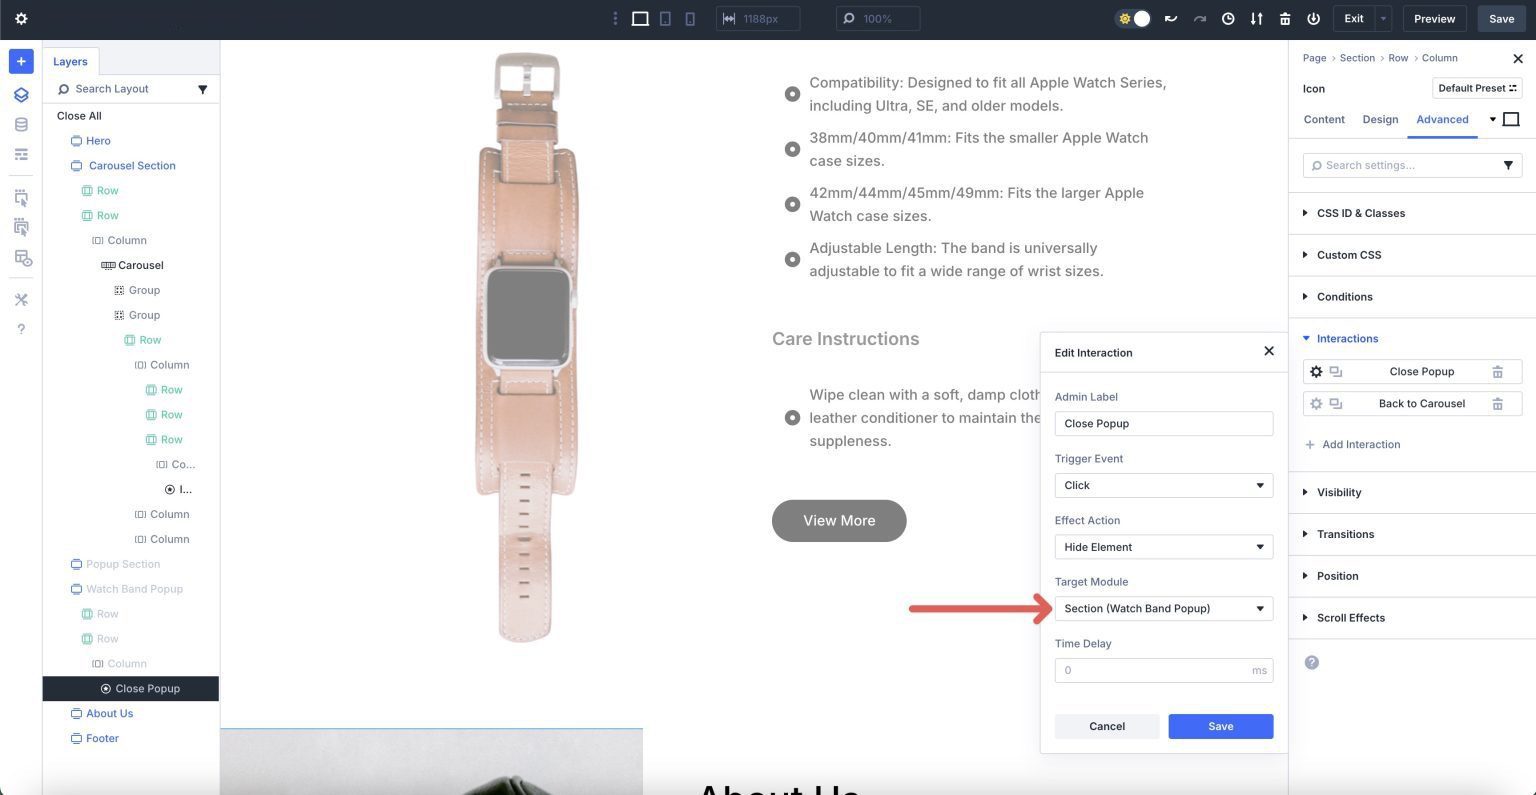
Repeat the steps above to keep watch over the Scroll to content material subject matter reveal Interaction throughout the Carousel and the Interactions throughout the Watch Band content material subject matter reveal’s close button Icon module.
That’s it! As you’ll be capable to see, Divi 5 makes it easy in an effort to upload interactive content material subject matter in your internet web page in a few simple steps.
@media most simple computer screen and ( max-width: 767px ) {.et_bloom .et_bloom_optin_1 .carrot_edge.et_bloom_form_right .et_bloom_form_content:previous than { border-top-color: #ffffff !important; border-left-color: transparent !important; }.et_bloom .et_bloom_optin_1 .carrot_edge.et_bloom_form_left .et_bloom_form_content:after { border-bottom-color: #ffffff !important; border-left-color: transparent !important; }
}.et_bloom .et_bloom_optin_1 .et_bloom_form_content button { background-color: #f92c8b !important; } .et_bloom .et_bloom_optin_1 .et_bloom_form_content .et_bloom_fields i { colour: #f92c8b !important; } .et_bloom .et_bloom_optin_1 .et_bloom_form_content .et_bloom_custom_field_radio i:previous than { background: #f92c8b !important; } .et_bloom .et_bloom_optin_1 .et_bloom_border_solid { border-color: #f7f9fb !important } .et_bloom .et_bloom_optin_1 .et_bloom_form_content button { background-color: #f92c8b !important; } .et_bloom .et_bloom_optin_1 .et_bloom_form_container h2, .et_bloom .et_bloom_optin_1 .et_bloom_form_container h2 span, .et_bloom .et_bloom_optin_1 .et_bloom_form_container h2 tough { font-family: “Open Sans”, Helvetica, Arial, Lucida, sans-serif; }.et_bloom .et_bloom_optin_1 .et_bloom_form_container p, .et_bloom .et_bloom_optin_1 .et_bloom_form_container p span, .et_bloom .et_bloom_optin_1 .et_bloom_form_container p tough, .et_bloom .et_bloom_optin_1 .et_bloom_form_container form input, .et_bloom .et_bloom_optin_1 .et_bloom_form_container form button span { font-family: “Open Sans”, Helvetica, Arial, Lucida, sans-serif; } p.et_bloom_popup_input { padding-bottom: 0 !important;}
You’ve were given successfully subscribed. Please check your email maintain to confirm your subscription and get get admission to to unfastened weekly Divi layout packs!
Assemble Interactive Carousels In Divi 5 In this day and age
The blending of the Staff Carousel and Interactions in Divi 5 offers you an excellent toolkit for growing horny, visually unexpected carousels. This is just a glimpse of what’s conceivable with Divi 5. As we continue against the reliable Beta Phase, we’ll be rolling out a lot more choices to give a boost to your design workflow. Now, it’s your turn to find and experiment with the ones new choices and percentage your concepts with the Divi community!
The post How To Create An Interactive Content material Disclose Carousel With Divi 5 appeared first on Chic Issues Weblog.
wordpress Web Design
[ continue ]
wordpress Maintenance Plans | wordpress hosting
read more