
Many web websites use a large, eye-catching image on the most efficient of their homepage, known as a hero image. And wordpress, a popular internet web page builder, implies that you’ll be able to add this feature for your site.
That being said, many purchasers need lend a hand figuring out simple tips on how to exactly do it. We’ve received loads of questions about wordpress hero image dimension and where to as it should be organize a hero image inside the wordpress Customizer or Whole Internet website online Editor.
To be frank, after years of constructing web websites, we’ve found out upper methods for together with a hero image than using wordpress’ built-in choices.
This knowledge will show you simple tips on how to add a hero image in wordpress in a large number of techniques, and also you’ll make a choice the method that works best possible to your needs.
wordpress-hero-image”/>First Problems First: Get able Your wordpress Hero Image
Previous to you add a hero image for your wordpress web page, you need to create one that can clutch your visitors’ attention. A in point of fact best possible hero section starts with a surprising image that shows what your site is all about.
Canva is a popular software for designing internet web page graphics. It’s easy to use and comes with loads of templates to create your hero image. When you’re not fascinated with Canva, we’ve a list of Canva choices you’ll check out to look out person who works for you.
When making your hero image, you will want to keep a few problems in ideas.
First, take into accounts the dimensions. Hero images are most often not too tall and ceaselessly quilt the entire width of your front internet web page.
A common wordpress hero image dimension is about 1920 pixels huge by means of 400-600 pixels tall (or from time to time additional). Then again this may increasingly industry depending to your wordpress theme.
Next, take into accounts what message you need to send. Your hero image should quickly show what your internet web page is about. It may be a product hero image, {{a photograph}} that represents your brand, or even an excellent full-screen video background.
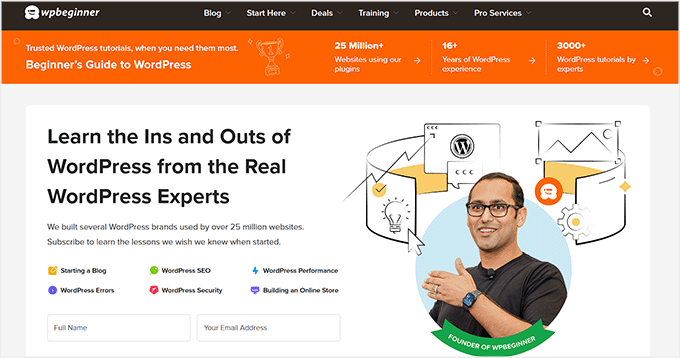
As an example, we determined to feature our founder Syed Balkhi in our homepage’s hero image. It shows that there’s a real explicit particular person in the back of our brand who’s dedicated to helping wordpress shoppers be successful, which is what WPBeginner is all about.
Moreover, go away some space for text. Many hero sections have a headline or a button. Make sure that there’s room for the ones and that they’re easy to be told.
It’s a good idea to take a look at other web websites for your field for hero section examples. This gives you ideas to your non-public design. Some of the entries in our wordpress web page examples can serve as great inspiration.
With that out of the way in which by which, let’s take a look at simple tips on how to actually add the hero image. wordpress lets you do this in a large number of different ways, on the other hand which one you wish to have to make use of relies on what feature or plugin you use to design your internet web page.
You’ll use the fast links beneath to skip for your most popular way:
Skilled Tip: Need a gorgeous internet web page without all of the onerous art work? Our design execs at WPBeginner Professional Products and services can create a high-converting business internet web page, online store, blog, and additional in nearly no time!
Approach 1: The usage of Theme Customizer (Antique Problems Very best)
When researching for this educational, we quickly realized that together with a hero image to antique wordpress subjects isn’t always easy. The process can vary extensively depending to your theme, as some have built-in hero sections while others don’t.
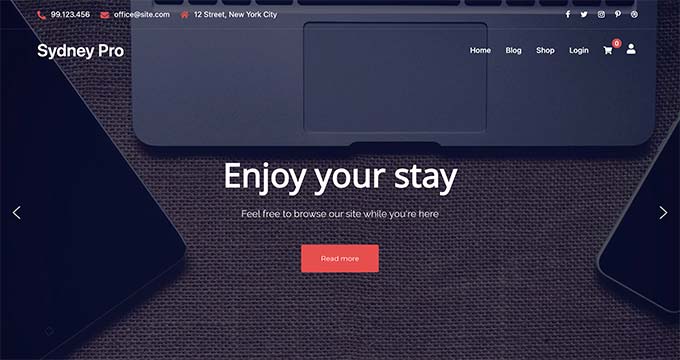
Take the Sydney theme, for example. It comes with a hero section ready to transport, making problems much more straight forward.
When you’re attempting as a way to upload a hero for your provide site, on the other hand your theme doesn’t have a built-in feature for it, then this will also be frustrating.
For many who are merely starting out and don’t ideas choosing a brand spanking new theme, then we advise switching to a minimum of one with a built-in hero section, as it might save you time in any case.
When you’re on the lookout for theme ideas, then you definately’ll check out our skilled choices of the easiest and most well liked wordpress topics available on the market. Upper however, you wish to have to make use of a internet web page builder with a theme that has a hero section, which we’ll show you the way in which in approach 3.
Prior to creating any massive changes, we always suggest using a staging website online to test new subjects completely. This manner, you’ll be sure you’re making the proper variety to your site.
When you’re not sure how to do this, check out our data on easy methods to correctly trade a wordpress theme.
Satisfied along side your provide antique theme? No problem. Skip ahead to approach 4, where we’ll show you simple tips on how to add a hero section using a plugin. This implies works with any theme, so that you’ll create a surprising hero image without overhauling your entire site design.
When you’re using Sydney or a an identical theme, you’ll customize your hero image during the Theme Customizer. Merely head to Glance » Customize for your wordpress dashboard to get started.
Follow: If the Theme Customizer is lacking to your dashboard, then you definately’re virtually unquestionably using a block theme and in addition you should skip ahead to approach 2.

The sidebar should have plenty of alternatives to customize your antique theme.
In Sydney, the ambience to customize your hero section is known as ‘Hero House,’ on the other hand this particular menu will vary by means of the theme. Transfer ahead and click on on on it.

The Sydney theme has 3 menus to create your hero section: Hero Type, Hero Slider, and Hero Media.
We will be able to most effective use the principle two because of they’re enough as a way to upload a hero section for our serve as.
First, select ‘Hero Type.’
In Hero Type, you’re going to be asked to make a choice what type of media you’re going as a way to upload for your hero section.
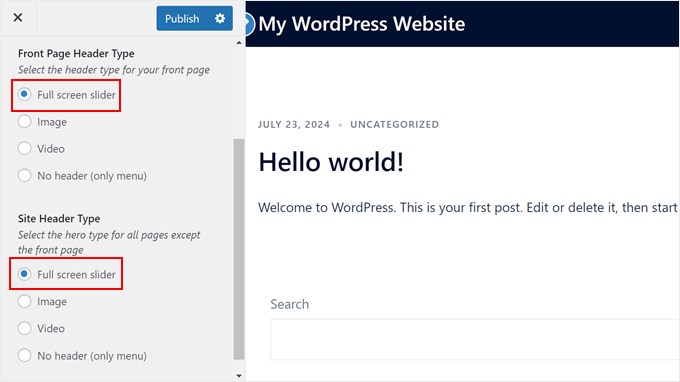
You’ll choose between a full-screen slider, a video, an image, or no header.
We will be able to select a full-screen slider for the hero section on our front internet web page and our entire internet web page. The reason is that it shall we in us to create a slider with multiple images for the hero, and add text and a button on absolute best of the pictures.
Now, go back to the Hero House menu and select ‘Hero Slider.’
Proper right here, open the ‘First Slide’ tab and click on on on the ‘Select image’ button.
This may increasingly open your wordpress media library, where you’ll add a brand new symbol or select an provide one to your hero section.
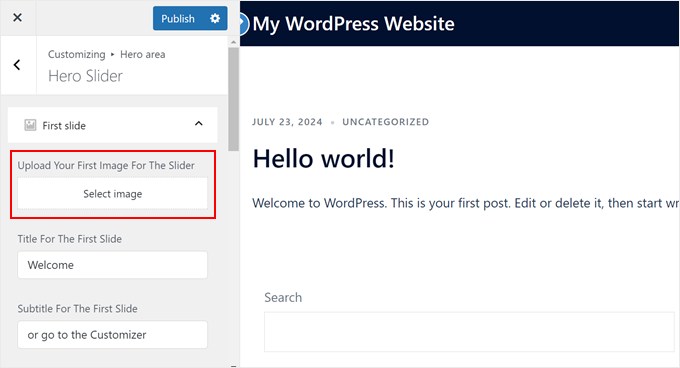
After getting uploaded an image, you’ll scroll down and change the text inside the determine and subtitle fields.
You should see the changes you make mechanically reflected on the internet web page preview.
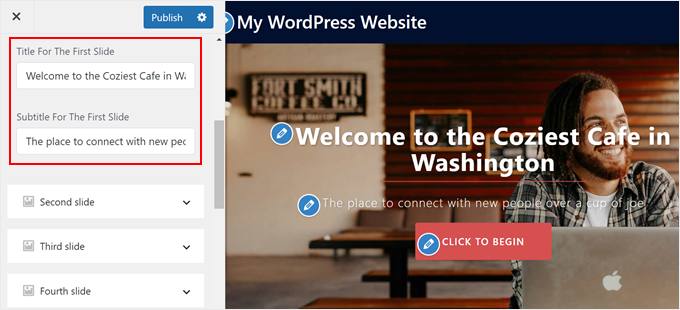
If you want to add a few image to the hero section, you’ll repeat the identical steps with the rest of the slides.
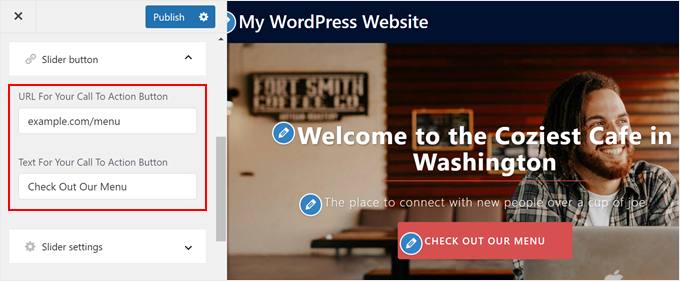
Another way, you’ll scroll the entire means right down to the ‘Slider button’ menu.
Proper right here, you’ll industry the URL and text for the call-to-action button.
After that, scroll down all over again to the ‘Slider settings’ tab.
That’s the position you’ll alter the slider’s pace, select to turn the identical text during all slides, and make the slider’s behavior responsive.

If you want to industry the button’s color, then go back to the Theme Customizer’s number one menu.
Next, click on on ‘Commonplace.’
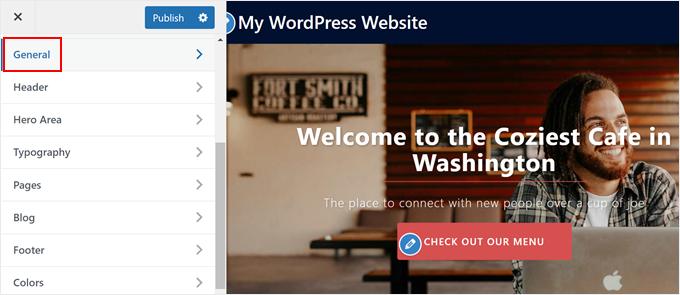
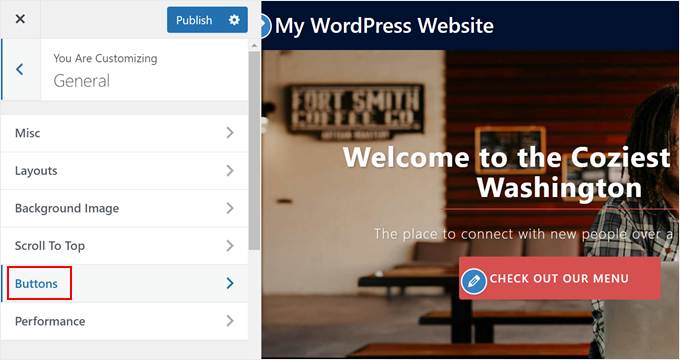
You should now see plenty of menus to customize your theme’s fundamental settings.
Proper right here, merely click on on ‘Buttons.’
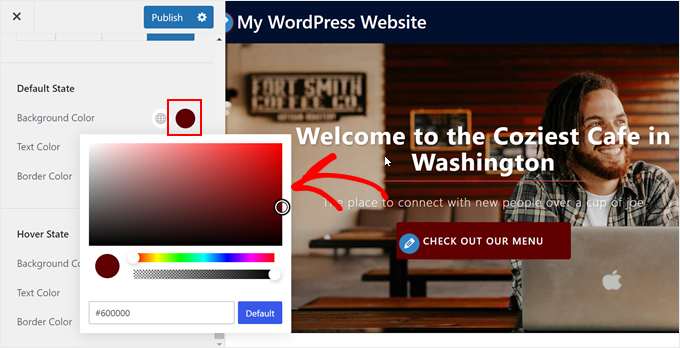
Now, you’ll scroll the entire means right down to the ‘Default State’ and ‘Hover State’ sections, where you’ll industry the button’s color depending on its state.
To switch the color, merely click on on on the color picker software and select a brand spanking new color.
Most wordpress subjects moreover mean you can customise the colours and typography of your design. Then again, the changes you make will most often practice to your entire internet web page, not merely your hero section, so merely keep that throughout ideas.
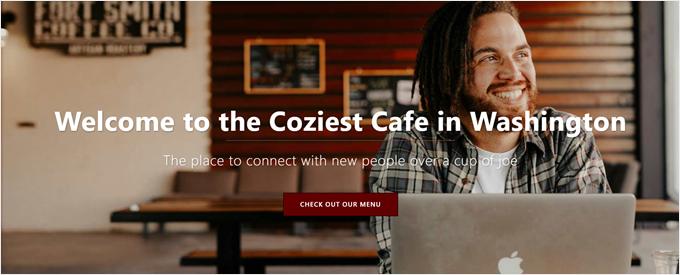
In spite of everything, correct right here’s what our hero image looks like, made with the Sydney theme:
website-online-editor-block-problems-very-best”/>Approach 2: The usage of Whole Internet website online Editor (Block Problems Very best)
When you use a block theme, then you wish to have to make use of the Whole Internet website online Editor’s Duvet block to easily create a hero image in wordpress. No plugin is sought after.
Step 1: Open the Whole Internet website online Editor
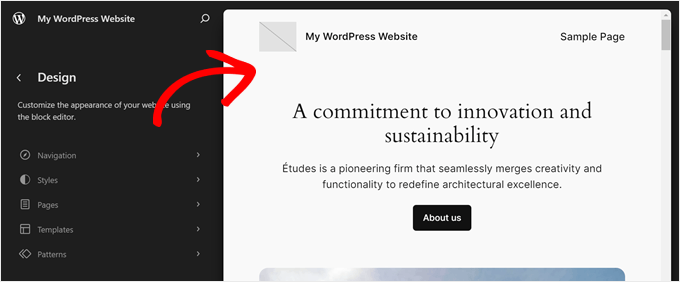
First, go to Glance » Editor for your wordpress admin.
 wordpress-fse-dashboard-min.png” alt=”Selecting the Full-Site Editor from the wordpress admin panel” class=”wp-image-231581″/>
Now, you’re going to see the editor’s number one menus.
Let’s say you need as a way to upload your hero image for your homepage most effective.
If that’s the case, merely click on on on the theme preview on the suitable side of the internet web page.
If you want to add the hero image to another internet web page, a convention internet web page template, or a block construction, then you definately’ll be told our data on wordpress Complete Web site Enhancing for more information.
Step 2: Add the Duvet Block to Your Internet web page/Template
Given that hero section is most often located above the fold (the best part of your internet web page that appears as visitors land on the site), then you need to make sure you’re in the proper location. The hero section is most often suitable beneath the header.
In the event you do that, you need to each delete the existing blocks in that location or add a brand spanking new Crew block suitable above those provide blocks.
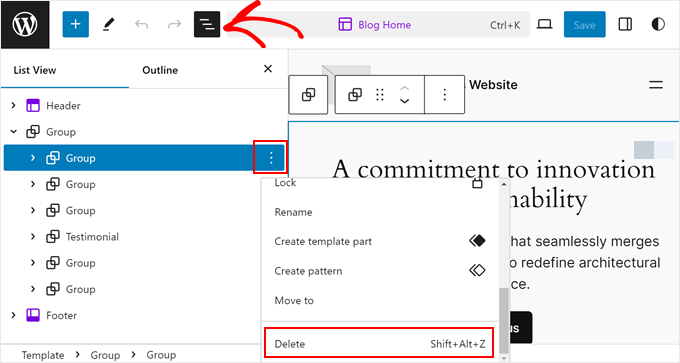
In our case, we will be able to simply remove the blocks that were already on our homepage. If you want to do the identical, you wish to have to click on on on the ‘Checklist View’ button on the left side of the internet web page.
Then, find the block(s) that you need to delete to make room to your hero section. After discovering it, merely click on on on the three-dot button, and select ‘Delete.’
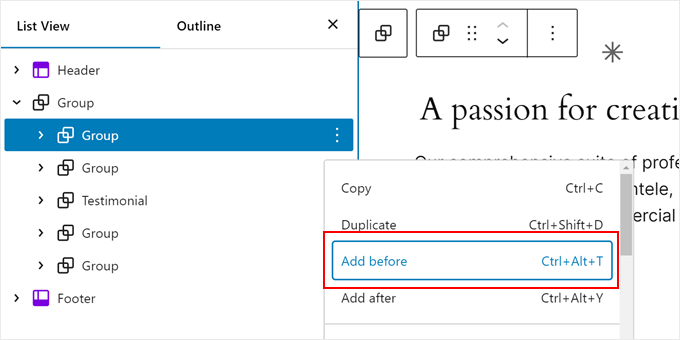
Now, select the block that was once as soon as suitable beneath the block(s) you merely deleted.
Then, click on on on the three-dot button and select ‘Add faster than.’ This may increasingly add a block suitable above that block and beneath the header section.
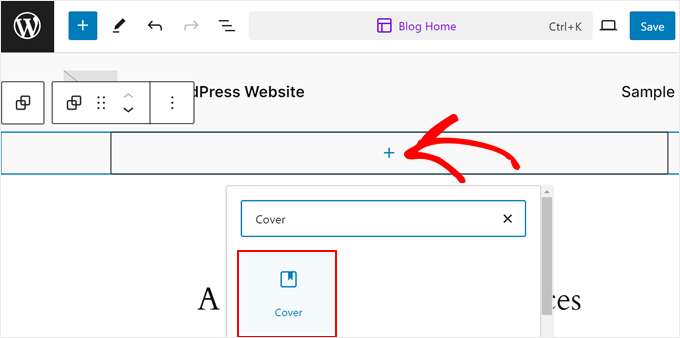
At this level, you’ll click on on on the ‘+’ button that appears inside the meant hero section.
You need to upload a Team block correct right here, as this may increasingly most probably mean you can arrange the hero image, text, button, and other portions as a single block when sought after.
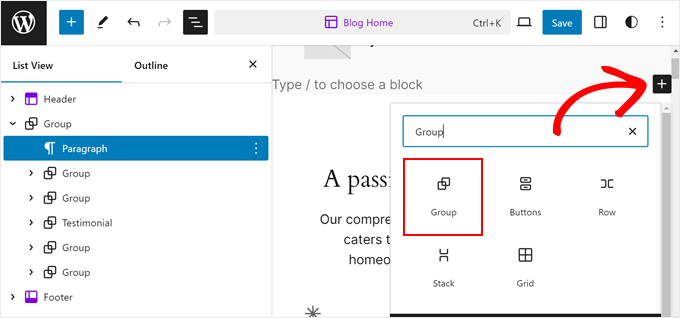
You’ll now select a container as a way to upload your blocks to.
For demonstration, we’ve decided on the fundamental Crew container.

Next, merely click on on on the ‘+’ button inside the Crew block.
Proper right here, go ahead and select the ‘Duvet’ block.
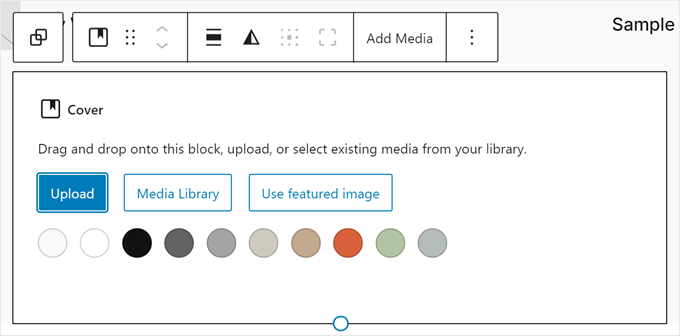
After that, you’re going to see 3 alternatives as a way to upload your hero background image: uploading it from your computer, together with it from your media library, or using your featured image.
In our example, we will be able to click on on on ‘Media Library’ and select an provide image.
If the image upload is a luck, then you’re going to see your hero image right away. Then again, there are some adjustments you need to make.
Step 3: Configure the Image on Your Duvet Block
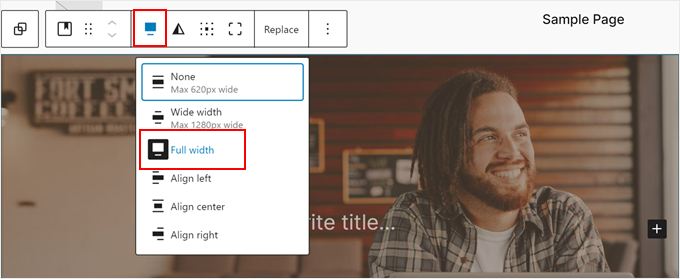
First, select the ‘Duvet’ block itself so that its toolbar turns out on absolute best of it.
Then, click on on on the ‘Align’ button and select ‘Whole Width.’
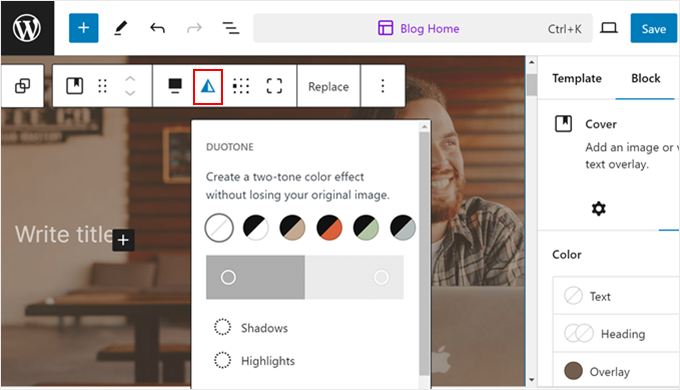
Next, you’ll click on on on the duotone icon to modify the duotone clear out that is applied for your image.
When you’re not fascinated with it, you’ll disable it later, which we’ll show you simple tips on how to do.
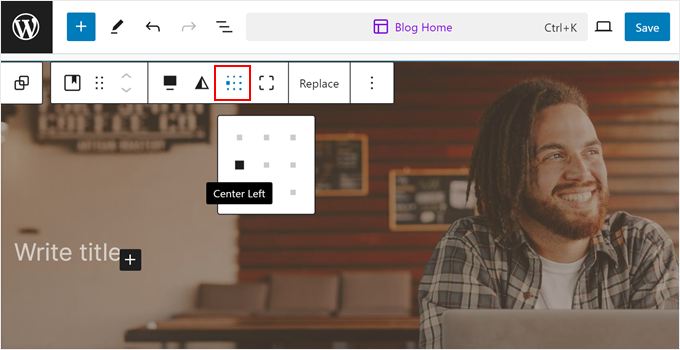
After that, you’ll click on on on the content material subject material position icon to modify where your text and button will appear on the image.
We’ve determined to transport with the center-left side, as the point of interest of the image is on the suitable.
Now, click on on on the ‘Settings’ icon and switch to the ‘Block’ tab.
Proper right here, scroll the entire means right down to the Settings. That’s the position you’ll optionally upload a parallax impact for your image (‘Fixed background’) or use a repeated background.

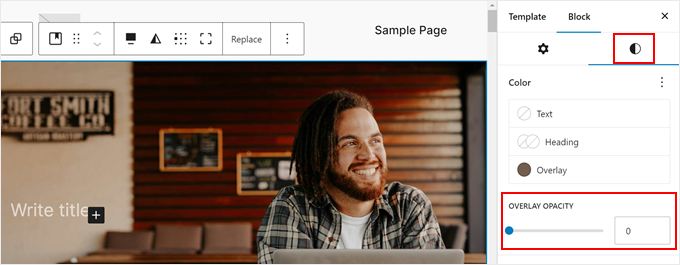
You’ll moreover scroll once more up and switch to the kinds icon.
That’s the position you’ll set the overlay opacity to 0 so that your image doesn’t use any clear out.
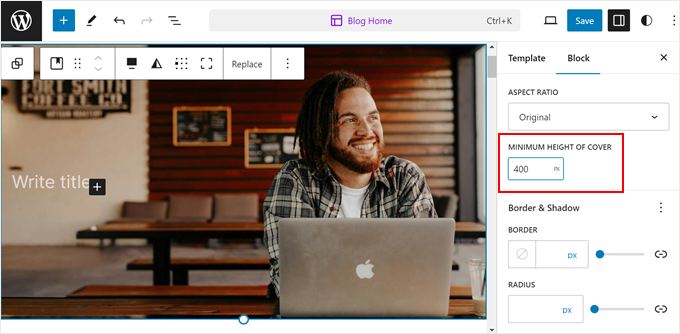
If you want to industry the height of the image, then you definately’ll insert a number in pixels inside the ‘Minimum Top of Duvet’ field.
We’ve determined to set our image to 400 pixels.
Be happy to customize other settings like border and shadow, block spacing, padding and margin, typography, and so on.
Step 4: Add Blocks to Your Duvet Block
We’re now ready as a way to upload additional portions for your hero image.
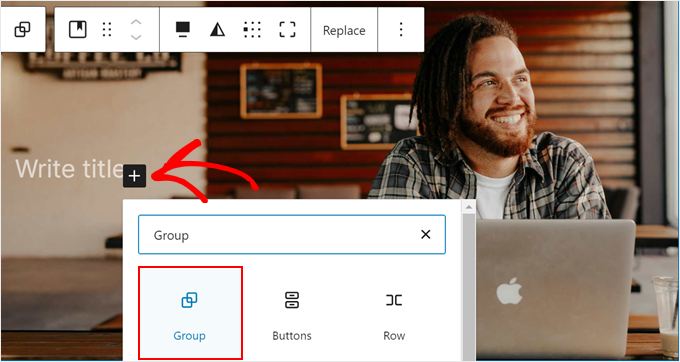
You should keep in mind by means of now that there’s a ‘Write determine’ text on absolute best of the image. You’ll need to click on on on ‘+’ button next to it and select ‘Crew.’
You need to use this block to workforce together all of the portions you’ll add later on the Duvet block. This manner, they can be customized as a single block when sought after.
Then, select your desired container like inside the previous step.
In the event you do that, you’ll click on at the ‘+’ button all over again as a way to upload a Heading block.
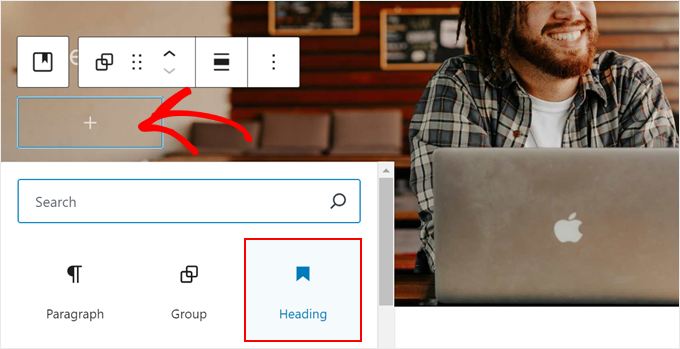
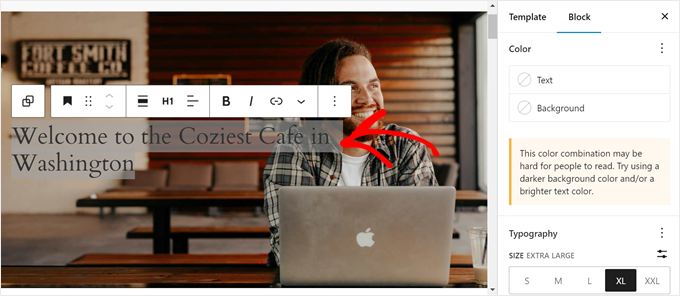
Now, you’ll insert your internet web page’s headline.
Be happy to trade the textual content colour, dimension, and dimensions inside the block settings sidebar if most popular.
After you’ve performed that, you’ll hit the ‘Enter’ key.
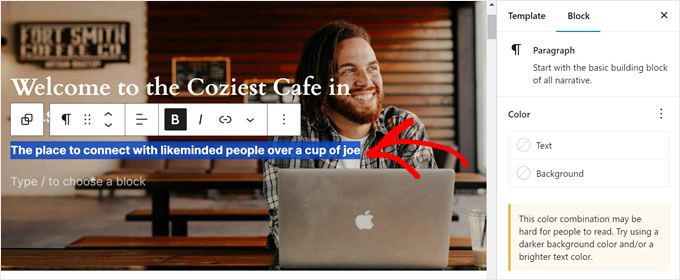
At this level, feel free as a way to upload a subheadline suitable beneath the heading.
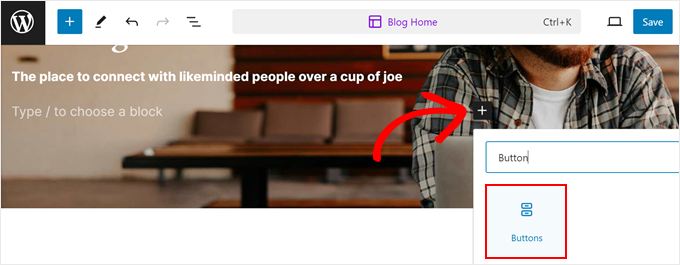
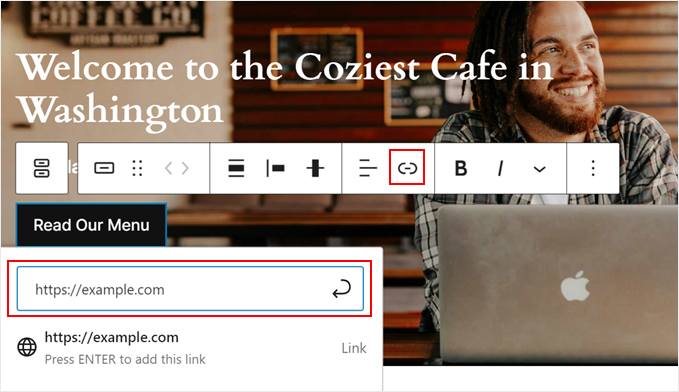
Finally, you’ll add a call-to-action button for your hero image.
To do this, merely hit the ‘Enter’ key all over again, click on on on ‘+’ button, and select the ‘Buttons’ block.
Next, merely insert the button replica.
And as a way to upload a link to the button, simply click on on on the link icon on the toolbar and insert your URL in the proper field.
Then, click on on on the arrow button.
If you need tips and tricks to create high-converting buttons, you’ll check out our data on call-to-action easiest practices.
And that’s with reference to it. You’ll add additional portions for your hero image or customize it for your preferences.
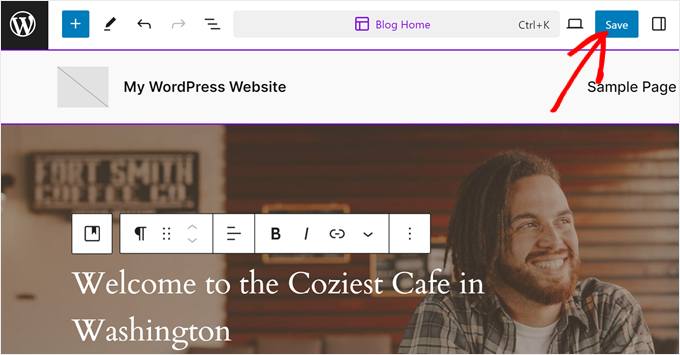
In the event you’re happy with how the hero section turns out, merely click on on ‘Save.’
Proper right here’s what our Duvet block looks like:

Approach 3: The usage of a Internet web page Builder (Custom designed Landing Pages/Problems)
Let’s say you’re merely to begin with ranges of putting in your internet web page. Or, you’re taking a look to create a convention landing internet web page without being confined by means of your theme’s limitations. If that’s the case, we advise using a web page builder that accommodates templates with hero sections, like SeedProd.
SeedProd is a drag-and-drop internet web page builder that we’ve ceaselessly used to create custom pages for WPBeginner and our other brand internet sites, along with Duplicator and OptinMonster.
While easy to use, it moreover supplies a large number of built-in wordpress modifying choices that the Theme Customizer, Whole Internet website online Editor, and Gutenberg don’t have by means of default.
On account of that, we’ve been able to save lots of rather a lot of time and money on setting up third-party plugins merely as a way to upload explicit choices to our subjects or landing pages.
SeedProd is to be had in a free and paid style. You’ll indisputably use the free style to create a convention landing internet web page, on the other hand the template and block alternatives are beautiful limited. On account of this, we advise upgrading to a paid plan for additonal choices, along with the AI content material subject material generator.
For more information, check out our SeedProd evaluate and our comparison between Elementor vs. Divi vs. SeedProd, which could be all well-liked internet web page builders.
Step 1: Set Up SeedProd
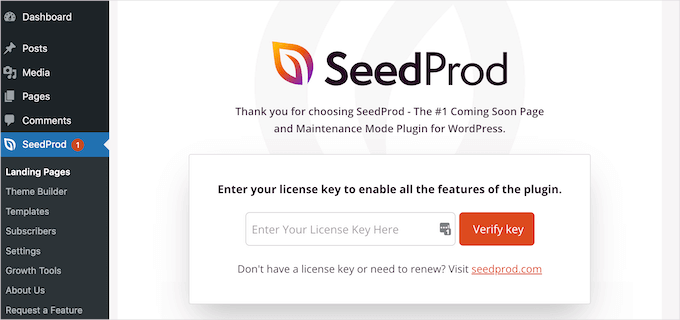
To use SeedProd, you need to set up the wordpress plugin supplied for your SeedProd account for your admin area. As quickly because the plugin is vigorous, you’ll be asked to enter your license key, which you’ll get from your SeedProd account internet web page.
After you’ve entered it, merely click on on on the ‘Check key’ button.
With SeedProd, you’ve gotten 2 alternatives: you’ll add a hero section to a landing internet web page or certain pages within a convention theme.
To organize your landing internet web page or theme, you’ll be told the ones guides:
For the rest of the training, we will be able to use the Menu Gross sales template.

Step 2: Customize Your Hero Section
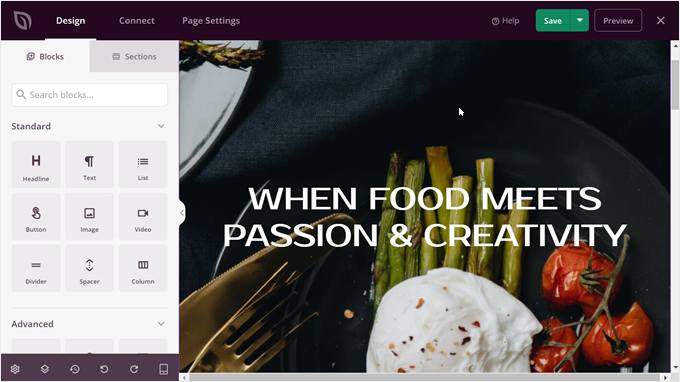
After getting decided on a template to your theme or landing internet web page, you’re going to land inside the SeedProd editor.
The SeedProd enhancing interface consists of a internet web page preview on the suitable side and a left sidebar where you’ll add additional blocks, customize a block/section, undo/redo changes, view your internet web page’s layers, and preview your website online on cell or tablet devices.
Given that SeedProd theme already includes a hero section, our procedure is already halfway performed. What we need to do is solely change the image, customize it, and add additional blocks to the hero section if sought after.
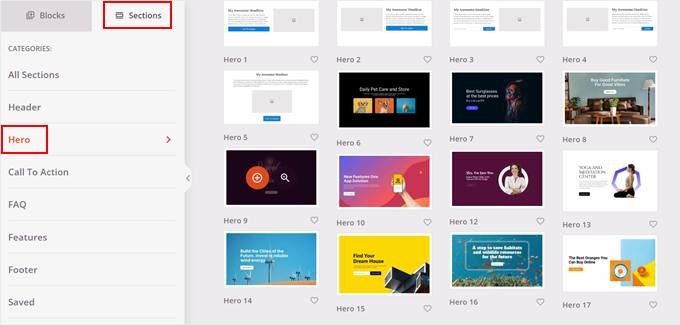
Alternatively, you’ll be able to to find additional hero section designs by means of switching from the Blocks sidebar to the Sections sidebar on the left side. Then, navigate to ‘Hero’ and click on on on the ‘+’ button on the hero section template that you need as a way to upload for your internet web page.
SeedProd will then insert it into your internet web page.
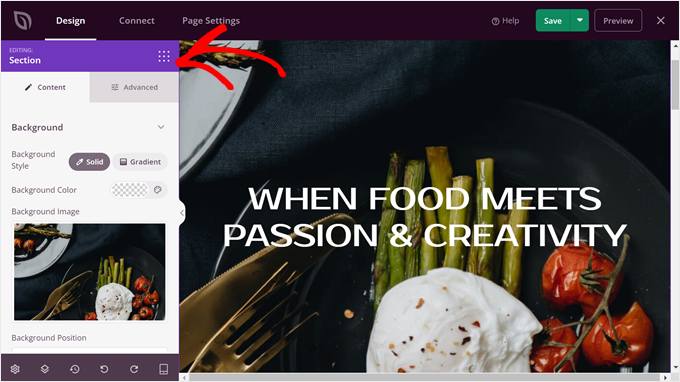
Let’s industry the hero image first.
To do this, click on on on the topmost section that accommodates the hero image. You’ll know you’ve made up our minds on the proper issue when a purple ‘Bettering: Section’ box turns out inside the left sidebar.
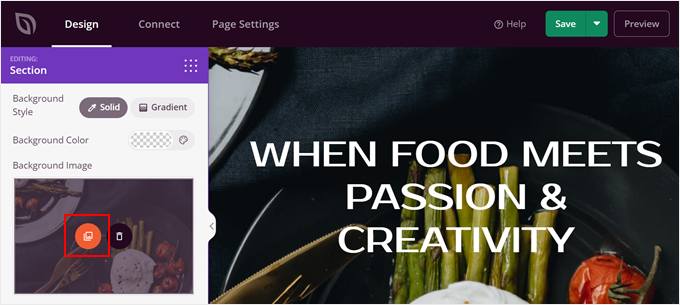
Now, hover over the background image inside the sidebar.
Then, click on on on the ‘Media Icon.’ After that, you’ll upload your hero image from your computer or the media library.
Next, you need to make a choice the background position that works best possible to your image.
We find that the ‘Custom designed Position’ selection supplies us the best regulate over positioning the focal problems, so we’ll select that selection.
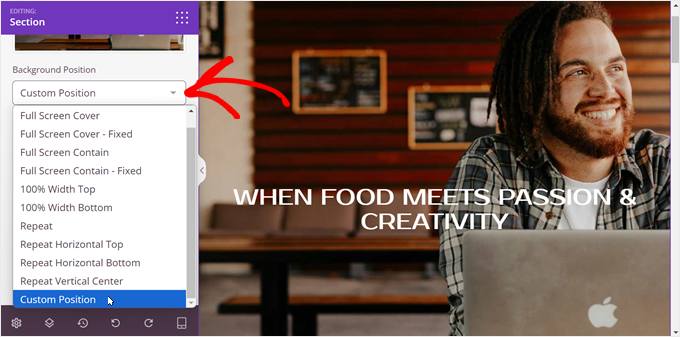
The Custom designed Position selection gives you plenty of techniques to configure the background.
For the X and Y positions, you’ll industry how the image is situated vertically and horizontally.
The Attachment environment has 2 alternatives: Scroll (non-parallax) and Fixed (parallax).
If your image is smaller than the hero section on the other hand you need the entire section to be full of the image, then you definately’ll repeat the image throughout that section. Another way, merely make a choice ‘No-repeat.’
As for the wordpress hero image dimension, you’ll select the ‘Auto’ selection if you want to have the image to mechanically alter to the hero section.

Be happy to clutter round with the ones settings to appear what works best possible to your image.
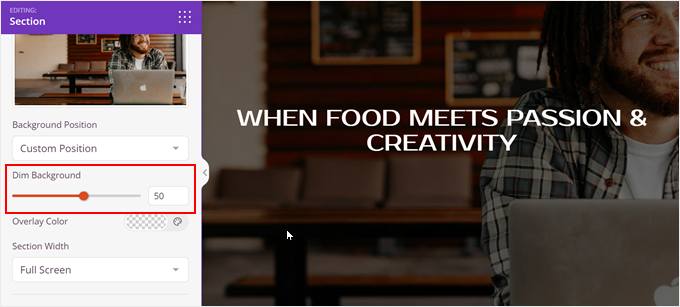
Any other issue you’ll do is dim the background image so that your text stands out upper.
To do this, you’ll drag the ‘Dim Background’ slider for your desired degree of opacity.
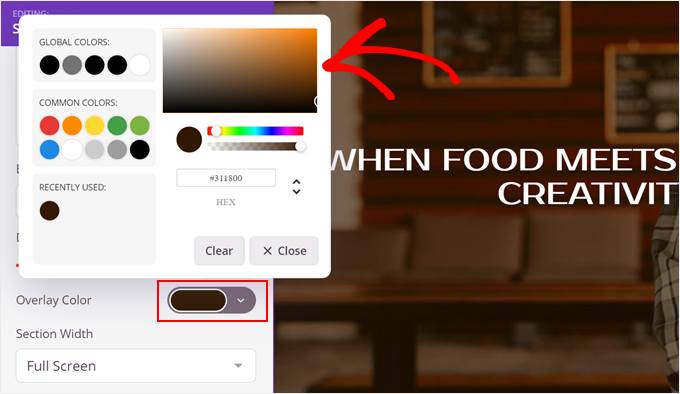
If you want to industry the protective background colour, merely click on on on the ‘Overlay Color’ color picker button.
Then, simply select your most popular color.
Let’s now scroll once more up and switch to the ‘Complicated’ settings. That’s the position you’ll add all types of cool effects for your hero section.
As an example, you’ll open the ‘Particle Background’ tab and upload an animated particle background for your image. This may occasionally make your hero section a lot more impressive and unique.

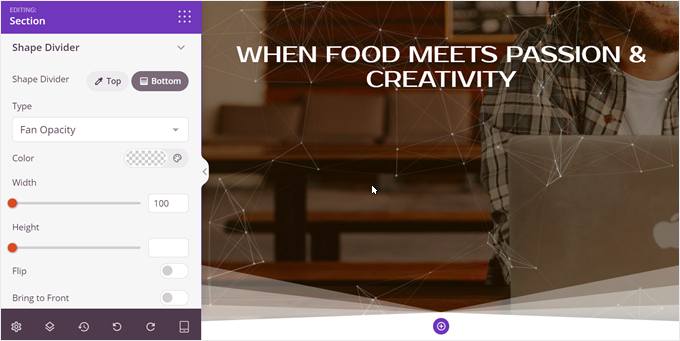
Next, you’ll upload a tradition form divider on the most efficient and/or bottom side of your hero section by means of going to the ‘Shape Divider’ menu.
Doing this may increasingly add additional visual pastime for your hero section. Plus, must you add a fun shape divider at the bottom, you’ll encourage shoppers to scroll down your landing internet web page and learn additional about your offer.
Step 3: Add and Customize Additional Blocks to Your Hero Section
Along side your hero image ready, let’s add additional blocks to the hero section.
Since ours already has a headline block, we’ll click on on on it and customize it. When made up our minds on, you should see that the left sidebar now has an orange banner that says ‘Bettering: Headline.’

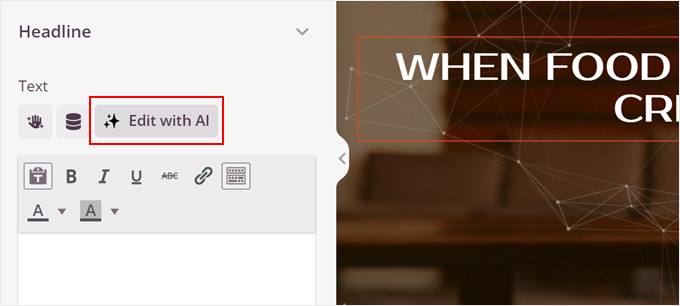
The cool issue about SeedProd is it has a built-in AI content material subject material generator.
So, must you’re not sure what headline to use, you wish to have to click on at the ‘Edit with AI’ button to come up with some ideas.
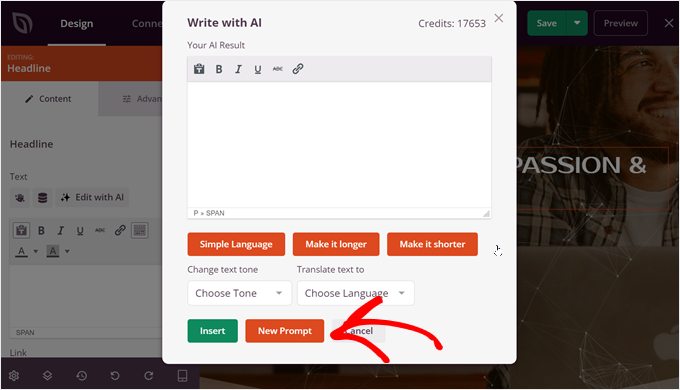
You should now see a popup window where you’ll write your content material with AI.
We wish to generate a completely new headline, so we’ll click on on on the ‘New Advised’ button to try this.
Next, merely tell the AI what kind of content material subject material it wants to do.
Then, click on on on the ‘Generate Text’ button.

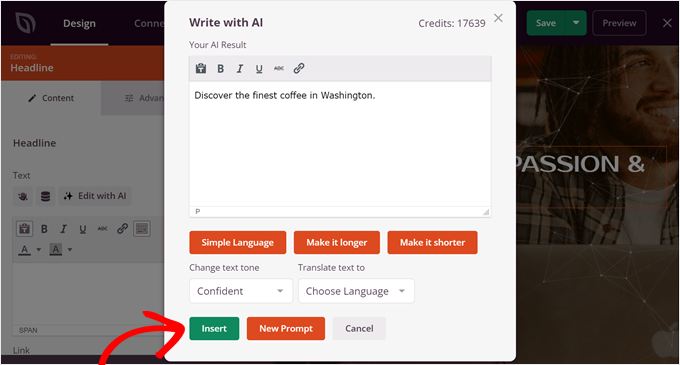
The AI will then generate the content material subject material for you.
Then again you’ll however industry it by means of changing the tone, simplifying the language, making the text longer or shorter, and even translating it into over 50 languages.
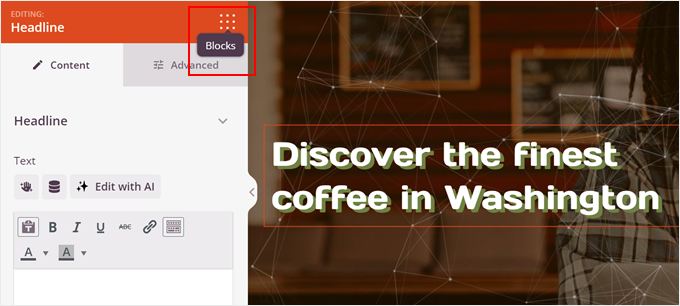
In the event you’re happy with how the headline turns out, merely click on on ‘Insert.’
Now, you’ll scroll down the left sidebar.
That’s the position you’ll industry the alignment of the text, the font dimension, and the heading tag to suit your preferences.

If you want to have the text to stand out a lot more, then you definately’ll scroll once more up and switch to the ‘Complicated’ tab.
Inside the Types menu, click on on ‘Edit’ on the Typography settings. Proper right here, you’ll feel free to modify the font circle of relatives, the street most sensible, the letter spacing, and the letter case of the text.

You’ll moreover switch slightly of extra down and add a text shadow to the headline.
Proper right here, we’ve determined to create a custom-colored shadow to make the text stand out a lot more.

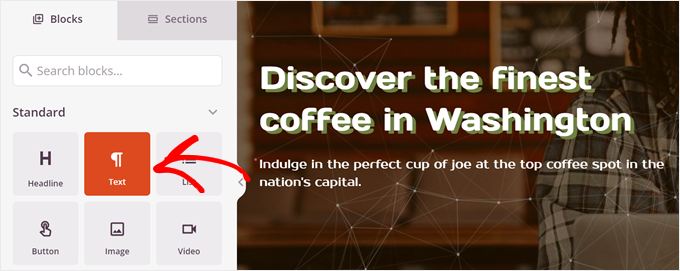
So that you can upload a subheadline beneath the headline, then you definately’ll merely click on on on the ‘Blocks’ button on the left sidebar.
This may increasingly ship you to the library of blocks.
Now, merely drag and drop the ‘Text’ block suitable beneath the headline.
The settings for the Text block are beautiful similar to the Headine block, so that you’ll repeat the identical steps as faster than the create the subheadline.
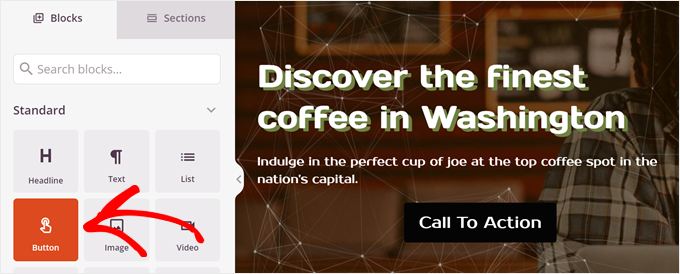
So that you can upload a call-to-action button, you need to pull and drop the ‘Button’ block to the internet web page.
It’s most often located suitable beneath the subheadline.
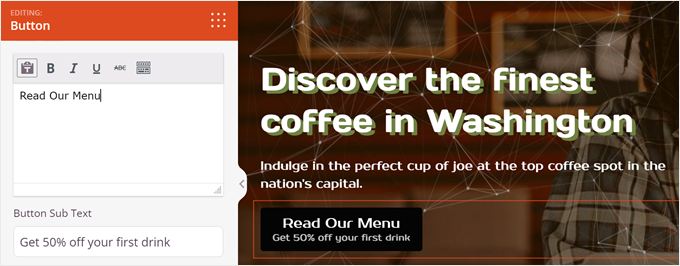
With that performed, go ahead and enter your button replica in the proper field.
You’ll moreover add a subtext suitable beneath the principle button replica for additonal context.
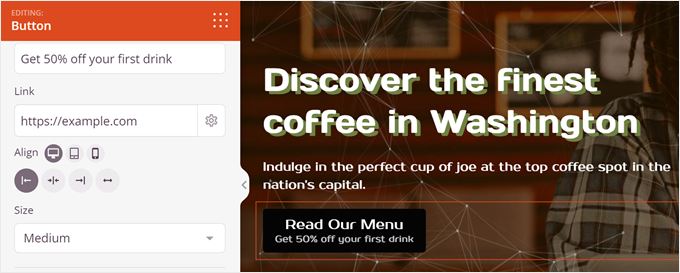
Then, scroll down and add a link for your button.
Be happy to modify the button’s alignment and dimension as smartly.
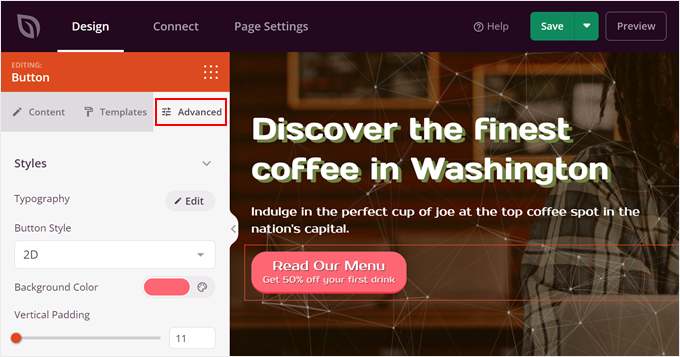
Now, switch once more up on the sidebar and switch to the ‘Templates’ tab.
That’s the position you’ll industry your button style so that it fits upper along side your internet web page design.
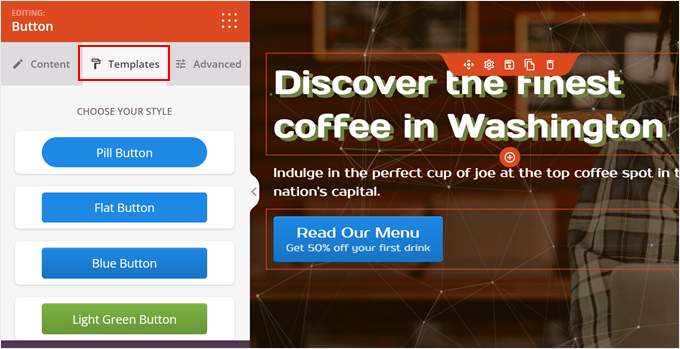
When you don’t identical to the default template designs, then switch to the ‘Complicated’ tab.
Proper right here, you’ll industry the button’s typography, style, color, padding, shadow affect, and so on.
Be happy to continue customizing your template until it sort of feels very good.
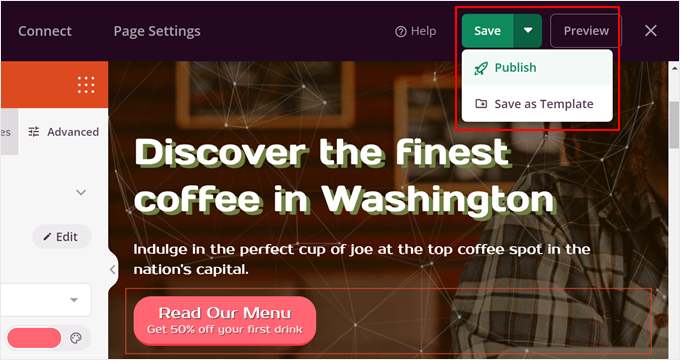
When you’re happy, merely click on on on the ‘Save’ button on the most efficient and select ‘Post’ to make the internet web page live.
And that’s fascinated about together with a hero image with a internet web page builder.
Proper right here’s what the hero section looks like on our demo site:

Approach 4: The usage of Hero Banner Plugin + Shortcode (All Problems)
This final way technically works with all subjects, on the other hand we advise it most to people using a antique theme and no longer the use of a built-in hero section.
To apply this method, it is very important arrange the Hero Banner Final plugin. For step-by-step instructions, you’ll check out our data on easy methods to set up a wordpress plugin for rookies.
Step 1: Set Up the Hero Banner Plugin
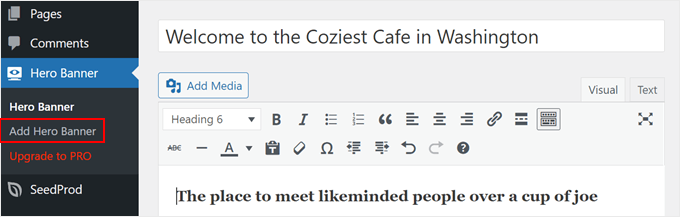
As quickly because the plugin is vigorous, go to Hero Banner » Add Hero Banner.
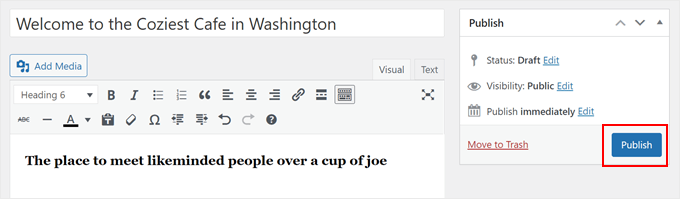
After that, give your hero banner a determine. This may increasingly act as your headline.
Once performed, insert some text inside the visual antique editor that can function as your subheadline. Be happy to modify the formatting and color correct right here.
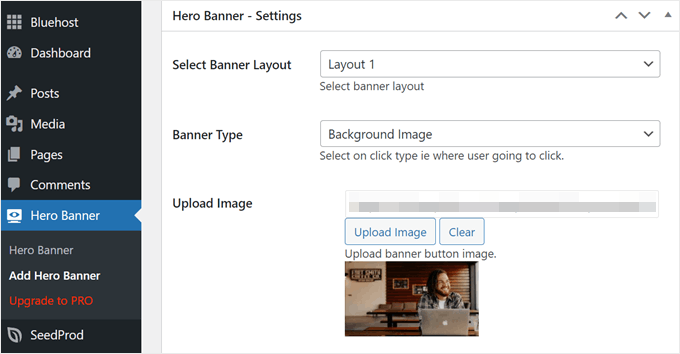
Now, scroll the entire means right down to the ‘Hero Banner – Settings’ section.
Proper right here, you’ll select a banner layout. Unfortunately, you’ll be able to’t preview the layout in exact time, on the other hand you’ll always industry it later. We’ll select Construction 1 for our tutorial.
As for the Banner Type, you’ll select ‘Background Image’ for a hero image, on the other hand you’ll moreover select ‘Background Video’ if when you’ve got a full-width video to use as a hero.
Next, don’t put out of your mind to click on on ‘Upload Image’ as a way to upload your image from the computer or the media library.
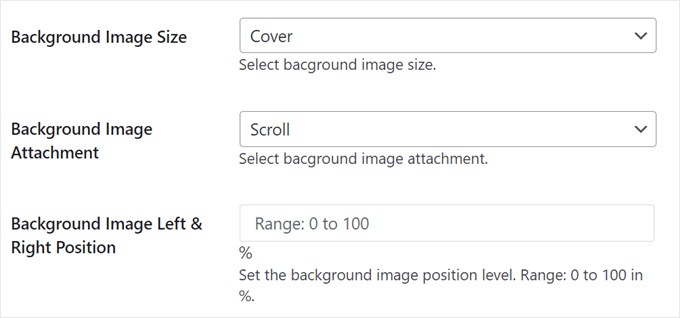
At this level, you’ll set the background image dimension to ‘Duvet’ so that the image is full-width.
You’re going to moreover want to make a choice ‘Scroll’ for the background image attachment to disable any parallax affect.
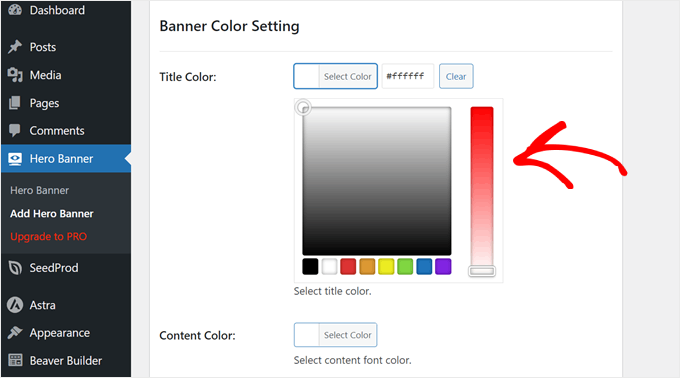
Transfer down until you reach the Banner Color Atmosphere.
That’s the position you’ll industry the color of the headline (Identify Color) and the subheadline (Content material subject material Color). Simply click on on on the color picker software to do so.
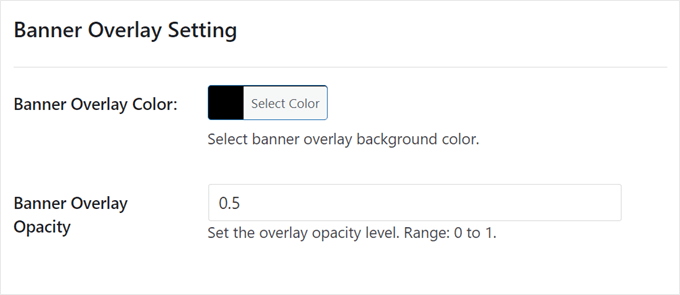
Additionally, it’s conceivable you’ll wish to add an overlay color on absolute best of the image, which will also be handy to keep an eye on the readability of the text against the image.
We’ve determined to transport with the color black, with an opacity of 0.5.
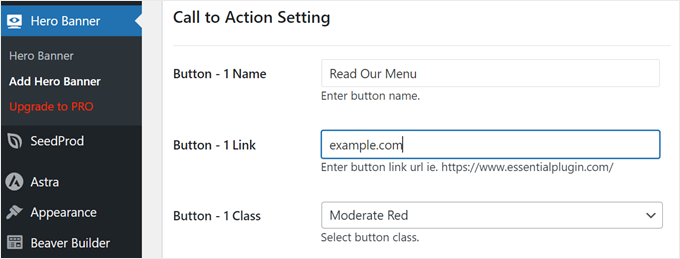
Let’s configure the call-to-action settings.
Proper right here, you’ll insert the replica and link to your button. You’ll moreover industry the color in ‘Button – 1 Class.’
All you need to do next is scroll once more up.
After that, click on on ‘Post.’
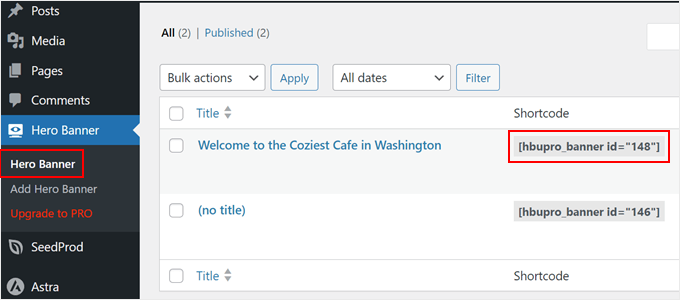
Let’s now go to Hero Banner » Hero Banner. You should now see that your hero image has been created and the plugin has generated a shortcode so that you could display it.
Believe of this shortcode, as we will be able to need it later.
Step 2: To find the CSS Selector of Your Theme’s Header Section
To turn the hero image, we need to know the proper CSS selector to your header section. This may increasingly mean you can add the image suitable beneath the header.
To do this, discuss with your internet web page on the front end. Then, right-click to your header section and make a choice ‘Check out.’
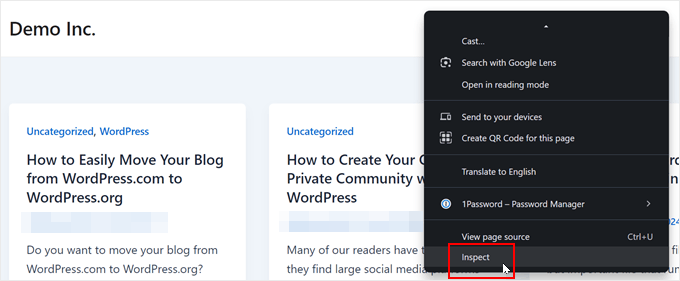
On the suitable side, you need to look out what CSS selector the header section is using. You’ll hover your cursor over the entire ones code snippets until you understand that the header section is highlighted on the front end.
Proper right here’s an example:
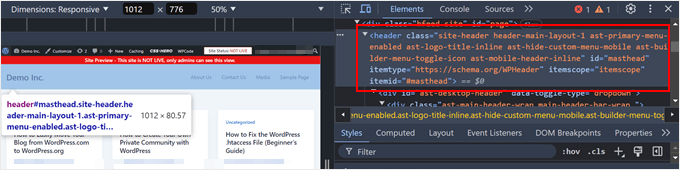
If the entire header section is highlighted as you hover over the code, you’re on course.
Now, right-click on that code snippet, and select Copy » Copy selector.
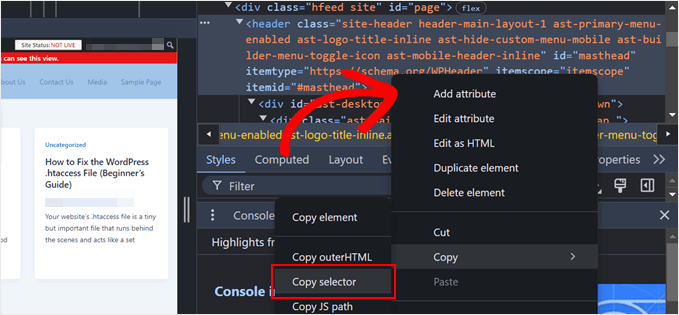
After you do that, you’ll each paste the selector somewhere safe, like a text editor, or just keep this tab open.
Step 3: Add Your Shortcode to WPCode
The next step is to position in WPCode, which is a code snippet plugin.
Technically, you don’t need to use a plugin to insert custom code snippets into your theme data. Then again we would have liked to do this to stick problems safe, as pasting code correct right into a theme file can give some sudden errors.
We’ve found out WPCode to be super helpful for managing tradition code snippets with out breaking your website online.
First, set up the wordpress plugin for your admin area. As quickly because the plugin is vigorous, navigate to Code Snippets » + Add Snippet, select ‘Add Your Custom designed Code (New Snippet),’ and click on on on the ‘+ Add Custom designed Snippet’ button.

Now, let’s give your new code snippet a name. It can be something simple, like ‘Hero Banner Shortcode.’
After that, industry the Code Type to ‘PHP Snippet.’
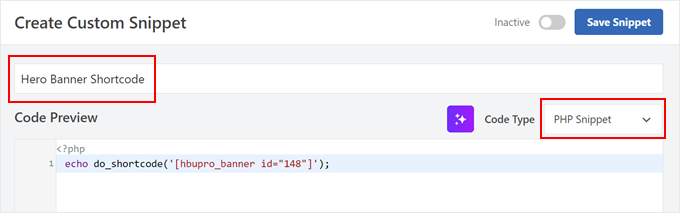
Inside the Code Preview box, paste the following snippet:
echo do_shortcode('[hbupro_banner id="XXX"]'); // Replace with your personal shortcode
You’ll need to industry the [hbupro_banner id="XXX"] with your personal Hero Banner shortcode that you simply spotted earlier.
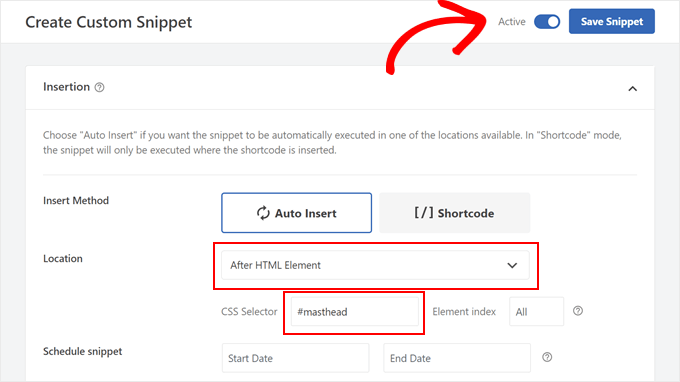
Next, scroll the entire means right down to the ‘Insertion’ section.
Proper right here, the Insert Approach should be ‘Auto Insert,’ and the Location should be ‘After HTML Element.’
Then, paste the selector you copied earlier inside the ‘CSS Selector’ field. In our case, it was #masthead, on the other hand this may increasingly most probably vary by means of the theme.
With that performed, you’ll toggle the ‘Inactive’ button so that it turns ‘Energetic’ and click on on on the ‘Save Snippet’ button.
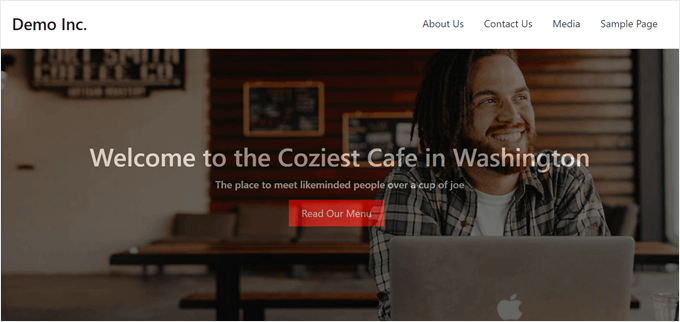
And that’s it!
When you view your internet web page, you should now see the Hero Banner image suitable beneath your header:
We hope this newsletter has helped you learn how to add a hero image in wordpress. You may also want to check out our data on easy methods to upload a preloader animation to wordpress and our skilled choices of the easiest equipment for developing and promoting virtual merchandise.
When you liked this newsletter, then please subscribe to our YouTube Channel for wordpress video tutorials. You’ll moreover find us on Twitter and Fb.
The post Learn how to Upload a Hero Symbol in wordpress (4 Simple Tactics) first seemed on WPBeginner.
wordpress Maintenance
[ continue ]
wordpress Maintenance Plans | wordpress hosting
read more
wordpress-4-simple-tactics/”>Source link